Tuesday, September 29, 2015

REAL LAGER AT ALE TEMPERATURE - FERMENTIS 34/70 The Method, and 2 additional methods.

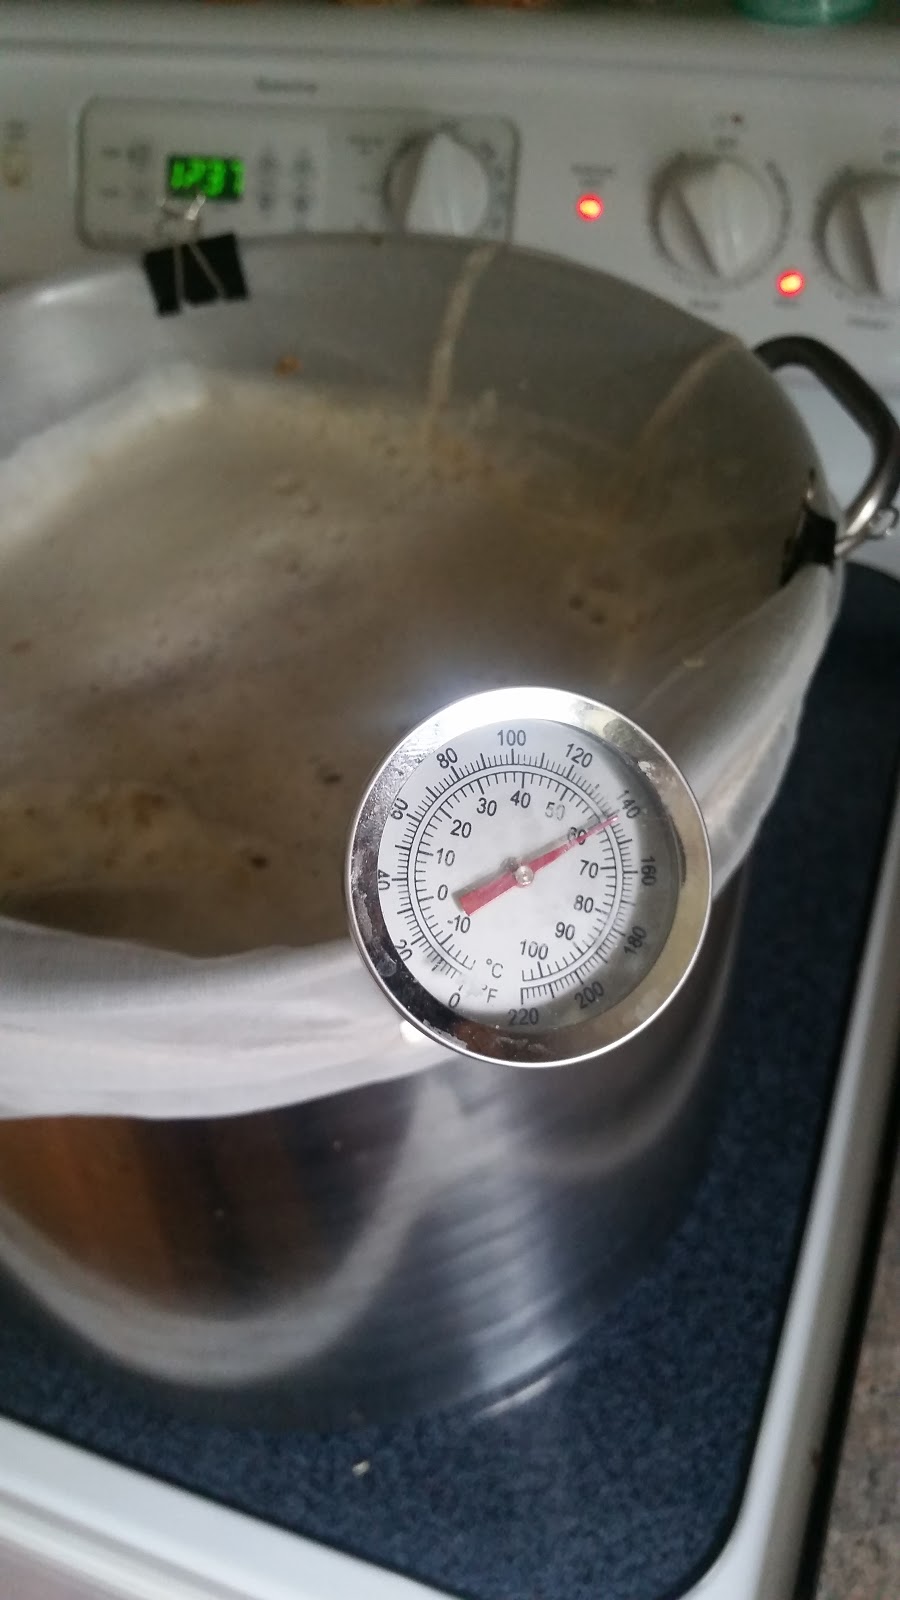
Crazy Weekend.  But Sunday, I found time to brew a batch of beer.  Just good ol simple beer.  Shooting for 1.032 post mash... Got 1.030, I'll take it.  Shooting for 1.042 post boil and nailed it. Small batch has slightly higher boil off rate percentage.

This Batch is a light american lager.   And that is a key you have to understand with lagers.  There are hundreds of lager yeasts.   Some attenuate out great, posting impressive 83% to even 88% attenuation.   But many, if not most lager yeasts feature fairly low apparent attenuation, in the home brew realm. So unlike an ale yeast that can handle huge OG. Many lager yeasts can not, they would leave the beer too sweet.  And that is not what you want from most lagers.  Certainly not what you want from a Light American Lager. (of course you can adjust your pitch rate to accommodate higher OG, I find attenuation has way more to do with the brewer and the pitch rate than the yeast) (NOTE: I am aware that commercial lagers under, commercial brewing conditions can and will attenuate out at avery high rate.  But most lager yeast, Saccharomyces pastorianus (( S.Carlsbergenus)) can not break apart one of the carbon links in a Maltotriose trisaccharide. )

This batch is pretty straight forward
2.25 gallon batch.
Water adjustments to get to 5.2 pH
4# lager malt
.3# carapils
.7# flaked rice (or minute rice)
Mash at 152 for 75 Minutes, no mash out (got about 72.3%) not bad
Hallertauer at 60,15,0 ... .33 oz.  each addition
Hard boil to break up proteins.
No Whirlfloc
Will use Gelatin to fine this before packaging.

And now for the shocker... I'm fermenting with Fermentis Saflager 34/70.  And I'm doing the primary fermentation at 65F.   After about 10 days I will move the fermentation vessel into the garage fridge at about 36 F for 3 to 5 weeks.
Now before you get all up in arms, and start firing me comments about how this will never work.  Take a breath and ask yourself the following questions.
  1. Why not? Why in the world won't Saccharomyces pastorianus ferment at 65F?  What could possibly prevent this yeast from converting sugar to alcohol and carbon dioxide at this temperature?   What part of the metabolic transformation will be inhibited?  I think you know the answer is nothing.   It works fine I have been doing it for over 20 years.
  2. Have you ever tried it? are you open to new techniques?  No this is not the classic, or even best way to make a lager.  But it works.  It works just fine.   
  3. Have you confirmed your point of view with the yeast manufacturer?  I have.  I have had extensive conversations with Fermentis about this technique.  They say it should work fine. Fermentis is amazing to deal with, I encourage you to check out all of their yeasts.  
This is how lagering was invented.
Ferment as normal then store cold.
Now I know this isn't conventional,  But give it a shot.  All you need is a fermenter that can fit in your fridge, or even your keezer.   This is not at all what the Brulosopher did with his recent xbeeriment.  Where he displayed that you can ferment lagers at 66F and not even trained judges can tell the difference.   (And by the way if you're not reading and supporting Marshal's work, start now.  He is advancing home brewing.  So buy a dang Tshirt, we need his work to continue.)  Of course, you have to choose the right lager strain to pull this off.


This is a tried and true old school method for making a lager at home.  It is how we did it in the dark ages of home brewing.

Alternate method #1.  Choose a clean lager strain and just ferment the beer at ale temperatures.  It will be fine.   If you don't believe me read the Brulosophy post above.

Alternate method #2.   Ferment it at ale temperatures, and then lager it in the bottles or keg, cold for a month or two.  We used to call this bottle lagering.

It is Tuesday morning.  I brewed on Sunday.  There is a beautiful Krausen on the beer.   Cant wait to drink this one in 6 to 8 weeks. Wednesday morning nice 1/2" creamy lager krausen on the beer.

IMPORTANT NOTE.  AERATE YOUR LAGERS LIKE CRAZY


Saturday, September 26, 2015

Quick Update

So this is one of those weekends.  I am probably not going to have time to brew this weekend.   We have extra hobbits in the home.  Some friends of ours are on a vacation and we are taking care of their kids.  One of whom is 7 Months old   I have obligations in our church drama.   You know the kind of weekend that is more work than relaxing.  So brewing may have to go in the back burner for
now.

But, I am doing home brew related stuff...

Just checked the gravity of my Lager.  It is down to 1.018.  So it still has a ways to go, but it is delicious.   Probably needs another 10 -14 days.  But no buttery notes, no butterscotch.  It's going to be great.

Checked the broken beer.  You may remember months ago I screwed up a mash.   Well I added amylase 5 weeks ago.  It is ready for bottling.   It is a delicious golden ale.

Tried the 2 hearted ale.  Only been in the bottle a week.  Way too sweet.  Ill give it a week and try it again. (UPDATE the sweetness faded a lot over the next couple of days.  Had one Thursday night it was dang close to the original)

Tried the Miller the Muggle.  This beer is good.  You make a very light ale.  Then you add amylase to secondary and let a secondary fermentation occur.  The end result is a crisp dry "lager" like ale.  It is very good and very drinkable and only 4.3% alcohol

Tomorrow I'll be racking from one Mr. Beer to another so I can wash some 2112 yeast.

Some time this week Ill be making another batch of Miller the Muggle.  And next weekend Ill be making a 2112 Light Lager.   Trying to make lots of what you might call session beers.  Kinda tired of 8-10% DIPAs.

Thursday, September 24, 2015

HELP NEEDED MR BEER Partial Mash - A steam lager called "DON'T RUSH to judgement"

As many of you know, I procured 4 MR BEER Kits for cheap.   They were an overstock item.  I have never made a MR BEER kit.  I don't really plan on making a MR BEER kit.  Although I am a fan of their equipment.  2 gallons is just about the perfect size for me.   And unlike my other fermenters,  the LBK fits perfectly in the fridge for cold crashing, and lagering.

My favorite lager yeast is 2112 from Wyeast.  You probably know this yeast as California Steam beer yeast. You may have been told that it is a "hybrid" yeast.  Some weird variety that is not really a lager and not really an ale. In truth it is in fact a strain of saccharomyces pastorianus, or lager yeast. It is just a lager yeast that was mutated many years ago to create a lager yeast that could produce lager characters at ale temperatures.   

There are some issues with 2112.  It is not a perfect panacea for people wanting to make lagers, without lagering equipment. The aa% (apparent attenuation) can be a little low.  (But that is true for all lagers).  Here is what I have found;
  • You have to aerate the heck out of this.
  • You have to pitch an adequate amount of yeast.
  • Although it should work fine up to 70 F. (21 C)  DON'T DO IT. It works fine at ale temperatures, not at room temperature.  So use a wet t shirt (swamp cooler) , or put it in your fermentation chamber.
That being said.  I just can't bring myself to throw away the MR BEER extract. I know it is pre-hopped, but... good barley gave their all for that extract. And now that coopers is making it, it is just Cooper's pre hopped extract. So I'm Going to do a 5 gallon partial mash in my electric turkey fryer.  This beer isn't super hoppy, so I am going to chill it down with ICE. The idea here is to show MR BEER guys that they can make a great beer with the ingredients that came in the box, a 5 gallon fermenter, and less than $20.00 of additional ingredients.    

ASSUMPTIONS (and this is where I need your input)
  • MR BEER American Light is pre-hopped so that it will create about 12 IBUs in a 2.25 Gallon batch.   So if i double that, I will get 24 IBUs in a 2.25 gallon batch.   But I am making a 5 gallon batch.   So that means that I have to account for this.   
    • 24 IBUs of SAAZ (which is what they use) is equivalent to 1.3 oz in 2.25 gallons.   
    • So 1.3 Gallons of Saaz in a 5.5 gallon recipe is 16 IBUs.  Right in line for the style I am brewing.  Premium American Lager. 
    • Am I thinking this through correctly?   Both Beersmith and Brewtoad seem to think so, but... Come on guys did I miss anything here.
  • I am assuming that I can just follow my normal partial mash process, but Mr. Beer kits are no boil so... Am I thinking Correctly
Let me know what you think.   My recipe is here.

But it is basically
2 # of Pilsner
2 # of 2 row
.3 # of Carapils
.5 # of Corn Sugar
and 3.74 of MR BEER LME
Wyeast 2112 yeast cake.

Sunday, September 20, 2015

A Pliny Inspired All Grain American IPA brew day. for the Mr. Beer Fermenter

So Saturday I had a day to my self.  The SWMBO and the hobbits were all gone.   It was just me and the animals.   College Football on the television and home brew on the stove...  relaxing.  In actuality, I had 3 batches to bottle, loads of cleaning and organizing to do.   But my main focus was on brewing my AIPA.    A 2.25 Gallon batch that I will ferment in a Mr. Beer LBK.

I posted the recipe in the last post.  The recipe was originally Drew Beechum's Pliny the Toddler. But like all of my recipes, it has kind of morphed over time.  Drew uses Maris Otter,  I use 2 row and I now add some Biscuit malt.  My hop schedule has changed as well.  This is a great way to develop a recipe.  Start with a proven recipe from a great brewer,  change 1 thing at a time until you have what you love. 

Since I was alone, I decided to really geek out. I did a full on step mash.  I doughed in low for a protein rest, then rose slowly to 152 F where I held the mash for 60 minutes, then I rose to 168 F for 10 minutes.   I'll admit it took a long time, the total mash time was 115 minutes, nearly two hours. Was it worth it?  probably not.  I haven't noticed a huge difference in step mashing vs single infusion mashing.   But it is kinda fun, and you know with out a doubt you are getting the kind of conversion you want.

We used to always step mash, but that was because we had under modified grains to deal with.   We had to.

The mash went very well.  I got a lot of cleaning and bottling done during the mash.   I bottled my Saison / Chardonay Blend (freaking amazing I will make it again and post the recipe soon).  I bottled my Bells Two Hearted clone, for this I actually used the Mr. Beer Bottles.  I figured, why not?  I have them, they're easy, I have the carbonation drops.  Let's give it a try.   You can get a lot done during a 115 minute mash.   At the end of the mash I pulled my grains and let them drain.  Perfect, after draining I had 2.9 gallons of wort.   I let the bag drip into another pot for a gravity sample.  1.032 (81% efficiency remember this is a session beer)

Started the 60 minute boil. But this time I added a hop stand at the end of the boil.  At flame out I added my hops and moved my kettle off of the heat.   Then I let it stand for 20 minutes before I started chilling. The idea behind a hop stand, or a hop burst if you prefer is that the essential oils (alpha and beta) of a hop are released into the wort, but nothing is evaporated,  So you get awesome aroma and flavor compounds with out too much bitterness.

Then I chilled it and aerated the heck out of it.   I can't stress enough the importance of aeration.  In fact, I would say that the 3 most important things you can do to improve your beer are, pitch a healthy and adequate yeast,  ferment at correct temperatures, and aerate.    It got foamy.   Then I pitched most of a sachet of US-05. (8 g)
pre boil reading
post boil was 1.032

It is Sunday morning the Krausen is already starting to form.  Really loving these, small batches.    The gravity came out at 1.042.  My recipe calls for .5 # of cane sugar to be added at High Krausen.   So that is going to boost this closer to a standard AIPA, but I need the addition to get back up to 2.25 gallons, because I took some out for a gravity reading.

Cane Sugar is 46 ppg so 23 ppg /2.25 = 10.22 so this beer is going to be about 1.054 OG... If it ferments out all the way to 1.010 it will be a 5.78 % abv beer.  Not a super high abv, but certainly not a session beer either.  I may just leave it, because, it was supposed to be a session-able beer after all.

Friday, September 18, 2015

An awesome hop combination AIPA - By Grace and Banners Fallen -

I love hoppy beers, not necessarily bitter beers.  Hoppy.  If you love beer enough to be reading my blog.  You probably love them too.  I will let you know there is a series coming up featuring recipes designed to appeal to beer muggles.   This is NOT this series.   This is a post on an almost session-able American IPA.  This is a beer that is 66 IBUs but only 5.5% alcohol.  Is this the hoppiest beer in the world?  No...no it is not.  Not even close.  Is it amazingly hoppy and flavorful for it's alcohol content?  Yes. and yet somehow it manages to be balanced.  It is an excellent beer.  I
have worked on it for years and I have the blend and balance of the hops just right.

It is also because my brother in law is coming to town.  He is a dedicated hop head.   It is time for him to try a real homemade hob monster.  This beer is inspired by my two favorite DIPAs; Russian River's "Pliny the Elder", and Boulevard's "The Calling".  I stole elements from both, and it was awesome...

Here is my recipe: the names of my beers are inspired mostly by books I have read.  Because... well because I am a nerd.

By Grace and Banners Fallen  American IPA
2.25 gallons Ill ferment in an LBK.  Fermentation should be quick probably 21 days.  Then Ill cold crash and bottle.  The beer should be ready for when we celebrate my step moms birth day.

2.8 lb
 2-Row (US)
AnyMash372 °L
0.3 lb
 Biscuit (BE)
AnyMash3523 °L
0.2 lb
 Carapils (Dextrine Malt) (US)
AnyMash331 °L
0.2 lb
 Cane Sugar
AnyLate Boil460 °
0.4 ozWarrior (US)60 minBoilPellet16.0%
0.3 ozColumbus (US)5 minBoilPellet15.0%
0.3 ozCentennial (US)5 minBoilPellet10.5%
0.5 ozMosaic™ (US)0 minBoilPellet12.5%
0.3 ozCascade (US)0 minBoilPellet7.0%
0.5 ozMosaic™ (US)7 daysDry HopPellet12.5%
0.3 ozCentennial (US)7 daysDry HopPellet10.5%
0.3 ozSimcoe (US)7 daysDry HopPellet13.0%

I prepare my water.  If I'm using Tap water, I just use 1 teaspoon.   My municipal water is pretty ideal for brewing. I often add a teaspoon of Gypsum.

When brewing at my brew partner's home we have to use reverse osmosis water.  In that case we add Calcium Chloride and acidulated malt to almost ever batch.  And other minerals per style.

Dough in Low 129 F (54 C) The wort will fall to 125 F (51.6 C).  Hold it there for 5 Minutes, then begin a rise to 152 F (66.6 C).  When you get to 152 F (66.6), hold it there for 60 Minutes.  Then rise to 168 F (75.5 C) for 5 Minutes. Stir during Mash Out.

Pull the bag and squeeze till your volume is where you want it.  For me, on my stove top that is about 2.8 Gallons (10.52 Liters).  Then begin the boil and hop additions.  I do a 10 minute hop stand at flame out. I then set the grains on a colander over another pot.  They drip out enough for a check of extract gravity.

I use a hop bag. I use yeast nutrient and irish moss.

Chill this batch quickly.  I put the pot in a sink of ice water, and use my small 25' immersion chiller.  I am to pitching temperature in about 15 Minutes.

Aerate well.  I use an aquarium pump.  I do it for 20 minutes minimum.


Thursday, September 17, 2015

Illustrated Guide to my Partial Mash...a practical approach for excellent beer. Give partial mash a try!

What is the point of brewing beer?  The answer is different for different people. Some people love the biology of brewing. They want to understand the metabolic pathways and chemical reactions that creates great beer (their beer tends to be awesome).  Some guys want to make complicated brewing systems and really understand the engineering of brewing.   For me, the point is two fold; having fun, and making excellent beer.   Now, if you read this blog, you know that I have been brewing for a long time.   I have accumulated a lot of equipment over 20+ years of brewing. I have a gravity system, 3 five gallon pots, an electric turkey fryer, and countless fermenters etc... I also have all of the fun gear for brewing... hydrometers, refractometer, pH meter, pH strips,  2 wort chillers,  seemingly endless tubing, valves and bottling equipment. So I can really brew any style of beer in just about any way you want me to brew it.  Save super high tech HERMS or RIMS... systems.  I haven't made that leap yet, and probably wont.  I enjoy doing the process by hand. I don't want push button beer.

So for me brewing the way I do is because it is the most fun way for me to brew excellent beer, not because of any limitations on my equipment or experience.  

I choose to brew partial mash in my kitchen.  It makes excellent beer every time, and because it is a lot of fun for me.   After brewing for many years I can tell you this,  if I tell you that if I've decided 3 vessel is more fun for me... Ill start doing more 3 vessel again.    Remember there is no one right way to brew, have fun, make great beer. 


I use an electric turkey fryer for my partial mash and extract (with grain) batches.  It was $80, on amazon.   I use the brew in a bag method for the mash.  My turkey fryer will hold the mash temp right at 150 F (65.5 C) for however long I want.   I usually mash in low (around 130 F 54.4 C)  I use 3.5 (13.25 L)  gallons of water and 6 lbs. (2.72 kg) of grain.   I have a large enough brew bag to do much larger grain bills in the fryer, but I have my recipes down to a science of 6 lbs (2.72 kg) and 2 - 4 lbs (.90  - 1.8 kg) of DME.

Yes you can use a small cooler, or two for mashing your grains.  Yes you can use Chris Colby's original plan of about 4 lbs of grain.   That all works fine.   Chris is a beer genius and you should all be reading the beer and wine journal.  This is how I do it.  It costs less and makes damn fine beer. I should note, I use 5star pH stabilizer.  I adjust the addition for the smaller volume.

I dissolve my DME (sometimes LME) in a separate pot in 2 gallons (7.75 liters ) water that is around 130 F / 54.4 C.  I remove the pot from the burner and stir in my extract. I take special care with my whisk to make sure that there is no extract on the bottom of the pot.  Then back on to the stove where  I let the temperature of this slowly rise during the mash to about 190 F / 87.7 C.  I find doing this keeps the colors closer to the intended SRM.   Further, it is easier to stir in a pot than in the turkey fryer

In yet another pot, I get my sparge/rinse water ready. 2 gallons (7.75 liters )  I heat it to 170 F / 76.6 C. Yes there are 3 vessels involved.   Again, fun for me, makes great beer. So if you choose to use my method, you can honestly say that you are a partial mash, brew in a bag, 3 vessel brewer.

At the end of the mash / mash out.  I add the DME to the turkey fryer. The turkey fryer has a basket.  The basket gets placed on a stainless steel bbq grate over the kettle.   My combined volume is about 4.9 gallons of wort.  I then sparge to my intended pre boil volume.  Usually 5.5 - 6.5 gallons (20.8 to 24.6 liters).  The boil off rate is not very high because I boil with the lid on but ajar... egads... aren't you terrified of DMS... again... No, No I am not.  I have covered that many times on this blog.  

The lid on but a jar.
From this point on the brew is just like any other brew, add hops, add your extras... yeast nutrient, whirlfloc, etc...I add my hops in a paint strainer bag from home depot ($1.87) This saves on Trub loss.  I will note again, I brew with the lid on but a jar.  This creates such a vigorous boil that I can not walk away for even a moment for fear of a boil over.   I get complete breakdown of the proteins.  Why is this important to mention? because some "Tommy Knowitall" will try to tell you that you have to have a 200,000 btu banjo burner, or you'll never be able to make great beer... and that person is just wrong.  With the lid on but a jar, my boil off rate is only about .5 - .75 gallon per hour.  Don't you miss your target? Almost never. 

25' Stainless is fine for
small batches.
When the boil is over it is time for the chill... there are people who believe that you have to chill rapidly or you won't get clear beer.   Hogwash.   Chilling helps with clarity, but the intensity of the boil is what really helps.  I do not usually chill batches that are not super hoppy.  I just don't like to waste the water.   Recently I have learned of some new techniques that  appear to save a lot of water, so I will probably be testing and implementing these techniques.  If they are successful, I will probably start chilling every batch. I also am inspired by the Wasp chiller by Jaded Brewing.   When a beer is super hoppy, I chill it.   But super hoppy beers tend to be 2.25 gallon batches around here.   So chilling them is a breeze.  Large batches get chilled on the back porch. a garden hose attached to the double coil 50'. I am usually to pitching temperatures in about 25 minutes.   I prefer immersion chillers.  They are easier to keep clean.  And since brewing is about fun... and cleaning a plate chiller / counterflow chiller sucks... I'll stick with them.

I always aerate my beer.  I used to be a shake the carboy guy, then I became a pour it back and forth guy.  Now I have a $9.00 aquarium pump.  My tube has a hepa filter in it.   The filters are cheap and should last about a year.   It does the job so very well.  I aerate my beers for 15 -20 minutes minimum.  Higher gravity beers, and lagers, get aerated for longer.   Fermentations have been fast and very clean ever since I got the aquarium pump.  I also usually cover the top of the fermenter with aluminum foil.  (I took it off for the picture)  You may also notice the aquarium pump is on a brew day rag.  That keeps it from sliding around while I am aerating.

Pitching Yeast.  I am a fan of dry yeast.  Having said that I have no particular preference about what yeast you use.   For most ales I use US 05 or Nottingham.  I rehydrate but, Fermentis says you don't need to any longer.  For almost all lagers I use Wyeast 2112.  The apparent attenuation (aa%) can be lower than some lager yeasts... 68-74%  but I don't really care.  I usually get about 70-71% attenuation and that is just fine.  My premium american lager is awesome.   For Belgian Strong Ales I am currently hooked on WLP500.  Something about the finished taste just agrees with my pallet.  And it is great even before aging.  I am excited to try CryHavoc yeast.  I'll admit I do sometimes get special deals and gifts because I write this blog.  Fermentis is awesome. I will be trying a lot of lagers in the next year using their yeasts.  If you are a new brewer I'd say stick with dry yeast for a while.

Fermentation Control.   I used to own an undercounter 2 door bar refrigerator.  It was awesome.  I had a Johnson controller... I say used to because after a blow off of epic proportions I took it out side to hose it out (it was a bad ass BSDA that went crazy).  I had it leaning against the minivan to drain out.   I live in a pretty nice neighborhood. But scrappers can get you where ever you are, and they got my fermentation chamber. So I am currently fermenting in the master bathtub.  I used my laser thermometer and  this was the best spot. Around 65 F (18.33 C) year round.  My next big project is constructing an ale fermentation chamber and converting a dorm fridge for lagering.  I will be using a more affordable temperature controller. This picture is what I will be building.

I currently bottle my beer.   I had to sell my keezer and keg set up when times got tough.   I actually don't mind bottling.  But I think I will probably start kegging again. I may also be getting the tap a draft keg systems.   I do so much small batch that they really look like they would make some sense for my 2 gallon batches.  I'd end up with 1 tap a draft, and a 1 liter bottle that I could force carbonate.   I also force carbonate in 2 liter bottles.  That is easy and fun, and lets me start trying my beer in a couple of hours. 


Tuesday, September 15, 2015

Belgian Dark Strong Ale... One of the Pinnacles...

In the world of homebrewing there are certain pinnacle recipes.  Certain beers that seem to garner respect and awe from other brewers when done well.   Certainly a ridiculously hoppy double india pale ale is one of those beers, a royal imperial stout is one of those beers, and most definitely a barleywine is one of the pinnacle beers.  But I submit that a Belgian Strong Dark Ale (BSDA) is one of those beers too. Every time I make a BSDA other brewers who try it slowly nod their head and say..."I have to try one of these someday".    sexy fermentation photos at the end....

Aerate your wort.
Temperature control and aeration
make the biggest difference.
Sunday I made my BSDA partial mash beer.   This was the second time in 2 months that I have made a BSDA, the other time was an extract kit with a "new to brew" friend.   It was a 5 gallon batch that finished at 1.067.  I know they say the beer improves with age, but I wouldn't know.  I have never successfully left my damned hands off of one of these.   The first batch was made with WLP500 Monastery yeast.  The yeast was washed using woodland brewing research's modified yeast washing protocol.  This created 6 pints of yeast slurry.  I kept 2, gave 2 to the newb, and gave 2 to another friend.

Mashing away
at 150 F.
So this weekend it was time to brew up some more... just for me.  And for any friend who can pronounce Chimay correctly, and doesn't think it is a monastery in China.

I forgot to take a picture of the grain. Sorry about that.   It was 6 lbs total of grain.  When I partial mash in my electric turkey fryer, I generally use only 6 to 7 lbs of grain.  That still means about half of my fermentables are coming from grain and half from DME.  I use DME.  It is very rare that I use LME.   I find DME is easier to control color with, and also it stores so well it is rarely stale or off in flavor.    The recipe is here. 

I have a little different approach to partial mash than most people.  I mash my grains in 3.5 (13.5 L) gallons of water at 150 F ( 68 C ).  Always, doesn't matter what the recipe.  If it isn't giving me the mouthfeel I need, I add some oats or wheat next time.   I dissolve my DME in 2 gallons ( 7.57 L) of water. I combine the two, and then I sparge to volume.  I overshot my target gravity.  I was aiming for 1.070  I ended up at 1.072.

This method works for me, I have produced quite a few excellent beers this way. Partial mash is nearly indistinguishable from all grain.  I have hosted samplings at the LHBS, where people were asked to identify the all grain, and the partial mash.   No one can ever tell, and they usually prefer the partial mash.   The advantages of partial mash are discussed in earlier blogs.  As you can see from the photo at the right, 4 lbs (1.81 kg) of DME went into this one.  Along with 8 oz of D180 (.22 kg) Candi Syrup.   The hops were Cluster for bittering, and Styrian Golding for aroma and flavor.

The boil went just fine.  AS you can see the turkey fryer will actually boil 6 gallons of wort just fine. And it will really rock and roll with the lid on but ajar.   I use a hop bag when I brew.   It is just a large paint strainer bag from home depot... $1.87. Usually I rinse it out... but sometimes.  I just pitch it.

This was a no chill batch.  When I brew 5 gallons (or more) of beer,  I never chill batches where the hops are not the predominant flavor.  Chilling uses lots of water.   When finances allow it, i will be purchasing a jaded chiller (or making a knock off).  As brewers I think we have to be conscious of the water we are using and wasting.    I am confident that an hour of steam and boiling wort has sanitized the lid and the boil kettle.  So I just let it stand with the lid on for 20 minutes.  Then I pull the hop bag and the element.  I put the lid back on and wrap it up in saran wrap. So far I haven't had any problems with no chill.  But I've only been doing it for about 20 years.  So, check back with me...By the way the Australians did not invent no chill.  They just radically improved it. People did it all the time when I first started brewing.


Photo stinks but it is at 1.072, so I overshot by .002.  With partial mash I come pretty darn close to the recipe every time.

I'm going to try like crazy to let part of this batch cellar.  The current plan is to take 24 beers to my dads house and cellar them in his basement.   And by 24 I mean 18... or maybe 12...ok a 6 pack will go to my dads basement and Ill try it occasionally when I am over there.

And here it is in my temporary fermentation chamber / master whirlpool tub.  It stays cool year round.  Bad for baths...great for beer.  You may also notice the 3 lbk Mr. Beer fermenters from the recent... You can go all grain with the Mr. Beer.... series.

Thanks for reading.
Keep on Brewing.

Prost!

Super Sexy Fermentation Updates
At 12 hours the ring of bubbles is left over from the aeration
At 24 hours a Krausen is beginning to form around the edge 
at 28 hours Krausen has formed, blow off jug is bubbling
Cant wait to see this in 8-12 hours.
At 36 hours the Krausen is rising. The bubbles
are rocking. We'll see if I actually needed
the blow off tube.
I did not need the blow off tube, or at least I don't think I needed it.
Had I put on the air lock, it may not have been able to evacuate fast enough...
Ill keep updating as we go along.
At 60 hours the Krausen has fallen but the
bubbles are still rocking 1 huge bubble every 2 seconds.
What does that mean? It means I did a good job denaturing
the proteins in the boil and they will floc out completely.
So again, ignore the Tommy Know it alls who tell you
that you need a monster BTU burner.

At 96 hours the krausen looks the same, and the bubbles are still at 1 huge bubble every
2 seconds.  This one is going fast.
Cant wait to try it.

At 192 hours,  the bubbles have slowed to 1 every 30 seconds.
It went for days at 1 bubble every 5 seconds.
Impressive,  this should be a great beer.

Sunday, September 13, 2015

All Grain Mr. Beer Oktoberfest Brew day "you can go all grain"

Here is my brew day for part 3 of 3 in my series on what to do with your old Mr. Beer LBK... otherwise titled "You can go all grain".  If you haven't read the other posts, you might check them out.

My next beers in the series will be called small batch partial mash / stepping stone or landing spot?... In that series Ill be arguing the benefits, and merits of doing small batches of partial mash.  The benefits are many but apply especially to; exotics that you don't really want to have a lot of,  super high ibu IPAs DIPAs and APAs , and finally as a learning tool for getting into all grain.  If you read the blog, you know I am a fan of partial mash.   In recent years partial mash has been losing ground, as more and more people are discovering the ease of BIAB.  I love BIAB, but partial mash just makes a whole lotta sense for a whole lotta brewers. I hope you'll check out that story line too.

Always be organized.   Always have your plan/recipe at your disposal.  Today was a frantic day.  My attention was divided.   It was the NFL kickoff.  I was watching the Chiefs play reasonably well.

I doughed in Low at 138 F.  which dropped me to 127 when I added the grains.   I began a slow rise to 154 F immediately.  My step mash process takes about 2 hours.  30 for the rise / protein rest, 60 for the saccrification rest, and then rise to mash out.   Squeeze the bag... and boom  2.8 gallons of yummy wort.


This beer is being brewed with Wyeast 2112 Lager yeast.   And for you nay sayers... I say YAY, it is a lager yeast.  It is a strain of Saccharomyces Pastorianus, which is lager yeast.  So quit messaging me that it is a hybrid, because you read it in your basic brewing book.   The author was just trying to help you understand... not stating scientific fact.  It is an awesome yeast.  If you have the ability to aerate it, you can make almost any type of lager with it.  You could also use Wyeast 2124, or White Labs San Francisco Lager.  (Steam beer yeasts).  There are many, many strains of lager that ferment well in the active, or primary, phase of fermentation at 65 F.  But you have to lager them cold (secondary).

As you can see in the picture on the right, the mash is rising to saccrification temperatures.

In this photo saccrification rest has been going for a while.   My thermometer reads about 2 degrees high.  So if you see that in my photos, just know that I do occasionally calibrate my thermometer.  If you haven't ever done that it is easy.  Just stick it in some ice water that is mostly ice, that is your low end.   Then stick it in some nearly boiling water.   Here where I live, water boils at 212 F.   If you live in the mountains it may be lower.

I realize the photo on the right is going to drive some of you crazy.  You have been told that leaving a lid on a boil, even if you leave it a jar, will cause DMS.  I have covered this in previous posts.   For now I will just say, hogwash.   I wont get into a long explanation again, Ill just say, that well modified grains don't contain a lot of the DMS precursor S-MS.  So as long as it can vent... you're fine.   DMS fear is a hold over from the days when malt wasn't well modified.


My pre boil gravity was 1.049... which means I got 80% efficiency.   So don't believe the knuckle heads who tell you BIAB is not as efficient as 3 vessel.  You can see the proof right on this page.

My post boil gravity was 1.059.   So this is going to be a really good 6.5% beer.   Yes only 6.5%; it's a festbier, and it is fermenting with Wyeast 2112... so it will finish around 1.014.
 I think I nailed the color.  The cold break was great.   If you look closely you can see it down in the pot... It looks like a cloud, or an alien brain...  At the right is the LBK with the aeration stone rocking. The key to the steam yeasts is aerating the heck out of them.  I aerated for about 25 Minutes.


I use a dry erase marker and write on my fermenters.  Yes, it will stain your fermenter or lid.  Yes... I don't care.   It helps me remember dates.

This has been a very fun series.  I know I am going to keep brewing small batches a lot in the LBKs.   For me the current plan is 1 or 2 five gallon batches, and 3 small batches a month.  That should be just about the right amount of beer, and it will mean I can keep brewing every weekend.

Keep on brewing,  and keep sending your comments and questions.    This was the first of two beers I brewed today...  The second a Belgian Dark Strong Ale, Partial Mash, No Chill 5.5 gallon... (wow beer nomenclature is getting long) I will post about in a day or two.

UPDATE ON THE OKTOBERFEST:

The beer was so well aerated that it developed an awesome Krausen with in 18 hours of brewing.   It is humming along fine.  I can see the bubbles popping, but I don't see new ones forming.  So I think we are reaching the end of primary in only 5 days.   But this is Wyeast 2112, it will sit here for another 16 days.  Then cold crash, then bottle.  So in 1 month, I will be drinking awesome homemade Oktoberfest... only a month later than I should have been.  

I will re use this yeast cake for a high gravity premium american lager.   Champagne lager... 1.060.