Friday, January 29, 2016

Strawberry Wine... seventeen... a cold winter day, dreaming of spring


Forgive the title of this post... but Dena Carter...yeah... ok..
So step mashing is a long process.  But it definitely improves your beer.  The flavor of a step mash, or decoction mash for that case is more... grown up.  Not commercial, mind you, just more refined.   Yes, I know it isn't necessary.   Yes, I know most malts are fully modified now...  But a step mash ensures that all phases of the conversion are addressed.  And when brewing a Belgian Abbey style it is absolutely necessary if you want to enhance the production of ferulic acid and therefore create more phenolic flavors....


So why am I talking about a step mash in a blog that is clearly focused on Strawberry wine?  


Here's why,  Step mashing takes so long, that if you are step mashing, you easily have time to make a 1 gallon wine kit, or 1 gallon of fruit wine.   And that is exactly what Mark and I did last Saturday.  And you should too,  if you can make beer, trust me, you can easily make decent wine.  In another post Ill talk about wine expectations, and wine snobbery.   You can make world class wine at home, but do you really want 30 bottles of some amazing oaky, complex cabernet?   Come on, you're a beer guy...or gal... or person... Not a wine snob.


During the mash,  Mark and I took 4 lbs. of frozen strawberries, and 1 lb. of frozen mixed berries.   Why did we add frozen mixed berries... cause that's what SWMBO brought home.   We added all of the berries to a stainless brew pot on the stove and slowly thawed and heated them to 160 F (71 C) for 10 Minutes.   It isn't strictly necessary to pasteurize frozen berries, but it doesn't hurt anything, and because you'll be letting the berries hang out in the must for a few days, it is a good idea.   

Making wine is easy.  And if your SWMBO is like mine, she isn't much of a beer person, wine is a great alternative.  Just do your self a favor from your very first batch.   Forget all wine snobbery.  Make drinkable,  easy to make, fast to ferment good wines.  I like fruit wines, and the 1 gallon wine expert kits.   When I do make a 6 gallon wine kit, it is usually something very easy drinking like, white zinfandel, or one of the Island Mist Kits.  They're delicious, and ready in 4 to 5 weeks.   Nothing blends better with Saison, than a country wine.  An important thing to remember.  You will get better and better as you learn more and more.  Just like brewing, your first couple of batches will be good, but maybe not great.  But trust me,  after a couple of batches your understanding will grow and you will be on your way to excellence. 

Here's a recipe for an easy Strawberry Wine

Ingredients

Before sugar
Addition
  • 4 – 4.5 pounds strawberries Frozen is fine. 
    • I usually go 4 pounds of strawberries, and 1 pound of mixed berries,  the color is fantastic.
  • 1 gallon water
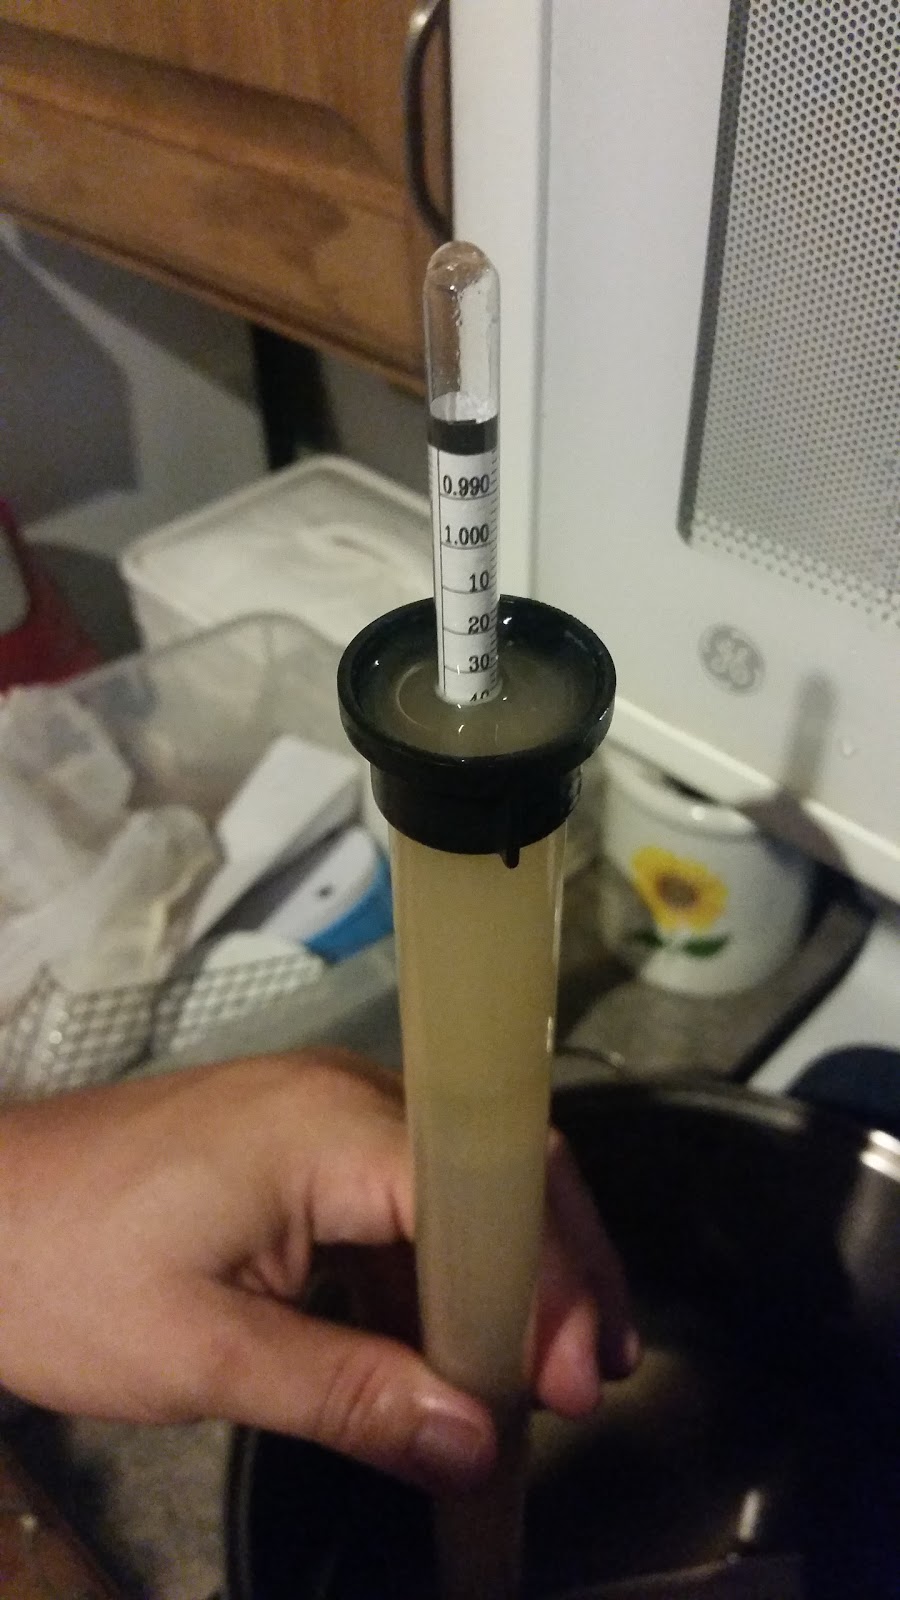
  • 2 - 3 pounds corn sugar to a OG of 1.080 minimum. 
    • I like strawberry wine sweeter so I usually go to 1.100...
      • Won't the yeast eat all the sugar?... depends on the yeast.   But even if it does, you can back sweeten wine.   Easily...
  • 1 teaspoon acid blend
  • 1/8 teaspoon tannin
  • 1/2 teaspoon pectic enzyme
  • 1 teaspoon yeast nutrient
  • 1 Campden tablet - for when it's time to stop the fermentation.
  • 1 package Côte des Blanc or champagne yeast (can substitute regular wine yeast)
  • 1 Package of Sparkaloid... or lots of patience... It can take months to clear.
    • I generally just wait.  1 gallon is 5-6 bottles of wine.  If you make 1 or two a month you'll be swimming in wine.
 Instructions
  1. Wash and remove the stems and leaves. 
    1. if using frozen this is done for you already.  I just slowly bring the fruit and1 gallon of water to 160 for 10 minutes.   And I mash it up with a potato masher.
  2. Use a straining bag and fill with the crushed strawberries. Tie the top, and leave straining bag in a sterilized bucket.
  3. Add water if needed, sugar, and acid blend, tannin, pectic enzyme, and yeast nutrient. Stir well.
  4. Before you add the yeast, you will need to sterilize the must. Crush up one Campden tablet and add to the must. Stir and cover for 24 hours. Now you may add the yeast. Stir well, cover, and stir every day for 4-5 days.
  5. Then siphon into your 1 gallon jug, put the rubber stopper on and airlock.
  6. It will take about 2-3 months before your wine is clear enough to bottle.
  7. You can make more than just 1 gallon if you just multiply out the recipe. 
    1. I used half a pack of yeast for this batch.
Other questions


Can I use other fruits?  Of course, just about any fruit can become wine.  Even garlic... yup... it's gross.  But Apples, Pears, Grapes, Apricots, Strawberries, Raspberries, Blackberries are all easily done.


How do I learn to make other fruit wines?  Well first you understand that winemaking is a process.   Kind of like brewing is a process.  But in wine making the quality of the ingredients are very important.  It took me a long time to realize that the strawberries from Wal-Mart were actually better for wine making than the strawberries from WholePaycheck market.

Where can I learn more? Not surprisingly, Beer and Wine Journal is an excellent resource.  As well as this article written by Beer and Wind journal editor Chris Colby for Grit Magazine.


That's all for now sports fans.
Prost!

Tuesday, January 26, 2016

Pilsner Ale... With Fermentis K-97 and Weyermann Barke Pilsner (TM)

Saturday Mark Anthony and I brewed a Pilsner.  A crisp refreshing American Pilsner.  The penultimate easy drinking beer.   We used 7# (3.17 kg) of Weyermann Barke Pilsner (TM), and .5# (.22 kg)of Flaked corn.  The batch was hopped with 2 charges of Hallertauer at 60 and 15.   We were shooting for 25 IBUs and a gravity of 1.044.   A little hoppier than most American Pilsners, but that is what we wanted.  Crisp and reminiscent of a German pilsner.  There was only one weird thing going on, as far as we knew,  we were using an ale yeast by Fermentis called K-97.  More on that amazing yeast later.


What we got was a 21 IBU,  1.050 batch.  That is ridiculous extraction from the grains.   That is 88.64% Mash efficiency.   Brew house efficiency of around 86 to 87%.   Now, I generally get in the 80%.  I set my recipe calculator for 82.5%, which is my normal efficiency ever since I switched to BIAB.  But... 88%  Something was different.   

We crushed fine like we always do, I set the mill to a little more than the thickness of a credit card.   We doughed in low.  Having never used the malt before we wanted to give ourselves the best possible chance at success.   We step mashed beginning with a protein rest at 135 F (57C) for 20 minutes, then a slow step up to saccrification at 149 F (65 C) for 40 minutes, then a slow rise to mash out at 168 F (75.5 C) for 10 minutes.   The mash took a while, 95 minutes.  But we sampled beers, and discussed our travels, and plans.   We are about to brew some beer for an upcoming ethnic festival and there was considerable planning to do. There has been a lot of emphasis on speed in brewing recently.   My question for you is why?   Yes, excellence can take a long time.  Yes,  your brew day may last for 5 or 6 hours.  But many of you dream of "going pro" someday, so you can be assured if you ever do, you'll remember fondly the old 6 hour brew days.  

We tasted the mash at the beginning of the saccrification rest.  We didn't use iodine today,  because I need to get more.   I have said before, your mash takes what ever time it takes.  I stand by that.  Most mashes are done long before 60 minutes.  So we taste at 15, 30, and 45.   In this case at 40 minutes.   The mash tasted amazing.  I'll trust MA to make a comment to back me up on this.  Probably the best mash I have ever tasted.  

That is when things got weird.  Our gravity sample was 1.039.   What the What?     We had overshot.  And I never miss my gravity.  Gravity samples are boring for me.   Listen, I'm not saying I'm the best brewer in the world.  I'm not a multiple NHC winner or even a state champion, I'm just a really experienced home brewer.  I hit my damn numbers.   So what changed.   The malt.   You see, for everyday pilsners, I am a fan of Cargil IdeaPils.  Good malt for single step saccrification. I Still use it, used it Sunday as a matter of fact.   But this, Weyermann was amazing stuff.   This is clearly a German Government Secret Malt.  This is nuclear powered pilsner malt, there can be no other explanation.   I just don't overshoot by that much,  even with a long careful step mash.     If you have access to Barke Pilsner (TM) by Weyermann I suggest you go get it.   Get all you can.   Mortgage your dog, make your wife give plasma... just get some.  The extraction and flavor are excellent. 

But this day was really about a yeast experiment.   If you've read my previous post, you know I am a lover of clean crisp refreshing beer.  Not BMC conglomerate beer (although I respect them) something a little more flavorful.   But still very drinkable.   You also know that I have been searching for years for an easier method for making "lager like" beers.   Now, having said that I have the ability to lager.   I have a mini fridge, and a rudimentary temperature controller.   Soon, Ill have a chest freezer and 2 inkbird controllers.  So Ill have an ale chamber and a lager chamber.  But I still search for that perfect yeast that can make a lager like beer.   Today, we were trying Fermentis K-97.   K-97 has only recently become available to home brewers.   It has been used for years in commercial breweries. Safale K97 is an ale strain that when used correctly and at consistent correct temperatures will attenuate at or above 80%, and will produce very little ester, only about 23 ppm in a 1.074 wort at 68 F (20 C)  That is amazing.


To give ourselves the very best chance at a clean fermentation we made a starter, kind of... you see for years Fermentis recommended making a starter.  They said you could make it with sterile water or with a very low gravity wort.   The idea was to get the cell walls of the yeast pliable again prior to pitch.   But then the boys in the lab said,  "rehydration is not necessary with most beers" and confusion was instantly created.   I have a series coming up with Kevin Lane of Fermentis where this will be covered in detail.   At the beginning of brew day, we pitched the dry yeast onto a 1.035 starter at around 85F.   We let it sit as we made the beer.  

By the time we were ready to pitch we had a fantastic yeast starter.   Easy,  if you can make beer, you can follow this method.   I'm pleased to tell you the beer took off and was forming a krausen with in 6 hours.   That is very similar to the performance I observe when I make a starter with liquid yeast.    Here is an easy way to make a starter.   4.25 Cups of water, 1 cup of DME.   Bring to a boil.  Chill to around 85F.   Pitch the yeast.  Do this at the beginning of brew day.


Bet you blizzard boys
wish you had an
electric turkey fryer
this week?
Back to the brew.   We made 1 ounce hop additions at 60, and 15 minutes.  The wort was amazingly clear by the end of the brew day.   We boiled in my electric turkey fryer with the lid on but ajar by about 2".   And again the obligatory, "no I'm not concerned about DMS, I have covered that adnausem on this blog... well modified malts, very little risk... blah blah blah...."  We made our hop additions and our other additions.  At the end of our brew day we chilled the batch, aerated,  and pitched the starter.   I for one cant wait to try this beer.  it is fermenting in a 62 to 64F (16 - 17 C) environment right now. 


That's all for now sports fans.


Prost.

Easy links


Weyermann Barke Pilsner Malt  accept no substitutes, Weyermann is the only provider of Barke Pilsner Malt (TM). 


http://www.fermentis.com/brewing/industrial-brewing/product-range/ yes I know it says industrial product range, but trust me, they have it for home brewers now too. 


Monday, January 25, 2016

The holy grail... a lager like ale, at ale temperature

For 27 years I've been on a grail quest.  Like the Templar Knights of old, searching through the treacherous, talismaned,  and golden treasured landscape of brewing,  searching for the elusive grail...I've endured trolls along the way, and I've out lasted most of my original brethren,  I've battled my two most arch enemies, "Tommy Knowitall", and "Charlie Followcanon" in my search.  My search for the elusive ale yeast that will mimic a lager.  Mimic a lager so closely that they are nearly indistinguishable.  


You can make lager at
Low ale temps with
Wyeast 2112 or WLP
810 San Francisco.
I'm no longer searching for myself.  My battle was lost long ago. I surrendered.  I'm not sure it can be done.  After all, we are talking about two similar but very different fungi here.  S. Cerevisiae and S. Pastorianus.   They are different.  Even the methodology of reproduction is different (coccular v. rod). So I surrendered. I gave up.  When I want to make a light "lager like" beer.  I just make a real lager.  So I'm continuing this search, this holy quest...for you.  My somewhat loyal readers, albeit accidental readers. ( By the way,  I can, and have argued pretty compellingly that this quest can be completed by using Wyeast 2112 or WLP 810 in a medium to low OG beer at low ale temps 60 - 62F.)  

The grail? You ask, What is the grail?  For this blog, the grail is a mythological ale yeast that would create an ale so clean it might be confused with a lager.  Think of it.  An ale yeast that would perform well enough to create a lager like flavor.  So clean that only the purists could detect that it was an ale.   Over the years I have tried many methods and yeasts; Kolsch yeast, Alt yeast,  US-05, 1056, 001... all were good... none could be confused with a lager.  I have tried "beano beer", and the addition of amylase enzyme.  Also very good, but not a lager.   You see they all had too much ester.  There is a fruity, almost pleasant acidic note to an ale.  Lagers produce far less esters and therefore we call them cleaner.  And chemically the esters produced by ale  and lager are different.   I won't be getting into the science of yeast in this blog,  I won't be discussing amino acid up take,  and it's role in higher alcohol production and limitation,  and subsequently esters.  But know that ale and lager produce slightly different esters and compounds,  simply because they are different.

Fermentis K-97,  If it lives up to the hype, it will be the ale
yeast we all use all the time.  The "new US05" if you will.
So I  begin another chapter in my search.  The latest contender, Fermentis  K-97. Laboratory reports on this yeast are excellent.   Real world reports of this strain are mixed.   But performance reports on the Internet,  especially negative ones, tend to be from people who aren't very good brewers.  Brewers who didn't take the time to understand fermentation temperatures.  This yeast needs low ale temperatures to be super clean.   I reached out to both those who loved the yeast,  and those who did not on the internet.  Guess what I learned. .. the guys who loved it, used it correctly,  they controlled fermentation temperatures, they aerated, they pitched adequately.   The guys who didn't,  told me how they fermented in their basement around 65, or maybe 68.  "Did temperatures vary?"  I would ask.  "Not real sure,  think it was pretty consistent." they would answer.   Generally with some comment about how they were about to build a fermentation chamber, or how they preferred a strain of yeast that could handle some temperature variation.  (and that is a fair and fine approach, that is what US05 can offer you).

But imagine a world of 1 fermentation chamber set to 62F where you could make, lagers, pale ales, cream ales,  and many english styles... you have to admit it's tempting. 

I intend to try k97 in a cool consistent ambient fermentation.  I will not be using my fermentation chamber for this one.  Some yeasts are very forgiving. Some tolerate temperature  swings well.  Some do not.  Some yeasts are finicky,  others are not.  I want to know if this one is finicky.  I want to brew this the way you probably brew at home.  All yeasts are affected by temperature,  and pitch rate.  For example,  US05 is clean and moderately fruity,  but if you ferment it in the 80s... you can make a dammed fine Saison with it... yes you can, so don't even argue this point.  At higher temperatures the "chico" strain kicks off all kinds of phenol and ester.   It's really good, you should try it.  What is important to note is;  every strain of yeast reacts differently based on certain factors.  Chiefly.
  • Temperature
    • Generally the lower the temperature the slower the fermentation, and the cleaner the yeast profile. the yeast kicks off less ester, and phenol at lower temperatures. That also means fermentation takes longer... OK, so?   If you want fast rehydrate US05...
  • Stress - Osmotic Pressure  and pitch rate
    • Putting yeast directly into a high gravity beer can kill lots of the yeast, yes even with liquid strains, but even more so with dry yeast.   Creating an underpitch of yeast... poor fermentation.   Pitching too little yeast can have the same results. 
  • Stress - lack of oxygen and nutrients
    • Putting yeast into an environment where there is not enough oxygen for growth, or not enough nutrients, can have a similar effect.  The yeast has to work harder to reproduce and there fore it puts off more ester and phenol.

I've been talking to Fermentis  again.  And again, they are more than helpful.  I encourage you to use Fermentis. They're great.  So here is the basic information,  and the plan  Safale K97 is an ale strain that, when used correctly,  and at consistent correct temperature will attenuate at or above 80%, and will produce very little ester, only about 23ppm in a 1.074 wort at 68 F.  That is amazing.  It is about the same esters as amount as many lager yeasts and a little more than half of what you get from US05.   But remember these will still be ale esters.   There are many kinds of esters.   The sharp esters produced by a lager will not be present in this beer.  But the esters should barely be noticeable.   

This is the best contender I've seen so far.  

this is the krausen on
the direct pitch, 14
hours into fermentation
don't worry theres a tshirt
covering it. 
Mark Anthony tending to the mash,
we stir every 15 minutes and check
the mash temps constantly.
So this weekend, I brewed some cream ale.  Actually 11.5 Gallons.  Mark helped me on Saturday with a Pilsner style cream ale.   7# Weyerman Barke Pilsner and .5# of flaked corn.  The Weyerman Barke Pilsner is amazing stuff.   You need to try it.  The wort was delicious, and the extraction was fantastic. We got 1.046 for 6.2 Gallons of Wort.... Do the math... it's in the 90% efficiency range.   Tried a new technique for rehydration.  We pitched the dry yeast into a 1.035 wort starter at the start of the brew day.  By the time we were ready to pitch we had a great foamy starter.   That batch is rocking and rolling.   I'll do a brew day post tomorrow.


The direct pitch
is at 64 F.
On Sunday I brewed a House Standard Cream Ale.   3# of Rahr 2 row, 3# of IdeaPils, 1.5# of Flaked Corn,  .5# CaraPils,  4 ounces of C40, and 4 ounces of flaked oats.  Im a big fan of Cargill IdeaPils for everyday pilsners.  Liberty Hops 3 additions to 23 IBUS... Ill dilute it down 15 IBUs with a water and corn sugar addition tonight.  Bringing it up to 6.5 gallons.   My wort was 1.045 again in 6.2 gallons of wort... again I'm in the high 80% range.  Don't believe me?   come brew with me... you're always welcome.  I'll show you what I do to get the efficiency I get.  This week Ill probably post with every step I take to get into the high 80% to 90% range every time.   This batch was direct pitched with dry yeast after a 20 minute aeration with my aquarium pump.

That's all for now sports fans...
Prost!

UPDATES:  It has been 11 days for the beer Mark and I brewed.  And The Krausen has begun to fall.  The Krausen lasts a long time with K-97.   The gravity is down to  1.010.  Should drop a little more before secondary.  Yes, Im going to secondary these beers, use gelatin, and cold crash.  This yeast is not a great flocculator.  But it will clean up with these steps.  Should be brilliantly brite.  Im in no rush.  

It has been 9 days since I brewed the cream ale.  The Krausen is shrinking.  I'll make the Water and Corn sugar addition tonight.  But I will taste it first.  And decide how much to add.

Update: decided against secondary on both of these.   Just fined with gelatin.   Both batches have dropped under 1.010 both are around 1.007.  The taste is amazing.   Also I never added water and corn sugar to the cream ale and it still got this low.  This is done good yeast.   But reports of low flocculation seem to be true.  So if you use this yeast you'll have to fine with gelatin.  I'm going to use again soon for a true kolsch, that one I'll fine with super clear kc.  To get a perfect, brite beer.  

Thursday, January 21, 2016

Hot Brewing action inside...10 gallon double batch... Weizenbock and Stout

Sunday was brew day.  We brew almost every weekend as a group, and I brew every week, either with the group or on my own.   But this Sunday was a process test.  Can we make 10 gallons of beer nearly simultaneously on two 5 gallon systems.  With 4 of us brewing, 10 gallons is a case of 12 ounce beers, or 12 bombers each.  By brewing 2 batches we can make 2 different styles, and increase variety.

The day was cold, the
mash was a challenge
The Oatmeal Stout mashing in
the electric brew kettle.
Sunday was our test run.  And to tell the truth, it went well.  My fledgling brew crew is turning into a semi experienced efficient team.  Everyone has certain skill sets and personality attributes that will make this a championship team in the future.

We brewed a weizenbock and an Oatmeal Stout. The weizenbock because Jake loves weizenbock, and the stout, because... St Patrick's day is coming.   The Stout was also a tribute to Alan Rickman... so we named it "Severus Stout, The Potions Master"    The weizenbock is called "Ill be bock"

Brewing 2 batches at the same time can be hectic.  But with a good team and good planning, you can pull it off.   Organization, and division of responsibility are the key to a 2 batch brew day.  So John and Jake handled the Weizenbock, and Mark and I handled the stout. Jake and Mark are both very precise people. John and I are both overview people.  We all love beer.  So great team.

Jake had to stir and
adjust the heat
constantly during mash, 

He is not smoking, that is
the thermometer cover.
Very sanitary Jake!
The mash for the stout was uneventful.  Mark took charge and kept the temperatures perfect.  The weizenbock was more challenging.  The weizenbock was brewed in the garage.  The temperature outside was 2 F.  Maintaining the mash temperature was nearly impossible, even with sleeping bags, and reflectix insulation.   (next time well be using a bag in a cooler, and doing a no sparge brew in a bag in a mash tun type of thing...got it?  good!)   A bag in a cooler will allow us to continue to crush fine, and gain the efficiency of BIAB, but keep more consistent mash temperatures on Jake's system. And it takes about the same time as BIAB, so it won't expand our brew day.

As it was, Jake had to work his but off to keep the mash going,  Stirring, and heating occasionally.   I'm sure it was the most frustrating mash of his young brewing career.   But he and John powered through and still produced a 1.074 Mash, expecting 1.080 so not too far off.  That is actually pretty good on a brew day where you can't keep the mash temperature consistent.  They were also mashing at a fairly high temperature to create more mouth feel.

You can see the amazing deep dark
brown color, almost black... yes I
know BJCP says Black... I dont
really care.  It's awesome. 
The stout on the other hand overshot.   Mark kept it at 154-156 for the entire mash, and we still overshot by .05 points.  Still with in tolerable limits.   I must admit I love the smell of stout mashing. The roasted grains create the most wonderful aroma.   Some people cap their mash with the roasted grains opting for less bitterness, and "toasty-ness" from the grains.  But I prefer to just use a little less and let all of those flavors mash away.   I think that makes my stouts a cool color, deep brown, almost black, and full flavored.   They can take some time to mellow, but I don't really mind the wait.

The boils were uneventful.  Both systems easily handled the volume being boiled.  The weizenbock finished it's boil about 12 minutes before the stout.  Not quite enough time to chill before the stout was finished but close enough.  Next time well space them out better.   The weizenbock was chilled with the stainless 25 lft chiller.   It chilled in about 18 minutes.   The stout was chilled with both chillers.  It chilled in about 12 minutes.   Love using both chillers. Using two coils chills so fast.    The simplest and most affordable way to chill rapidly is to use two 25 linear foot chillers.   Just expand one large enough to allow the other one to slide into it.   Make sure all of your clamps and hoses are tight.  Boom, instant turbo powered chilling.

Aeration with a mixing
paddle.
Jake and John are experimenting with a new way of aerating wort prior to yeast pitch.  New to us at least.  And it worked great.   They attached a mixing paddle to a drill.  The mixing paddle was sanitized, and used to aerate the wort.   The stout was aerated with our standard aquarium pump method.

John pitching a 1 liter starter of wheat beer yeast into the
weizenbock.  It really took off. 
John made a yeast starter for the weizenbock.   It is a 1.074 beer, so it was necessary to pitch a big healthy colony of yeast.  If you're not making yeast starters, give it a try it is actually really easy.  A cup of DME, 4.25 cups of water... some yeast... easy.  Of course you have to sanitize everything.  But you don't even need a stir plate.  I suggest watching the brewing tv video, and using brewunited.com yeast calculator.  Just make sure you tell it how you're making your starter...  And despite what you may have read you can use liquid or dry yeast.   We use both. But remember it is hard to get more than 300 Billion cells growth per liter, so you may need to do a step up.  Making a yeast starter has lots of great benefits; less chance of minor infection, cleaner beer with less esters and phenols, faster fermentation, and higher attenuation of the yeast.  We only needed 277 Billion cells so, no step up was needed.

We had the common sense to attach a blow off tube to the weizenbock.  Good thing we did.  John is fermenting it upstairs to keep it warmer than usual.  We want those wheat beer flavors... He reports full blow off, and bubbling so loud that it kept them awake at night.  Awesome...well awesome except for keeping John and Beth awake.

I think next time we do a double batch, we'll make 10 gallons of John's cream ale recipe. Brew on 2 systems and combine.  He calls for kolsch yeast, but you may want to try US05 for a crisper beer, or white labs cream ale blend. It is really excellent recipe.  UPDATE:  TRY K-97 for john's cream ale recipe.   He leaves out the rice... and after years of "barley, corn, rice... repeat" cream ale recipes, it is a really nice change.

That's all for now sports fans...

Prost!


Tuesday, January 19, 2016

What the heck is a minor infection?

So you have heard the term minor infection before but maybe not known what it really means.   So what the heck is a minor infection and what can you do to prevent them?

An infection is an unwanted growth of mold, bacteria, virus, or fungus.   Generally we call the genus of an unwanted infection a germ.   When mold, or bacteria is wanted we celebrate it and call it fermentation or culturing.   Bacteria, Mold, Fungus (yeast), and virus are neither good or bad.  They just are.   They don't want anything.  They are merely programmed to survive.   They have no agenda, they support no political candidate.   But for our purposes it is good to look at them as an active enemy that is trying to lessen the quality of your beer.

Now when I talk about minor infections, I am talking about infections that are not big enough to overwhelm the growth and fermentation of your yeast colony.   I'm talking about minor infections that can live quite happily along side your yeast.  Infections like a relatively harmless a film yeast, or a myriad of other infections that can live down in the beer with your yeast, changing the flavor profile.

The variety and effects of minor infections is beyond the scope of this blog.  There are literally hundreds of potential minor infections.   The late Dr. George Fix talks about the role of minor infections in his seminal book "Principles of Brewing Science"  copyright 1999 Dr. George Fixx, and available through brewers publications.   He argues quite compellingly that post wort production of diacetyl and pentanedione are two of the most common flavor flaws in home brew.  Diacetyl tastes like butter, or butterscotch.   Pentanedion tastes like kind of like honey, but not in a good way. And further, that they are usually caused by minor infections.  There are other biological infections that can occur as well, but they tend not to be minor.  Infections such as common mold, film yeast (wild yeast), or Pediococcus (especially prevalent in keg systems that are not cleaned regularly).  Dr. Fix was a brilliant mathematician, and contributed considerable technical knowledge to the home brewing hobby.  Yes, the book was written in 1999.  But the point of the incredible scholarly research is still valid.   Minor infections are a major cause of off flavors in home brew.

So clearly a solution to minor infections must be found.

We are focused, therefore, in this blog on how to prevent minor infections and the off flavors they cause.  This is not a blog on all off flavors of home brewing. What processes, cleaning agents, and chemicals can we use to prevent off flavors from minor infections.

The late great Mankind (my brewing mentor) said, "if you don't like cleaning... you don't like making beer... you just like to make wort."   This was one of his many great sayings.   Now, I know many of you have taken um-bridge with some of Mankind's absolute rules of brewing.   But, his point is valid.   Making the beer, is fun and exciting.  Cleaning kinda sucks.   But the point is that you have to clean constantly to become a great brewer.

Soft Bristle Brush is a must have
 I am as guilty as the next guy.  I have been known to leave the dregs in a bottle on the counter for days.  I have been known to not clean my kettle until the next day.  And there is a rumor floating around that I almost never wash my brew bag on brew day.   So believe me this statement is not from a self righteous point of view,  you have to clean all of your gear before and after every brewing session.   Running Star San or PBW over and through your gear is not adequate.  Take out a soft bristle brush and get to work with your PBW, or Oxiclean Free.    Take your valves apart,  Get to work.  Consider it part of your next great brew.  The beginning of the next great recipe you are brewing.  Step one... Make your yeast starter, Step two Clean everything...

Here is a list of procedures I follow to clean my gear.

At the end of a brew day...
  • General cleaning with hot water and mild detergent, and a soft bristle brush / sponge.
  • Rinse all brew bags, hop socks, and tubing
  • Oxiclean/PBW soak of valves, wort chiller, and brew bags, and possibly brew kettle (my electric kettle is aluminum so I don't use PBW or oxiclean)   
  • Soak the Kettle element.
  • Thorough Rinse of everything.  
  • I let everything drip dry.  
  • Re assemble
  • Light mist of Star San into the brew kettle and into the valve to prevent growth of unwanted nasties.
During fermentation, nothing touches my beer that hasn't been, soaked, in Star San rinsed, and soaked again. I am known to break down my thief, my auto siphon, and thoroughly clean my tubing.  A quick soak in star san is not enough.  You have to clean everything.


At the beginning of the next brew day I thoroughly rinse everything with hot water and star san.

Occasionally I give my kettle elements a long soak in Oxiclean or PBW... which ever I have on hand.  And I really go to town with my little brush.   I do this when I'm bored, and my carboys are all full, like last week, and I just really need to do something related to home brew.

I don't use iodine/iodophor to clean.  But I know a lot of guys who do.   I don't want to stain my brewing gear.

I don't use bleach any longer either.  But for a stubborn system infection, or when trying to rehabilitate gear that was used for a sour at some time... you're going to need a bleach solution.   1 part bleach to 10 parts water for most instances.

Think it's overkill?  It really isn't.  It is part of brewing excellence.  Cleaning and Sanitizing are the first steps in brewing.   You should have these steps mastered before making yeast starters, or controlling fermentation temperatures.

Keeping your gear clean is one of the 3 big things that separates average brewers from great brewers. It doesn't matter if you brew with extract or all grain,  BIAB or 3 Vessel,  eHERMS, or traditional mash tun.   If you can master these 3 things... Cleaning and Sanitation,  Temperature Controlled Fermentation, and correct yeast pitch... you can make great beer.

Prost!


Wednesday, January 13, 2016

How much to invest in home brewing...links to DIY projects and products...

Home brewing is more than a hobby.  More than a hobby that produces delicious ales, lagers, sours, mead, and ciders.   Home brewing is almost a way of life.  When someone asks me what I am,   First, I am a man of faith (if you're not that's cool, not here to judge anyone, it just works for me), Second. I am a father, and third, and surprisingly high on my list, I find that I let them know I am a home brewer.  A fermentation enthusiast, a zymurgyst if you will.

Something I struggle with, that I know many home brewers struggle with, is how much money to invest in home brewing.  Sure, if I won the lottery my basement would surely and quickly be converted to my own personal micro pub, with all the tricks and gadgets.   I will admit I while away the hours dreaming of my ultimate system, complete with a glycol chiller, micron filters, a labratory set up, and multiple automated fermentation chambers that I could control from my phone.   But how do you take those dreams, that passion, that love, and convert it into the real world?   The world where you actually have to pay for all of this stuff?

My approach has been only to invest in things that make the beer appreciably better.   I brew primarily on the stove top (small batch) and in an electric turkey fryer (5 gallon all grain and partial mash).  I have a heat stick to supplement the turkey fryer, it is only 1650 watts.   I have added a valve to the turkey fryer to make transfer easier.  But for the most part I believe that simple and inexpensive is actually better. The best home brewers I know, the guys who win at club, the guys who win at major contests all tend to have a similar philosophy... it isn't the equipment, it's the brewer (assuming of course that the equipment is adequate.  

I ferment in clear plastic PET carboys, and in glass.  I rarely ferment in pails.  My sour set up is a black PET pail that has the word sours spray painted on the side.  I do make brettanomyces and lactic sours.  When I make lactic sours I tend to just kettle sour.  When I make brett, I build it up from dregs of commercial beers.   My yeast stir plate died.   So I make starters in 1 gallon glass jugs.  Or I plan a series based on a particular yeast and I pitch right onto part of the yeast cake.   I do tend to remove the cake clean the carboy, and perform a modified yeast wash.

All of these items are intended to make my brewing excellent, and to reduce the cost of home brewing.   For me that is important.   Good Beer, Simple Repeatable Processes, Low Cost.But really how much should you invest into home brewing?   What do you have to have?  Many of you read my rant that was inspired by a guy who thinks his home brewing obsession is more important than his daughter going to college (you know who you are,.. to his credit he started working 2 jobs to rectify the situation).

I propose the following as a guide to sanity in brewing spending.

Level 1:  The newb - No more than $250.   You'll need a couple of big pots, some pails to ferment in, a hydrometer, a brewing thermometer, a 1 gallon jug,  and some basic kitchen stuff.  You really don't need much more than that to make some really good extract batches of beer.  Newbs should focus on beers where fermentation temperature control is not a big issue, by brewing beers that ferment ok warm, and using yeast that will ferment ok at warmer temperatures.  Belgians, Wheat Beers, and Clean ales using US05, Wyeast 1056, WLP001, WLP008 (poor attenuation so make low og beers only) BRY97.  Lagers should probably be avoided when you are a newb.   If you want a lawnmower beer make a clean cream ale.   Ferment it in a laundry tub with water and frozen 2 liters to keep the temperature down.   To really improve your beer shake it up to aerate, and make a yeast starter in your 1 gallon jug... it isn't hard.

Level 2:  The occasional hobbyist -  No more than $500.  In addition to the things listed above you'll need some glass carboys,  a very large pot 8 -10 gallons, a burner or heat source capable of boiling 7 gallons, a wort chiller, some brew bags, and potentially a mash tun.  This is where you should really be thinking about some simple fermentation temperature control. Ferment it in a laundry tub with water and frozen 2 liters to keep the temperature down.   You should probably be making yeast starters at this point in your brewing career.

Level 3: The home brew enthusiast.  - An additional $500 to $1000.   In addition to the items listed above you are probably going to invest in a kegging system.  You'll probably want some tools to make your brew day even better, tools like a pH meter, and a refractometer.   And you'll want real automated temperature controlled fermenation chambers, a converted dorm fridge works great. Youll be making yeast starters so building a stir plate is probably on your horizon.   You'll probably also have bulk grains.  So having a place to store them is a bonus.

Level 4:  The lifer - No more than $5000 total, this is a freaking hobby afterall.  Use your head. Remember it is the brewer not the equipment.   This is the phase where you are all in forever.   You'll want multiple fermentation chambers for lagers and ales, a keezer set up for your kegs, and some pumps for transferring wort and possibly some automation.  You aren't just a home brewer anymore, you are a competitive home brewer, who makes some of the best beer your friends and family have ever tasted.   Any thing is with in your reach, from a reiterated barley wine to a light crisp American Pilsner (very difficult). You truly understand your system, yeast, malt, and hops.  Decoction and Krausening to improve attenuation are regular procedures for you.  You know in your head how much the temperature will drop when you add the grist, because you've done this hundreds of times.  You can look at a carboy and know what is going on with the yeast.

I tend to float somewhere between the enthusiast and the lifer.  Don't get me wrong I'm a lifer, after 27 years. But life happens, and much of the advanced gear I owned was lost in a hard times.  So I'm rebuilding my brewing empire.  I try to keep my head on straight.  I try to only to purchase things that improve my beer, and make my life easier.  Please always remember; it is the brewer, not the equipment.  You can make world class beer on your stove top if you really know what you are doing.  You don't need to mortgage your home to have a world class automated wort production machine.  Unless you really know how to clean, and don't mind cleaning, a lot,  the recirculating eHERMS, and plate chillers are probably not the best option for you.   I'm not saying they aren't good systems.  I'm saying they take a lot of extra cleaning to avoid "minor' infections.  And minor infections are the bane of brewing, the number one reason home brew doesn't taste quite right.    So my advice stick with gear that improves your beer, makes your brew day easier, and is easy to clean.   And keep your head on straight when considering how much to spend on home brewing.  Don't compare your set up to online bloggers.  Remember many of us get some free stuff to try out for a while.   I got a packet of yeast once... But seriously, you don't need all of that stuff.

Some important links to affordable DIY home brew projects.


Links to other easy to clean and use brew gear that will improve your beer.


 Notice there are no links to pH meters and refractometers?  You don't really need them a years supply of pH strips is $3 at your local Walmart (go to the aquariums or pools section) and you should already have a hydrometer.


Monday, January 11, 2016

Back to Big ... Amarillo Citra IPA

Overview of the counterbrew kitchen / brewery
John and I brewed today... I know that is no surprise since we are clearly both obsessed with home brew.  Today we brewed a Big IPA... originally I thought of it as a really big american IPA.  But during brewing we added some additional grain which clearly placed it squarely into the Imperial or Double IPA category.   We had no plans to add additional grain, but we are brewers who taste the mash while we are mashing, and that has a great advantage.

One of the many great advantages of milling your own, You
can adjust your recipe on the spur of the moment...
You see after 45 minutes the mash usually takes on a great sweet, bready, nutty flavor.  This time.. meh.... it was ok, not great, but ok.  But we knew it wouldn't stand up to our massive hop bill (3 ounces in a 2.25 gallon batch).  So we got the mill back out and added .5 pounds of C10.  One of the great advantages of buying grain in bulk is the ability to make changes on the fly.  So we capped our mash with .5 ounces of C10 and mashed for another 15 minutes plus the mash out.


The boil went well, The house
smelled amazing.
The boil went well.  This was a small batch on the stove top.  Loads of Amarillo and Citra were added through out the boil and the kitchen / brewery smelled amazing.   We chilled with the 25 ft stainless immersion chiller.   It was the coldest day of the year, and the chill was lightning fast.  We went from boiling to pitch temps in around 10 minutes.  Of course that is one of the advantages of brewing small batches.   They chill fast.


Then we aerated and pitched an entire package of US05.  A focus of our brewing recently has been achieving high yeast attenuation.   US05 is a champ for attenuation.

During the brew we tried the Cream Ale we brewed.  John wrote the recipe, and chose to go with corn and flaked barley rather than the standard corn and rice adjuncts.   It is absolutely amazing.   We used S04 ale yeast.  Next time I think well try US05 in this as well.

Busy week.  I have 20 gallons to bottle up this week.  No super secret tricks for that just a couple of hours of hard work.   10 gallons are already fining with gelatin.  Trying for super clear beer.
I should be ready for spring, hell I am ready for spring.
I have 20 gallons of light ale and lagers ready to go.


Friday, January 8, 2016

Counterbrew Challenge... Amazing Grand Prize...Multiple Winners...

So it is January.  A new year.   Last year I wrote 100 blog entries.  And I just reviewed many of them.  And after this soul searching, self reflective, journey of discovery, I can tell you now what I believe about home brew... not some pedantic, pedestrian  statement about home brew... like  "home brew rox!" or "home brew is totally bitchin".   But also not some altruistic crap about "home brew has a place for everyone" or "whatever your passion you'll find room for it in home brew..."  Nothing as trite as that... you can get that crap on any home brew forum.  because  home brew isn't for everyone, especially not for douche bags, hipster aholes, and other jerks.   They gots to go!

What I believe about home brew:
  • You can make fantastic beer at your home, with minimal equipment,  if you will learn some basic techniques.  
  • Your goal should be simplification of all things.  Simplification improves process, Simplification improves sanitation.  
  • The goal of home brew is to have fun while making excellent beer.  The method you use to make excellent beer doesn't mean squat.   
  • You are not more of a brewer if you do all grain,  you are not less of a brewer if you do extract. (by the way you're both wrong Partial Mash is probably the best method for 90% of home brewers) Disagree?  Then send me two identical beers made 3 months apart...
  • You are not better if you do 3 vessel eHerms than someone who does BIAB.  
  • BIAB is ALL GRAIN BREWING... quit saying "I BIAB now but I'm going to step up to all grain..."  As Will Rogers said,  "sometimes its better to keep your mouth closed...and let people think you're an idiot, rather than opening it and confirming it for them"
  • The best brewers are the guys who make the best beer consistently.  
    • What I know about the best brewers
      • They understand yeast and fermentation
      • They understand water chemistry
      • They understand hops
      • They work clean,  very, very clean.
      • The best brewers tend to keg their beer. 
  • There is nothing more important than sanitation.   
  • There is nothing more important than sanitation.
  • Fermentation temperature control is critical
  • Correct yeast pitch is critical...
  • Brewing is more than making freaking WORT... if you bought a "turbo brew 9500" before you could control fermentation temperatures... you missed the point.
Now on to the contest... Write down for me in the comment section what you believe is most important... just 3 or 4 items... the grand prize... a lifetime of great beer you made yourself.   

John and I are brewing Sunday... cant wait... it is a really simple grain bill and all citra and amarillo hops... should be awesome...

Our cream ale is damned near world class.  It was a little sweet, but the carbonation really helped it balance out.    Definitely making it again.  John nailed the recipe, some guys have the gift. 

Monday, January 4, 2016

Friday Brewed an All Citra IPA with the crew Saturday Brewed my Stell"ale" a great brew days...hot brewing action photos at bottom

Friday was new years day.  Banks and Markets were closed all over the world.  The turbo charged, whirling gears, and clogs that are our modern world, all ground to a stop. And for  a moment there is peace in our crazy lives...  So, what else would we do but brew some beer.  On this day, an all citra hop IPA designed to be somewhere between Zombie Dust, and Pseudo Sue.  Trying to get the bitterness of Pseudo Sue with the brightness of Zombie Dust.

Recently I have been talking with the good people at Cargill.  Cargill is a US Based Grain company.  It is almost not fair to call them a grain company, their business model reaches into so many different sectors.  Luckily for us, as home brewers, it reaches into some of the finest malts you can buy.  Cargill is a dominant force in macro beer production.  But they are still growing in homebrew, and craft brewing.  If you type "Cargill homebrew" into a search engine, you'll find homebrewers every where trying to find their products.   They were kind enough to supply some malt for me to try.  And, boy did that malt perform...

After using their malts a couple of times,  I can now say... "go, young padawan, and find Cargill Malt at a local home brew shop near you".  This stuff is awesome.  It extracts like crazy,  The flavor of the malt was bready, and nutty, and sweet, and complex.  Awesome Stuff.  Will I exclusively use Cargill in the future?  No.  I'm still a fan of Rahr, and MCI, and Briess as well, but I sure will happily use Cargill when I can get it.  The point is don't limit yourself.   There are many great malts made by many great companies.   Try them, find the one that works best in your recipe.

Friday's  brew session was with out event, other than a little spill of grains... on a garage floor. Pre-boil, who cares... we scooped up what we could, we picked out anything we saw and we headed to the mash. The crew is getting good.  The brew was very good.  And we bottled up 5 gallons of Cream ale that is going to be amazing.  Although, Jake did note if this is an amazing beer it is going to be difficult to replicate what ever dirt and minerals were picked up from the garage floor.

Saturday, SWMBO went to a "married at first sight" marathon wine party.   So, I brewed again.  (And if she leaves today, to go binge watch the Kardashians with her friend "DameDrama", I'm brewing an apricot wheat beer.)

Saturday brew in detail.   Stell"ale".  My lagering capacity is full (1 carboy, Need to work on that).

I ground my grains Old school.   The bid red funnel and the tall hopper will hold about 5 lbs of grain.   This recipe is only 5.8 lbs of grain.  So I didn't bother with the drill.   Just 5 minutes of good ol fashioned hard work.  I will admit my old arms do get tired when I grind by hand.  But there is something satisfying about grinding your grains up by hand.

The grist was perfect. I had set my mill to the thickness of a credit card. My advice for all brewers is get a bag and set you grain mill fine.  Even if you are a 3 vessel brewer.  Your efficiency will climb.  My efficiency with my 3 vessel set up is around 75%,  with brew in a bag I always get into the 80% region.   Sorry for the awesome photography of the grist.  I was boiling water to clean the brew kettle, so it was kinda steamy.


I mashed this batch at 148 for 60 minutes then rose to 168 for 1 minute.  Total mash time was about 78 minutes.  I think I created a very fermentable wort.  After sparge my gravity was 1.032.  Not too shabby.  With only 5.8 lbs of grain in 6 gallons of wort, that is somewhere around 89.3% efficiency.

The mash was awesome.  The cajun injector electric turkey fryer was awesome at keeping the temperature perfect.  I use my cajun injector electric turkey fryer for partial mash and low og all grain.  Never have a problem.   I set the temperature conttrol to 150 F and stir occasionally.  If the temperature falls below 148 F, I simply turn it up to 175 F for a couple of minutes, then back to 150 F.

I sparged this one to a volume of only 6 gallons, not 6.5.  I knew I would be adding corn sugar dissolved in a gallon of water as fermentation slowed.   I began my boil with my lid on but a jar.  The boil is rigorous when I follow this method.  I never have problems with DMS and I have covered this issue ad nauseum on this blog.

The hop selection for this batch was almost 100%  US Saaz.  US Saaz had a weird year.  The reported AAUs for saaz this year were 8.9%.  That is way high for a hop that is usually 3.5 to 4.25% alpha acids.  I did throw in .1 oz of nugget at 60 just to make sure I was around 21 IBUs.

At the end of the boil, I chilled, and shook to aerate.  Then I pitched re-hydrated US05 by Fermentis, you should really give it a try.  It is reportedly the famous "Chico" ale strain from a brewery in Chico California... It can be your go to yeast for almost all "clean" ale styles.  Styles where you don't want the yeast flavors to be more pronounced.

I realized I have become spoiled with my double coil chiller.  I only used the 25' copper chiller for this batch and chilling took 30 freaking minutes.  Back to the double coil next time.  I pitched rehydrated US 05.  And a calm but active fermentation had begun by 6 hours later.  I say calm but active.  Remember this batch was only 1.039 after the boil.   It isn't going to have a super vigorous amazing fermentation.

Tonight , I'm adding corn sugar and 1 gallon of water to the wort.  This is a great old school trick to use to help your beers finish out lower.  Don't add the simple sugars to the early part of the fermentation.  Wait until you have a big healthy colony of yeast in there.  Yeast will always eat the easy sugars first.  But if you give them the easy (simple) sugars after they are established, you will wake them up and get them munching again.   The result, they'll finish eating all of the maltose too... Boom! a clean, dry, ale... that tastes like a lager.   I'll update the blog with more pictures after I add the corn sugar.

Update:  it is 11 days later and this beer is done fermenting.  It tastes amazing.  It had fining added 2 nights ago and is currently cold crashing.   Still looks a little hazy in the carboy, but not in the hydrometer or the wine glass I use to taste.  So I'm bottling it up tonight.  I told you all how easy this beer is.  John and Jake both have tried it and assured me I am not crazy.  It really is excellent.

Update 2:  This beer is amazing.   There is the slightest fruity hint from the ale yeast.  Next go round well use K97.   But it tastes just like a stella.  Fantastic! brew it!