 Hello all. John here. Today, I am going to tell you all about my approach to cloning beers. I am not afraid to admit it. When I began my home brewing saga, my buddy and I had no idea what we were doing. We knew we liked super hoppy IPAs but also wanted to make beer that would appeal the general public. Our first attempt was an Irish Red, which we had really high hopes to become the "next big thing" in the home brewing community. I am not sure what we were thinking...we knew next to nothing about brewing beer. The end result of our effort was a terrible overly sweet batch of first time home brew. Fast forward 18 months, we have advanced quite a bit, by using one method to help us connect to our beer on a higher level. We design all of our recipes from top to bottom, start to finish. We plan the malt, the yeast, the hops, and the water every single time.
 |
| Plan your beer, take comprehensive records. |
 |
| I would say that this guys clone looks pretty dang close! |
 We are fortunate to live in a large metropolitan area with some great beer bars. One of the best is called Bier Station. And on Friday the 14th of October, Bier Station hosted a great event. Pilsner Urquell, unfiltered and un-pasteurized. Wow! This beer is good the way we get it here in the states. But holy cow was it good unfiltered and unpasteurized, fresh and balanced, malty and hoppy. The good news... We can make this beer when ever we want we just need to find and perfect a reliable recipe.
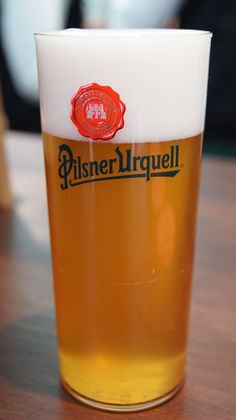 |
| Pils Urquell unfiltered and un pasturized was an amazing experience. |
Now a lot of you begin your cloning career by just choosing a recipe and brewing it, with no modifications. Here is the problem with that, you need to be modifying that clone to fit your brewing style and your brewing system. We get 73.24% from no sparge, we get 77.8% from a decoction no sparge. We lose 1 gallon of trub in a 10 gallon batch. We boil off 1 gallon per hour, so 1.5 in a 90 minute boil. If we want 11 gallons into the fermenters we have to boil 13.5 gallons. Michael gets about the same efficiency as we do, but not exactly the same efficiency. So we will have to adjust the grain bill for our slightly higher efficiency.
 Now pilsner Urquell is entirely Saaz Hops. So no problem there, easy to source. But we need to modify the hop bill as well. This is the biggest mistake that brewers make when trying to clone a beer. The don't modify for the current alpha acids of this years crop of hops. And if you don't modify for current acids, your beer can be way off. Here is an example. The alpha acid units are calculated by taking the ounces x the alpha acid percentage. So 1 ounce of a 10% alpha acid hop is 10 AAUs. 2 ounces would be 20 units. But alpha acids change from year to year. And sometimes radically. Saaz was 9.9% in 2015, it is usually about 3.75% obviously in 2015 we needed less hops. So here is how you calculate for correct replacement. 1 ounce of 3.75 AA% hops = 3.75 AAUs. So to get 3.75 AAUs of 9.9% Alpha Acid Saaz you only need. .378 ounces. .378 ounces x 9.9 = 3.75 AAUs (alpha acid units). Always calculate your alpha acid units.
 Modifying the recipe for special ingredients, or special characteristics of the brewery. In the case of Pilsner Urquell, they ferment open in oak barrels, and then they lager in pine tar pitch lined barrels. This lends the beer a unique character. Well obviously we are not going to do that. But we may to a semi open fermentation. just covering the fermenter loosely with a towel affixed with a bungee cord. We may also sanitize some oak chips and put them in during fermentation. That should create similar fermentation and similar atmospheres of pressure, and still keep the nasties out. But some of the traditions of the brewery can only be replicated with common sense on a home brew level. Obviously we are not going to line our fermenters with pine tar pitch. So how do we replicate that on the home brew level? A touch of smoked malt, should do the trick in this recipe for duplicating the pine tar character.. How much... well that is the fun of the cloning process. We wont know until we try it. We do know that you do not taste smoke when you drink a pilsner urquel, but there is a unique character. So we will only add a tiny amount, an ounce or two. We have loads of saaz hops, so in all likelihood we will make 10 gallons and ferment 5 gallons with our traditional method, and 5 gallons with our changes (intended to replicate the brewery). Is it necessary to replicate the brewery? No, but it is fun.
The recipe. Our inspiration can be found here. And here is our final recipe modified for this years hops, and for our efficiency. Is this the ultimate final version of our recipe? No, of course not. But it will be fantastic beer that we will enjoy. We will also take notes and talk about how to change it to be exactly what we want it to be. We often start out trying to clone a recipe and then end up deciding not to continue the cloning process. Electing instead to focus on another aspect of the beer, and focus on making the beer exactly what we want it to be, rather than copying the original beer. As you review this recipe you can see that we made subtle changes to Mike's original recipe.

Dave jumping in here. Now you may notice that this is a triple decoction recipe. If you are not familiar with decoction, I really encourage you to go back and read this blog. And read this blog. Oh, and watch this video. Decoction is not hard, once you learn what you are doing. Basically you are going to do a multi step mash, and to raise the temperature of each step, you are going to remove 2/3rds of the grain in the mash tun and decoct it. That means you are going to bring it to 150 -155 F for 10 minutes, and then to a boil for 15 - 20 minutes. You will need to stir constantly. If you are a new brewer, this might not be the recipe to try to learn decoction on. So In that case just mash for 60 minutes starting at 156 F and letting your mash fall naturally in temperature over 60 minutes. At the end of the mash remove 1/2 of the grains and bring them to a boil, stirring constantly for 15 minutes, then add them back into the main mash before draining, and or sparging. So your total mash time will be close to 75 minutes. This process is called a false decoction. It will get you very close in terms of color and mouth feel.
That's all for today. Thanks for reading.
No comments:
Post a Comment