Showing posts with label small batch. Show all posts

Tuesday, July 26, 2016

Back to Basics - Small batches to perfect your skills.

Ok, here's the deal.  I have preached and preached about common sense in home brewing.   I have shouted from the counter top.  I have ranted I have raved about not spending too much.  I have tried to show you all that you can make great beer with out spending thousands of dollars on a wort production machine.  So today.  I will be giving you some guidelines to follow and remember about home brewing.   Some hard and fast "rules" that can guide your home brewing career.

  • Small batch home brewing is the best way to brew often, and improve your skills
    • You can brew small batch in your kitchen. 
    • 1 to 3 gallons can easily be brewed in a 5 gallon pot with a paint strainer bag as your brew bag.  
    • You can easily "keg" These batches in "tap a draft" or in 5 liter kegs for a minimal investment.   
      • You can also use 1 or 2 liter soda bottles.  
  • There is nothing more important than cleaning and sanitation
    • If you bought something that is hard to clean... you screwed up
    • If you do not spend adequate time cleaning... you screwed up
  • Wort production is less important than fermentation
    • The best wort you can make will never be the very best beer if you can't control temperatures
    • If you cant control fermentation temperature then focus on Belgian style beers and forgiving yeast.  Fermentis US05, is a great choice. Danstar Nottingham is also a great choice.  For Belgian Ales try Fermentis Abbaye (BE 256), for Saison try Danstar Belle Saison
    • You can make a world class lager at 58-60 F.   But not at 72 F.  
      • Don't believe me?  try Fermentis 34/70 at 58 F in a 1.050 wort for 3 weeks.  Freaking amazing.  
  • You can make world class wort with a picnic cooler, a spoon, and a pitcher
    • There is nothing magical about a pump, or insulated stainless steel.
    • Heck you can make world class beer with brew in a bag on your stove top.  
  • Learn to be a wort whisperer
    • Taste your freaking wort.  Learn what it should taste like.   Learn how it should look.  
    • Taste your freaking grains.   Make sure they aren't stale.  Learn what they should taste like.   Consider adjusting the amounts based on the taste.
      • You can even make adjustments during the mash if you need to.
      • That is why our beer is so good,  we taste it during production.
  • Always remember your focus should be a delicious wort and healthy environment for your yeast.
    • Brewers make wort, yeast makes beer.
  • There is a reason certain hops are used with certain beers.
My hope is that we get back to excellence in beer making as a craft.  Now I say get back to because right now it seems like the focus is on finding a magical combination of ingredients.   As if what we do is potion making or alchemy.  The truth is the hobby we love is really more about learning. Learning proven processes and methods for producing excellent beer at home. Learning what quality ingredients should taste like.   My best advice is to focus on a couple of beer styles you love, and make them over and over until you can make them flawlessly and repeatedly.   You might consider smaller batches for this.   And brew a lot.  Every week, twice a week.  Yes you'll have more beer than you know what to do with.   Yes, bottling can be a pain.  But I'll let you in on a little secret.   I often "bottle" small batch in 1 liter bottles.   Why?  Why not?  They work fine and impart no flavor.  For my every day non competition beers.  It is so much faster and easier.  I also own loads of Mr. Beer plastic bottles.  They are also fantastic for home brew.

Another Couple of tips for fermentation.   Mini refrigerators are perfect for fermenting small batches. And the square tall frosting buckets from Walmart and Sam's club fit perfectly in a mini fridge.  All you need is a temperature controller and you are in great shape.  

So brew a lot, and brew small batch, work on your craft.  That is how you become great.   

Tuesday, May 31, 2016

You can go all grain: or.... How to rule the world from your stove top:

If you brew on your own, how should you brew?  What is the most fun?  What makes the best beer? and what can you do on your own to make the very best beer with the most affordable equipment? Well if you are like me, you have an enthusiasm for brewing, you would literally brew 3 or 4 times a week.  Brewing is not a chore that you enjoy occasionally, brewing is your relaxation.  Cleaning doesn't bother you.  Bottling doesn't bother you.  It is all an escape from other pressures in your life, and the end result is hand crafted delicious beer.  And I am here to tell you the most affordable way to brew, and the most efficient, is to do small batch all grain BIAB no sparge on your stove top.  If you've been brewing extract, you probably own everything you need.


When I brew on my own, I brew small batch.   I brew 2.5 gallon batches of beer.  Usually I brew 2.75 gallons and try to bring 2.25 gallons to package. So calling it 2.5 gallons is a misnomer.  It packages 2.25 gallons.  That is a case of beer.  I try to use minimal equipment, the less equipment, the less cleaning.  I brew in a bag utilizing the no sparge technique, When the grain bill is high OG, I generally partigyle my batch. That means I get 5 gallons of beer from a single brew day.   I use a small stainless wort chiller, in an ice bath. I bag my hops to reduce trub space. My fermenters are cake icing buckets I got from the bakery at Walmart. There is a bulb seal in the lid, so they are air tight. They are FDA approved and BPA free. To aerate I pour the batch back and forth between the kettle and the fermenter 3 or 4 times. To ferment I choose forgiving yeast, or I choose a yeast that benefits from higher temperatures. I do not generally control fermentation temperatures on small batches.  I probably should, but I have 1 small refrigerator/fermentation chamber and it is used for lagers.

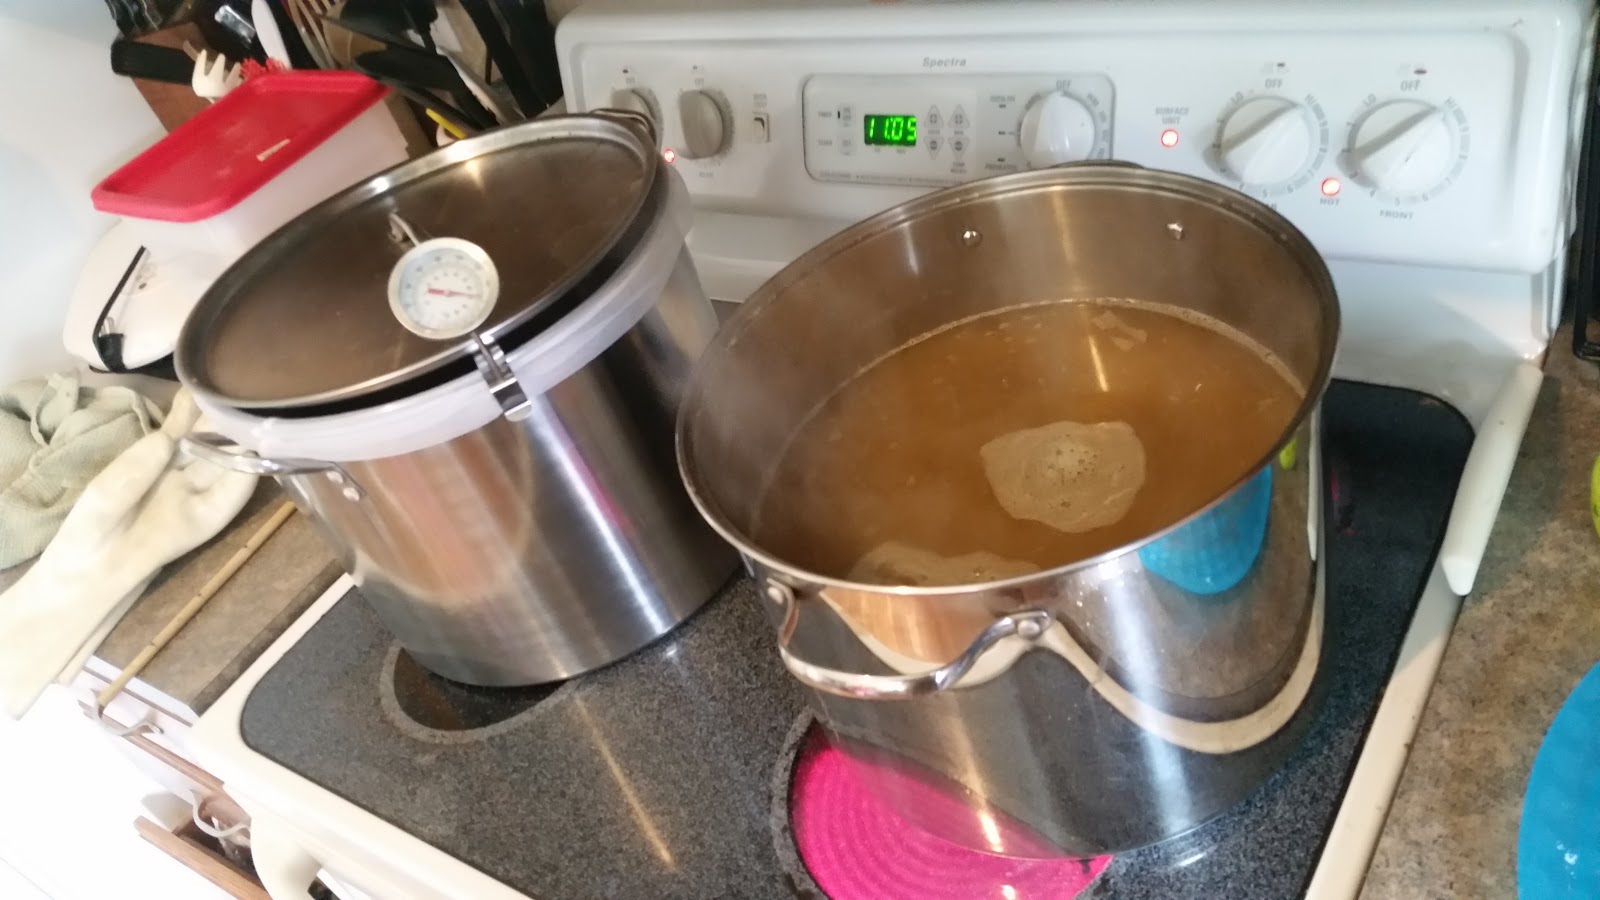
Batch one boiling, Patigyle mashing away!
Two 2.5 batches from one grain bill!
Once I started brewing small batch, I found that I brewed a lot more than most people, usually 2x a week.  That is a huge reason my beer is so much better than most home brewers.  I brew more often.  I have more practice.  And I started producing more beer, with less stress,  Bottling became easier.  It is no big deal to bottle one case of beer.  Sanitation became no big deal,  I can easily lift and clean any of the things I use to brew small batch.  I can easily carry the fermenters around and place them on the counter.   I find that I can brew any style of beer easily at 2.5 gallons without any loss in quality.  One gallon batches of beer are not nearly so forgiving but I make them too sometimes for recipe development and to brew something fun or weird.

To keep costs down on small batch I look for style appropriate bittering hops that have high alpha acids.  (Example when I brew my English IPA I use Admiral or Target for bittering).  I think about the cost and expense of brewing a lot. I often brew batches that feature high alpha acid hops.  like my Two Hearted ale clone, or my Zombie Dust Clone.  These hops save you money by the very fact that they are higher in AA%.  My local home brew store sells hops by the 1/10th of an ounce.  So, I buy them there.   I adjust them up a bit because they are exposed to oxygen at the LHBS.  If it is a special hop centric beer, like my dIPA I order pre packaged hops in 1 ounce packages.  These are flushed with nitrogen and provide you the very best freshness.  I like BSG, they have been good to us, but I am also a fan of YCH Hop Union.  Both companies offer pre packaged hops.


I often re use my yeast cakes by planning several brews on one yeast cake, increasing the OG with each batch.  I do not truly wash yeast. I do a modified wash where I collect some of it in a mason jar, I let it settle. Alternatively, I pour off almost all of it into the new batch leaving behind only the chunky gross stuff in the bottom.  I get crazy fast and complete fermentation using this method.  An example, With Safale S04, I make a Centennial Blonde followed by an English IPA and finally by a Scottish Ale. With Safale US05 I make a Cream Ale, followed by a Bells Two Hearted Clone, finally a double IPA.   This saves you a lot of money. Specialty beers are made with yeast harvested from our larger batches of beer.  Learn to wash yeast, it will save you a lot of money.   There are so many videos on yeast washing.  Here is my favorite.  His approach is very similar to mine.

Crushing your own
malt saves you a lot.
And improves your
beer dramatically.
I get my grains in bulk,  We brew a lot. So grains don't last forever, and I brew a lot on my own, but if you search around at your local home brew stores, you will find that you can get a bag of two row for about $35.00 to $40.00. Even a bag of Munich or Vienna will only be about $50.00 with no shipping. I also have been known to toast my own grains and make my own crystal malt.  But for small batch there is really no need, it is so affordable to grab the specialty grains at the local home brew store.  I like Rahr, Weyermann, Cargill, and Muessdoerffer, oh and Dingeman and Warminster... and and and...

The process is straight forward.
  • The day before brew day 
    • I dechlorinate the water with 1/2 of a  Campden Tablet.
      • That is all you need for de chlorinating your water
    • I crush the grains
  • On brew day
    • All of the water goes in the pot
    • The water is treated to adjust the pH.  
      • I am a fan of Five Star 5.2 stabilizer for small batch
      • I am a fan of Acidulated malt for small batch pH adjustments
    • The water is heated lid on to strike temperature
    • My false bottom/cake rack is put in the kettle
    • The grains are placed into the bag and lowered into the water
      • After 5 minutes I check my pH, if it is too high, I add some acid malt to lower it.
      • I don't even crush the acid malt.  I just add .1 to .2 lbs to get the pH corrected.
    • The heat is turned off once the grains go in.
      • I step mash a lot, but that will be handled in a later post.
      • I also have a valve on my kettle, so I can recirculate with a pitcher if I want. 
    • The grains are recirculated or stirred every 15 minutes, and the lid is left on during the mash.
    • I don't care if I lose a couple of degrees, and you shouldn't either.  
      • It really doesn't matter if your mash falls from 152 to 146 F. 
      • If it falls too much, turn on the heat and stir, but undershoot your target temp. 
    • At the end of the mash it is just like any other batch of beer. 
      • Bring to a boil
      • Add hops
      • Add extras
      • Chill (ultra fast on a small batch)
      • Aerate 
        • I aerate small batches by pouring them back and forth between the fermenter and the kettle (which I rinse out first)
      • Pitch yeast
        • You may not need an entire package of yeast. 
          • You can seal up the rest and use another time. 
      • Ferment -  if I need to keep a small bach cool, I ferment it in a laundry tub. 


Friday, May 27, 2016

Advanced Mashing for advanced results

This is a beer for the common man of France,
The French country ale shares it's heritage with
Biere de Garde, but unlike BDG doesn't need
long periods of lagering to finish malty and clean.
John is out of town for the Holiday weekend.  So that leaves the rest of the Counterbrew team to carry the torch. The infusion mash Tripel will have to wait a week.  So we're brewing at Mark's this weekend. We are making a french country ale, not a saison, not a farmhouse ale.  This beer is not yeast centric. It's a rich malty clean country ale. If you want to get technical this is a Biere de Garde.  But it doesn't really need to be lagered because we are using K97 Kolsch yeast.  It will be clean at packaging.   We will be step mashing  8 lbs of grain in the turkey fryer, then pulling a decoction to raise to mash out, adding even more malt flavor and color.  It's going to be a lot of stirring, but we are up for it.  Stirring?  Yes, stirring.  When ever you are doing a step mash, and applying direct heat, you should stir your mash.   Your goal is to keep the temperature consistent through out the mash and to keep the areas close to the fire from over heating. So if the element is on, we are stirring.

What?  You can't use a spoon to keep temperatures consistent, you have to have a eHERMs, recirculating wort, blue tooth controlled wort production machine!

Well yes, yes you can use a spoon.  I can and do all the time.  It's just home brew.  You can do what ever you want.  And I want to brew 3.5 gallons of a french country ale with a luxurious malt profile and mouth feel.   And they way you do that?  You step mash, and you do a decoction.  Both techniques have been covered ad nauseum on this blog, recently.  So I won't get into too much detail on that today.

Wait a minute, hold on now you're brewing a weird size.  What the holy heck?  Why can't you just do things the way the beer police say to do them? 

Well in truth, at Mark's we dont want to make a 5 gallon batch.  He lives in a loft.  We don't want to carry beer from the kitchen to the laundry room for chilling.   So we make a smaller batch and chill it with an ice batch in the sink.

This weekend we will be showing you that you can combine techniques.  They are just tools.  And we'll be applying the knowledge we have built with you on this site to use step mashing and decoction,

So here is the recipe, and the process.  Just in case you want to brew along.

color will be
somewhere
between these
Belle Terre - 3.5 gallon biere de garde - really a french country ale.
1.074 OG
1.014 FG
24 IBUs
11 SRM - may be slightly higher due to the decoction
7.9% ABV

5.5 lbs of Vienna Malt -
the longer
you decoct
the darker
the color
.75 lbs of Munich
.75 lbs of C20
1.0 lbs of Table Sugar
.50 lbs of Aromatic
.50 lbs of Biscuit

.6 oz of Northern Brewer at First Wort  9% AA = 5.4 AAUs
.5 oz of Strisselspalt at 25 Minutes to go in the boil 4% AA = 2 AAUs
.5 oz of Strisselspalt at 10 Minutes to go in the boil 4% AA = 2 AAUs

1 tsp of yeast nutrient

Fermentis K97 Yeast 2 packages.  Added Dry to chilled wort

The Mash
The grains will strike into 4.5  Gallons of 120 F water - The grains will rest at 115 F for 15 Minutes
The mash will be stirred and heated to 132 F - where it will rest for 15 minutes
The mash will be stirred and heated to 146 F - where it will rest for 30 Minutes
A decoction will be pulled and brought to a boil for 15 minutes  no need to rest at 150 -
The decoction will be added back into the main mash to raise the temperature to 168 F.
The grains will be pulled and set on a rack above the kettle to drain. squeeze to get to volume.
The pre boil volume should be about 4 Gallons.

From here on out it is just like any other batch.

Thursday, April 7, 2016

Going Small - brewing more and brewing smaller.

Yup, that is happening right now!
Hello sports fans, I am going through some of that "life happens" stuff right now.   Then end result of which is that I will be moving to a much smaller space for a brief period of time.  So I will be changing how I brew at home and probably brewing more often.  I need the comfort, the distraction, and the beer that home brewing provides.  The purpose of sharing this with you is to remind you that you can brew even if you live in a small space.

I am fortunate to have a great team.   John's house is already set up for large scale brewing and the vast majority of my big gear is already at Johns.  At John's we can easily produce a half of a barrel of beer if we so desire.  There will also be 4 full sized fermentation chambers at John's in the very near future.  Yup, my big guys are moving over there.  Do you all now see why I advocate brewing with a team?  You never know when your life will change, when you brew with a team, your participation in this great hobby doesn't have to change.

But as for me, When I brew alone,  I will be brewing primarily small batches for the time being.  Really focusing in on sours, and Belgian inspired beers.  I doubt you will notice much of a change on the blog, other than the back ground of some of the photos. But I will be laser focused on 2 to 3.5 gallon batches of beer when I brew alone.  I'm actually pretty excited about brewing more often and digging into sours, saisons, and Belgians more deeply.  I plan to make beer a lot.  Some of which wont be ready for 6 months or even a year.  I think Mark Anthony is about to begin a series of 1 gallon SMASH beers to study various hop flavors.  So I'll probably have him guest blog about that as well. So here is what I plan to do.   And this is what you can do to if you live in a small space.


I have the following gear for small batch already. You don't need all of this to set up for small batch.
  • Two 5 gallon kettles
  • My trusty Cajun injector electric turkey fryer for 3.5 gallon batches
  • Five 1 gallon glass jugs and air locks
  • Five 2.25 gallon Mr. Beer Fermenters ( one is for Brett / sours only)
    • I will be adding the following to improve fermentation.
      • rubber gaskets (replacement rings for wide mouth canning jars)
      • air locks
  • Three 4 gallon plastic fermenters (rectangular cake frosting buckets from Sams club)
  • A fermentation chamber - a mini fridge modified to use for fermentation 
    • can hold two Mr. Beer fermenters, or one 4 gallon bucket and one 1 gallon bucket.
  • A Saison / sour Box - A foam box that breaks down and fits under the bed for lacto fermentation, and Saison fermentation.  Can keep those temps nice and high!
    • held together with tape so it is easy to cut the tape and break it down. 
  • Two 2.25 gallon white plastic buckets.   One is for bottling and has a valve.  
  • Various brew bags.  
  • Scales, refractometers, hydrometers, pH meters, racking canes, bottling wands, etc...
I am purchasing a Tap-a-Draft system for "kegging" my beers. I may purchase two of them.   The apartment won't have room for loads of bottles.  I plan to switch to champagne bottles for the sours.  Again trying to take up less space.   Plus they look cool, and they impress the ladies. 

That's all I need. The rest of my bigger gear is getting labeled and taken to John's for use by the team. Tonight we are brewing, and I'm bringing about 250 lbs of grain.  Don't worry about John sports fans, he has already agreed to this brew gear invasion.  True story,  John just confirmed that this was OK as I was typing.  Beth, his lovely bride,  just wants to make sure everything stays organized in the basement, fair deal.   

I will primarily be brewing BIAB on the stove top.  Nothing fancy.  No fancy gear, No fancy valves.  Just good ol' fashioned BIAB. Me, my kettles and a spoon.  Direct contact with the beer, decoction, step mashing, Sounds awesome.   I'll be doing 1 to 3.5 gallon batches. I'll use the cajun injector for 3.5 gallon batches.   For beers I really enjoy, I'll make three and a half gallon batches and two gallon batches.. For beers I want to try, or for sours.  Ill make 2.25 gallon batches.   I'll be focusing on beers that don't need too much temperature control, saisons, Belgians, biere de garde.  I'll also be working with yeast that is tolerant of temperature swings, T-58, BE 256 US05, WLP001, Wyeast 1056, San Diego Super Yeast.  That's the plan. 

Some up coming beers small batch beers you can expect to see on the blog.
  • Torrid Liaison - an American sour blond - two gallons with Mark Anthony.
  • Desir et la Nuit - Belgian Tripel with orange blossom honey and orange peel - three and a half gallons - the best beer you'll ever try. 
  • Allegement a la Frambroise - Belgian blond with raspberries - three and a half gallons
  • August Hyppo - My favorite IPA three and a half  gallons
  • Wimpole street Brown - two gallons
  • Golden Brett - needs a name other than golden brett... amaze-balls - 2.25 gallons. 
  • Carmen Carmine- a Red mixed culture sour beer -2 gallons cool process, sour, ferment, pitch dregs. Easy way to make a Flanders style.  With Mark Anthony
  • Newd Bear - a mixed culture soured brown ale - 2 gallons 
  • Torrid mash raspberry lambic - 2 gallons - yup, I'm that crazy.
As you can see, most of my beer will be 2 or 3.5 gallon batches. Good beer is a lot of work, I want more than 1 gallon when I make it.  You can also expect more wine and mead coming your way soon.  Wine and mead I generally make 1 gallon batches.  It is really not hard to make wine.  I enjoy the 1 gallon wine kits from Northern Brewer's Partner, Master Vintner  Wine is easy peasy, and quite delicious.  The small kits don't come with oak, but we're home brewers, we know how to fix that.  I have been known to mix Saison with wine, and to mix reds into dark Belgians. Yum!  Mead is one of my all time favorite things to make and drink.  Mead also drinks like wine. So that is a big bonus.  

Of course the team will still be making beer too.   So you can expect lots of big hoppy beers, saisons, and BSDA like always.   Soon well be making a couple of lagers. A fest bier, and a PIVO pils inspired beer.  With those we'll be showing you how to quickly ferment a lager.   So that is what is going on here at counterbrew.  Changes are coming.  All of them for the best.

Wishing you peace and good beer!


Wednesday, February 17, 2016

Valentine's Day Brew Sour Malz

SWMBO was gone all day... so of course I brewed again.  This time a 1.5 gallon batch of "lambic" apricot.   Why the quotation marks?   Well because I didn't feel like actually doing a kettle sour, or setting this batch in an open fermenter and hoping some awesome wild yeast fell in to magically transform my brew. I din't feel like fermenting and then pitching a lactobacillus culture.   So I used a technique I first learned about some 15 years ago, and was reminded of when reading the blog at homebrewexchange.net. There is an entire page dedicated to small batch, or pico recipes.

A pico recipe is a 1 gallon batch of beer.  And if you live in an apartment, condo or smaller space, it might be right for you.   Heck, I live in a pretty big house, and I still make 1 gallon batches all the time.  They're fun.  They're perfect for experimentation.   If you have been brewing extract and you'd like to try all grain, this is the way to get started.  I promise you, your extract kettle is large enough for a 1 -2 gallon batch of all grain brew in a bag beer.  You don't even have to have a grain bag.  You can just use a kitchen strainer.  Although a grain bag really makes your life easier.  And they're like $4 at Home Depot for a 2 pack.  I have a friend who only does 5 gallon partial mash (partial boil), and 1 gallon all grain.   His beer is really good.  He has fermentation temperature control, he aerates properly, he pitches healthy yeast.   He makes brewing easy.   Who's to say he's not on to something.   He has spent less than $300 on his brewing equipment, he has temperature control, and he brews as much as you or I, probably more.

Mash in low and
slowly rise to 154 F
I totally get where he's coming from.  Brewing is relaxing for me.  It relieves stress and calms the spirit.  With pico batches, you can easily brew when you get home from work.  Everything is faster, the water heats faster the grain mills faster, the batch chills in record time.

So Sunday, I brewed a 1 gallon apricot "lambic".  It wasn't a true lambic.  I used sour malt, or acid malt, or acidulated malt to "sour" the wort.   2 ounces with the mash, and 2 ounces for the last 10 minutes of the mash.   And it will taste like any other beer that has loads of lactic acid in it... nice and sour.  The difference?  The sour won't be created by an active bacteria culture, i.e. lactobacillus.   The recipe is straight forward.
Your stove can easily make
1 to 2.5 gallons of all grain beer!
Pico Apricot Sour
1.5 Gallon Batch
1.064 Original Gravity
1.016 Final Gravity
23 IBUs
7   SRM
82.5% efficiency

1.7 # of  Cargill IdeaPils - Great Reliable Pilsner Malt
1.3 # of  Cargill Malted White Wheat
.2 Ounces of Cargill Acidulated Malt
.2 Ounces of Cargill Cara 60
.2 Ounces of Cargill Acidulated Malt (last 10 minutes of mash)
.2 Ounces of Centennial, First Wort Hops  2.1 AAUs  
1/2 a package of US05  (I often use Abbaye for this but I was out).

Simple mash,  I dough in at what ever temperature my sink water is at, when it is turned to it's hottest setting.  Then I rise to 154 F.  I rest for about 40 minutes to an hour.  Then I mash out, and start the boil.   That's it.  Simple, and It goes quickly.   The batch is chlled, aerated for 15 minutes, then the yeast is pitched.   That is all there is to this.  Trust me you can make a 1 gallon batch of all grain beer on your stove top.  Even if you never have before.   In a couple of weeks I will be joined by a friend who has never made an all grain batch, and we will be taking him through the entire process and posting about it.  So stay tuned.

"Wait, you didn't mention the apricots..." right... I didn't. There is no great magic to fruit flavorings.   You can use Frozen fruit in the secondary fermentation, or you can just use fruit extract from your local home brew supply shop.  I tend to do both.  For this batch i will be adding 1 package of frozen apricots from WalMart into secondary, and then at bottling Ill probably add .75 ounces of apricot flavor extract.

Apricot Sour, comes out a nice orange color too!
The batch is fermenting like crazy right now. With half a package in 1.5 gallons,  I expect a quick, clean fermentation.   Probably ready to go to secondary this weekend.  In about 2 weeks this will be ready to drink.   And it is one heck of a beer.   With lots of apricot flavor and aroma, a nice sour background, and a hint of hops.   A great beer for spring.  And I am definitely ready for spring to arrive.

That's all for now sports Fans!  Prost!


Friday, November 20, 2015

Sunday... double batch Sierra Nevada Pale ale clone... and "the dankness monster"... an extra hoppy Red Ale

Well first of all thank you for all of your kind comments about mankind's email.   He was one of a kind.

Sunday we are brewing again.  It is a day on a weekend... so, yeah we're probably brewing.   On saturday I'll be bottling up the Miller the muggle.   People are starting to break into the good stuff, so I have to shield it with more muggle beer.   If you don't "get" the term muggle, it is from Harry Potter, and it means non magical people.   Miller the Muggle is a beer designed for my non craft beer drinking friends.   But I have to tell you, it is pretty darn good.  Sunday... we brew.   Wonder how we brew so much?   Simple, we brew small batch. 

Image result for sierra nevada pale aleSo here is a question... "what is the beer that got you into craft beer?"  I remember mine like it was yesterday afternoon.  It was a crisp fall day.  I had been doing some work for Dad at his home.  I was maybe 20 or 21, and I was dedicated to Miller Genuine Draft.   That is when it happened.  Dad came back from the store, he had some beer.   Some beer I had never seen before.  He put the beer in the garage fridge (a 1960s beast that was avocado green no less).  He said try one if you want.   The package said Sierra Nevada Pale Ale.  It was green.   It had magical pictures on   Pictures of a stream, and trees, and what I thought were pine cones.  "What the heck" I thought, "I'll try one".


The world changed.  Everything stopped. And that one that one crystalline moment is burned in my memory.  It was bitter, and sweet, and roasty, and citrusy, and flowery...  It was all over.   Standing in that garage with the Kansas City Chiefs on the Radio I was hooked.   Now my tastes have changed and grown over the years.   But I still love SNPA.   We'll be brewing it this weekend.   

One of my favorite things about no sparge BIAB is how easy it is to partigyle.   All you need is another pot.   So we'll be using the grains from the SNPA and some additional grains, and DME, and we'll be making an original recipe we're calling "the dankness monster"  We're basically trying to brew up a red colored citrusy pine forrest.