Showing posts with label easy homebrew. Show all posts

Friday, June 10, 2016

All Grain The Easy Way....No Sparge - just make some beer!

So we here at Counterbrew are kinda known for complicated mash schedules,  advanced decoction, water adjustments, absolute hop monsters, and mixed fermentations.  But we started this blog as a way to get people brewing better beer with easy methods.  To encourage new and intermediate brewers to try some all grain brewing, and to make it easy and fun for them.  So this week,  we'll be returning to our roots.   There will be no advanced mash schedule, no cold steep of roasted malts.  There will be no dry hopping,  no hop stands, and no decoction.  I know, it's shocking.

This week we make it easy. We make a recipe that will be ready quickly.  No Sparge and Grain to glass in a month (less time if you keg).   We are making water additions as easy as possible.  We are making the mash as easy as possible.   We are using a durable yeast that can ferment at basement temperatures.   Presenting the counterbrew, Easy Blonde.  This will be the beginning of a new series on Counterbrew, where we show you some extremely easy beers to brew.

Now, we did not develop the Centennial Blonde recipe,  credit for that must go to a gentleman who goes by Biermuncher on Home Brew Talk.   He has lots of great recipes, and finished with 2 of the top 3 recipes last year in the HBT top 100.   But this recipe is damn near the ultimate house ale.   Flavorful enough for craft beer fans, but easy drinking enough for beer muggles.  We will probably make 10 or 15 gallons of this, because it really is that good.   But we will present a recipe for 5.5 gallons.  If you have never tried the Centennial Blonde,  I truly encourage you to give it a try, it is a fantastic, almost magical blend of 2 hops.   We've changed the grains in the recipe over the years to meet our tastes, but we leave the hop bill alone.

Easy Blonde - Inspired by biermuncher's Centennial Blonde.
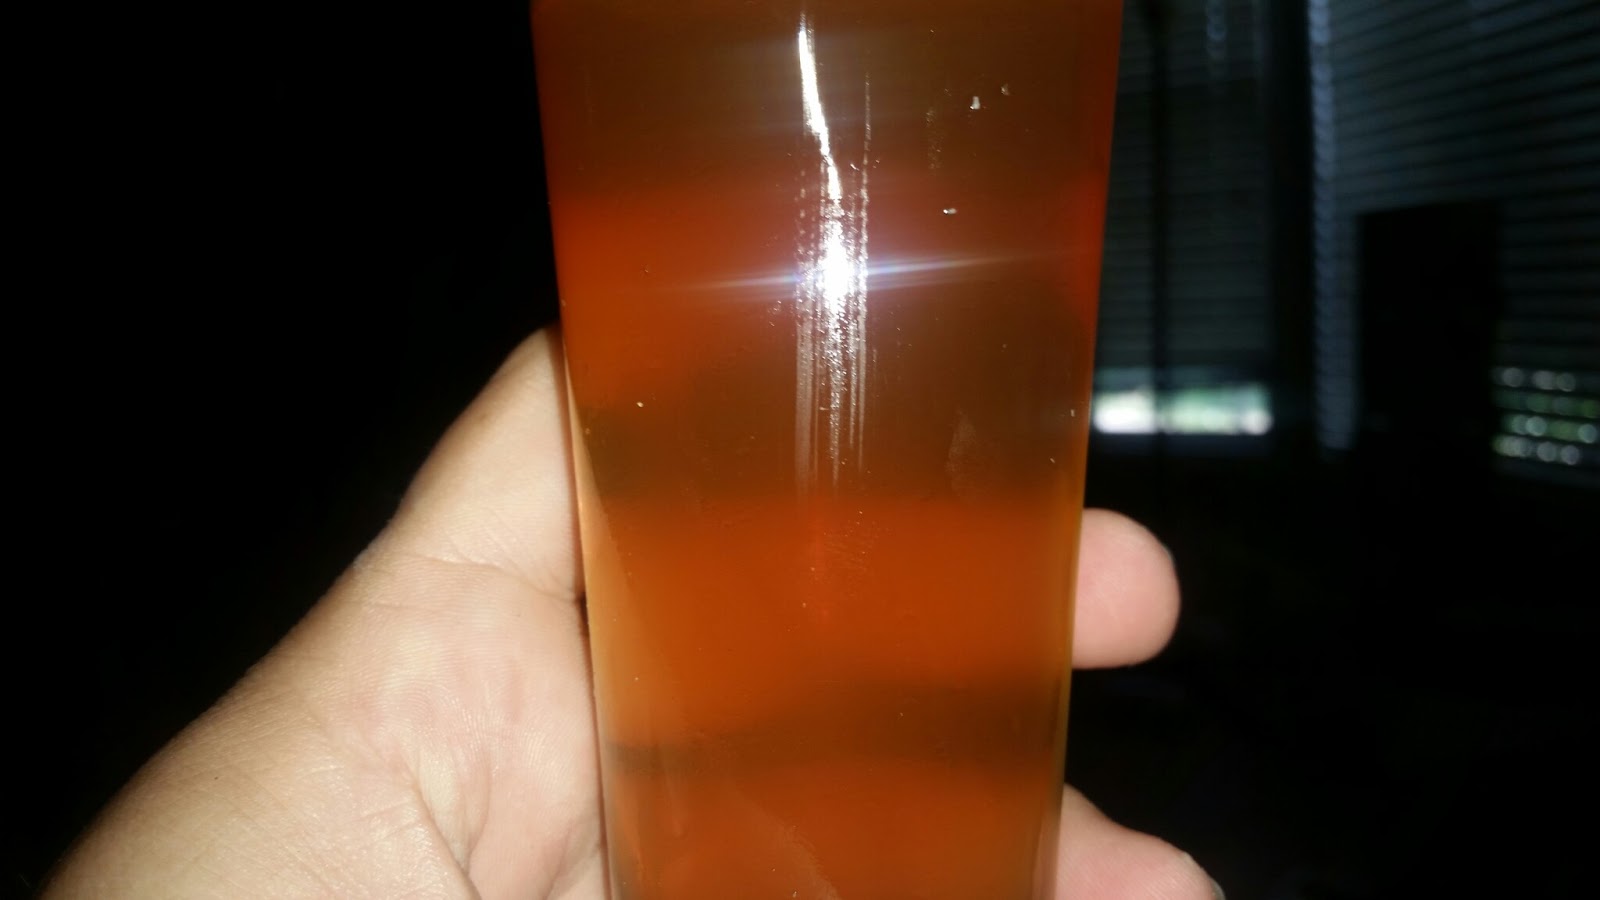
O.G, 1.042
F.G.  1.008
SRM - 4
IBUs - 22
ABV - 4.5%

6 # of Pale Ale (or pale two row)
2 # of Vienna
.5 # of C 20
.3 Centennial at 60 minutes
.3 Centennial at 35 minutes
.3 Cascade at 10 minutes
.3 Cascade at 0
US05 1 package - do not rehydrate.
1 whirflock 15
1 tsp yeast nutrient at 15
1 tsp gelatin fining


  • Mash grains at 150 F, for 60 minutes in 7.61 Gallons of water.  
  • After 60 minutes drain wort and begin the boil
  • Make hop additions at scheduled times. 
  • Chill - We'll be using our jaded hydra -  the best chiller you can buy.
  • Aerate - you can shake, use pure o2 (30 seconds), or use an aquarium pump
  • Pitch the yeast - pitch dry, sprinkle over the top.  
  • Ferment cool,  you can ferment this one in your basement, US05 is fine up to 72 F Ideal would be 64-66 F.
  • This will be done fermenting in about 5 to 7 days, but let it go for 2 extra days.  
  • Fine with gelatin and cold crash for 2 days. 
  • Keg or bottle. If you keg you can be ready to drink this beer in 14 days.  If you bottle you can be ready to drink in 21 days.  

You're going to love this beer.  I suspect it will become you go to house ale.   It is so critical to adjust your hops based on the alpha acids from year to year.   Sometimes we're at .6 per addition, sometimes were at .3, it just depends upon the alpha acids from year to year.  But keep them balanced, and don't change them.   It is the combination of centennial and cascade that make this beer fantastic.   Enjoy.  We'll post a brew day, next week.   We'll make sure to add videos, cause we know you guys like the videos.    But no sparge is really as easy as brewing gets.    Soon we're going to do a video of our super easy triple decoction in a bag bohemian lager... ok, well not super easy, but as easy as triple decoction can be.   In the near future, the gang will continue to make great beers, that any one can make,  but the small batch stuff will be highly focused on sour beers, and very high gravity beers.  In small batch we'll be exploring turbid mash, and reiterated mashing.

Update:  We brewed this beer, but It turned into a partial mash.  We were asked to test a new mash water calculator, and we did.  And It sucked.  I should have just used beer smith, or Brewtoad.   But fortunately the wort tasted amazing, so we were able to get to gravity with a DME addition late in the boil.  

Friday, January 8, 2016

Counterbrew Challenge... Amazing Grand Prize...Multiple Winners...

So it is January.  A new year.   Last year I wrote 100 blog entries.  And I just reviewed many of them.  And after this soul searching, self reflective, journey of discovery, I can tell you now what I believe about home brew... not some pedantic, pedestrian  statement about home brew... like  "home brew rox!" or "home brew is totally bitchin".   But also not some altruistic crap about "home brew has a place for everyone" or "whatever your passion you'll find room for it in home brew..."  Nothing as trite as that... you can get that crap on any home brew forum.  because  home brew isn't for everyone, especially not for douche bags, hipster aholes, and other jerks.   They gots to go!

What I believe about home brew:
  • You can make fantastic beer at your home, with minimal equipment,  if you will learn some basic techniques.  
  • Your goal should be simplification of all things.  Simplification improves process, Simplification improves sanitation.  
  • The goal of home brew is to have fun while making excellent beer.  The method you use to make excellent beer doesn't mean squat.   
  • You are not more of a brewer if you do all grain,  you are not less of a brewer if you do extract. (by the way you're both wrong Partial Mash is probably the best method for 90% of home brewers) Disagree?  Then send me two identical beers made 3 months apart...
  • You are not better if you do 3 vessel eHerms than someone who does BIAB.  
  • BIAB is ALL GRAIN BREWING... quit saying "I BIAB now but I'm going to step up to all grain..."  As Will Rogers said,  "sometimes its better to keep your mouth closed...and let people think you're an idiot, rather than opening it and confirming it for them"
  • The best brewers are the guys who make the best beer consistently.  
    • What I know about the best brewers
      • They understand yeast and fermentation
      • They understand water chemistry
      • They understand hops
      • They work clean,  very, very clean.
      • The best brewers tend to keg their beer. 
  • There is nothing more important than sanitation.   
  • There is nothing more important than sanitation.
  • Fermentation temperature control is critical
  • Correct yeast pitch is critical...
  • Brewing is more than making freaking WORT... if you bought a "turbo brew 9500" before you could control fermentation temperatures... you missed the point.
Now on to the contest... Write down for me in the comment section what you believe is most important... just 3 or 4 items... the grand prize... a lifetime of great beer you made yourself.   

John and I are brewing Sunday... cant wait... it is a really simple grain bill and all citra and amarillo hops... should be awesome...

Our cream ale is damned near world class.  It was a little sweet, but the carbonation really helped it balance out.    Definitely making it again.  John nailed the recipe, some guys have the gift. 

Sunday, October 18, 2015

Updates... lager at ale temp, Oktoberfest w/wyeast 2112, session ipa

Ok I got a lot done today,  more to do tomorrow.  5 gallons to bottle up tomorrow, and Ill probably brew a small all grain batch. 

I love the small all grain batches in the Mr beer fermenters.   You can brew them on your stove top and they are easy to move, and they are easy to bottle.   I just don't love the ingredients. I truly hope Coopers continues to make the LBK.   I even love the Mr. Beer bottles, and the carbonation tablets.  Although I ran out of those a long time ago and bought the Brewer's Best tablets.  The only problem is the location of the spigot means you will inevitably pick up some protein foop, and trub when you want to bottle.  But don't worry sports fans,  I have a $10 solution.  (update there is no problem bottling in PET)

I ran to the LHBS this morning.  Now, I am lucky I have 3 home brew stores in close proximity, where they know my name.  But I most frequently shop at one close to work called Bacchus and Barley corn.  I have been buying beer supplies at this store for 25 years.  The owners Big Al ( a petite woman named Alberta) and her husband Jackie are incredibly knowledgeable.  The store is plastered with ribbons from AHA competitions they have won. I purchased 4 lft of tubing, a 2 gallon bucket, a bottling spigot, and a voile hop bag.   

For all three batches I simply transferred from the Mr. Beer LBK to the new miniature bottling bucket.  I clipped the voile bag to the side of the mini bottling bucket, and inserted the tubing.   Boom, poor mans filtering.   The voile bag is an excellent filter.  I was able to bottle all three batches in under 1 hour.  All were filtered through the voile bag.  I got clean clear beer.   Easy. 

ROOM TEMPERATURE LAGER
Update on the "You can go all grain LAGER with the Mr. Beer"    I brewed this on Sept 5th.  It fermented for 10 days at room temperatures then, on the 15th it went into the fridge at 38 F.    I has been sitting there ever since.    You may recall our not so subtle friend "Tommy Knowitall" sent multiple messages assuring me it wouldn't work.  I bottled it in 2 liter bottles today.   Two of the bottles were forced carbonated with a CO2 gun.  The final bottle got 5 carbonation tablets.  The beer is freaking amazing.
 The beer is crystal clear, the beer has no off flavors or aromas.  There is the very slightest hint of DMS (appropriate and intended)  There is just a wee touch of Diacetyl (again intended). The beer is excellent.   On the left you can see the 1 gallon that I packaged up in 2, two liter bottles.    I have covered that topic before, but by all means feel free to ask questions about it.  It is really an easy way to package your beer. These will sit there under pressure for the week getting ready for John and Beth's wedding brunch.  When you force carb in 2 liter bottles you can try your beer in a couple of hours.  But to get it truly, fully carbed up, you have to let it sit for a couple of days,  occasionally shooting it with more CO2.

I also bottled up the Oktoberfest (made with Wyeast 2112) and the Session AIPA "by grace and banners fallen"  that was originally inspired by Drew Beechum's Pliny the Toddler.  The Oktoberfest is good, not great.  The carbonation might help the malt character come out more.  To me it just tastes like a basic, non hoppy, malty, amber beer.  So Im sure it will be a big hit with the muggles.  The AIPA is fantastic.  It always it.  It is a hop monster.  Hop perception is based on a ratio of hops to specific gravity.   This one delivers.  This batch in particular is very balanced.  About 66 IBUs and only 5% alcohol it is a tongue stinger.  It is a little darker than the last batch, I'm sure that is from the addition of the biscuit malt.   But the beer needed that balance, so I'll take it.

I also made counterbrew cider.   Cider is the easiest thing you'll ever make. Definitely give it a try.  Especially if your SWMBO or SO doesn't prefer beer.   I'll cover this in another post.   Today, Church, Chiefs, a Centennial Blonde, and bottling the Belgian Quad.

UPDATE I let the quad sit for another week.  It had a slight rubber note.  That is acetyl.   As of last night... that was gone... its ready to bottle.  The lesson?   BIG BEERS TAKE WHAT EVER TIME THEY TAKE.

Thursday, September 17, 2015

Illustrated Guide to my Partial Mash...a practical approach for excellent beer. Give partial mash a try!

What is the point of brewing beer?  The answer is different for different people. Some people love the biology of brewing. They want to understand the metabolic pathways and chemical reactions that creates great beer (their beer tends to be awesome).  Some guys want to make complicated brewing systems and really understand the engineering of brewing.   For me, the point is two fold; having fun, and making excellent beer.   Now, if you read this blog, you know that I have been brewing for a long time.   I have accumulated a lot of equipment over 20+ years of brewing. I have a gravity system, 3 five gallon pots, an electric turkey fryer, and countless fermenters etc... I also have all of the fun gear for brewing... hydrometers, refractometer, pH meter, pH strips,  2 wort chillers,  seemingly endless tubing, valves and bottling equipment. So I can really brew any style of beer in just about any way you want me to brew it.  Save super high tech HERMS or RIMS... systems.  I haven't made that leap yet, and probably wont.  I enjoy doing the process by hand. I don't want push button beer.

So for me brewing the way I do is because it is the most fun way for me to brew excellent beer, not because of any limitations on my equipment or experience.  

I choose to brew partial mash in my kitchen.  It makes excellent beer every time, and because it is a lot of fun for me.   After brewing for many years I can tell you this,  if I tell you that if I've decided 3 vessel is more fun for me... Ill start doing more 3 vessel again.    Remember there is no one right way to brew, have fun, make great beer. 


I use an electric turkey fryer for my partial mash and extract (with grain) batches.  It was $80, on amazon.   I use the brew in a bag method for the mash.  My turkey fryer will hold the mash temp right at 150 F (65.5 C) for however long I want.   I usually mash in low (around 130 F 54.4 C)  I use 3.5 (13.25 L)  gallons of water and 6 lbs. (2.72 kg) of grain.   I have a large enough brew bag to do much larger grain bills in the fryer, but I have my recipes down to a science of 6 lbs (2.72 kg) and 2 - 4 lbs (.90  - 1.8 kg) of DME.

Yes you can use a small cooler, or two for mashing your grains.  Yes you can use Chris Colby's original plan of about 4 lbs of grain.   That all works fine.   Chris is a beer genius and you should all be reading the beer and wine journal.  This is how I do it.  It costs less and makes damn fine beer. I should note, I use 5star pH stabilizer.  I adjust the addition for the smaller volume.

I dissolve my DME (sometimes LME) in a separate pot in 2 gallons (7.75 liters ) water that is around 130 F / 54.4 C.  I remove the pot from the burner and stir in my extract. I take special care with my whisk to make sure that there is no extract on the bottom of the pot.  Then back on to the stove where  I let the temperature of this slowly rise during the mash to about 190 F / 87.7 C.  I find doing this keeps the colors closer to the intended SRM.   Further, it is easier to stir in a pot than in the turkey fryer

In yet another pot, I get my sparge/rinse water ready. 2 gallons (7.75 liters )  I heat it to 170 F / 76.6 C. Yes there are 3 vessels involved.   Again, fun for me, makes great beer. So if you choose to use my method, you can honestly say that you are a partial mash, brew in a bag, 3 vessel brewer.

At the end of the mash / mash out.  I add the DME to the turkey fryer. The turkey fryer has a basket.  The basket gets placed on a stainless steel bbq grate over the kettle.   My combined volume is about 4.9 gallons of wort.  I then sparge to my intended pre boil volume.  Usually 5.5 - 6.5 gallons (20.8 to 24.6 liters).  The boil off rate is not very high because I boil with the lid on but ajar... egads... aren't you terrified of DMS... again... No, No I am not.  I have covered that many times on this blog.  

The lid on but a jar.
From this point on the brew is just like any other brew, add hops, add your extras... yeast nutrient, whirlfloc, etc...I add my hops in a paint strainer bag from home depot ($1.87) This saves on Trub loss.  I will note again, I brew with the lid on but a jar.  This creates such a vigorous boil that I can not walk away for even a moment for fear of a boil over.   I get complete breakdown of the proteins.  Why is this important to mention? because some "Tommy Knowitall" will try to tell you that you have to have a 200,000 btu banjo burner, or you'll never be able to make great beer... and that person is just wrong.  With the lid on but a jar, my boil off rate is only about .5 - .75 gallon per hour.  Don't you miss your target? Almost never. 

25' Stainless is fine for
small batches.
When the boil is over it is time for the chill... there are people who believe that you have to chill rapidly or you won't get clear beer.   Hogwash.   Chilling helps with clarity, but the intensity of the boil is what really helps.  I do not usually chill batches that are not super hoppy.  I just don't like to waste the water.   Recently I have learned of some new techniques that  appear to save a lot of water, so I will probably be testing and implementing these techniques.  If they are successful, I will probably start chilling every batch. I also am inspired by the Wasp chiller by Jaded Brewing.   When a beer is super hoppy, I chill it.   But super hoppy beers tend to be 2.25 gallon batches around here.   So chilling them is a breeze.  Large batches get chilled on the back porch. a garden hose attached to the double coil 50'. I am usually to pitching temperatures in about 25 minutes.   I prefer immersion chillers.  They are easier to keep clean.  And since brewing is about fun... and cleaning a plate chiller / counterflow chiller sucks... I'll stick with them.

I always aerate my beer.  I used to be a shake the carboy guy, then I became a pour it back and forth guy.  Now I have a $9.00 aquarium pump.  My tube has a hepa filter in it.   The filters are cheap and should last about a year.   It does the job so very well.  I aerate my beers for 15 -20 minutes minimum.  Higher gravity beers, and lagers, get aerated for longer.   Fermentations have been fast and very clean ever since I got the aquarium pump.  I also usually cover the top of the fermenter with aluminum foil.  (I took it off for the picture)  You may also notice the aquarium pump is on a brew day rag.  That keeps it from sliding around while I am aerating.

Pitching Yeast.  I am a fan of dry yeast.  Having said that I have no particular preference about what yeast you use.   For most ales I use US 05 or Nottingham.  I rehydrate but, Fermentis says you don't need to any longer.  For almost all lagers I use Wyeast 2112.  The apparent attenuation (aa%) can be lower than some lager yeasts... 68-74%  but I don't really care.  I usually get about 70-71% attenuation and that is just fine.  My premium american lager is awesome.   For Belgian Strong Ales I am currently hooked on WLP500.  Something about the finished taste just agrees with my pallet.  And it is great even before aging.  I am excited to try CryHavoc yeast.  I'll admit I do sometimes get special deals and gifts because I write this blog.  Fermentis is awesome. I will be trying a lot of lagers in the next year using their yeasts.  If you are a new brewer I'd say stick with dry yeast for a while.

Fermentation Control.   I used to own an undercounter 2 door bar refrigerator.  It was awesome.  I had a Johnson controller... I say used to because after a blow off of epic proportions I took it out side to hose it out (it was a bad ass BSDA that went crazy).  I had it leaning against the minivan to drain out.   I live in a pretty nice neighborhood. But scrappers can get you where ever you are, and they got my fermentation chamber. So I am currently fermenting in the master bathtub.  I used my laser thermometer and  this was the best spot. Around 65 F (18.33 C) year round.  My next big project is constructing an ale fermentation chamber and converting a dorm fridge for lagering.  I will be using a more affordable temperature controller. This picture is what I will be building.

I currently bottle my beer.   I had to sell my keezer and keg set up when times got tough.   I actually don't mind bottling.  But I think I will probably start kegging again. I may also be getting the tap a draft keg systems.   I do so much small batch that they really look like they would make some sense for my 2 gallon batches.  I'd end up with 1 tap a draft, and a 1 liter bottle that I could force carbonate.   I also force carbonate in 2 liter bottles.  That is easy and fun, and lets me start trying my beer in a couple of hours. 


Sunday, August 30, 2015

132 bottles of beer on the floor. ..

I'll post about my all grain  Mr beer brew day tomorrow. 

For now know this. .. sometimes our hobby takes a lot of work.  I bottled 132 beers this weekend. 

  • Belgian abbey. .. Freaking amazing.  
  • Wimpole street brown.  A tried and true partial mash recipe that I've been making for years.  So very good.  
  • Cool gales cream ale,  my partial mash version of cream of 3 crops.   I try to never run out of this beer.

I also brewed an all grain clone of Bell's two hearted ale.   Perfect brew day,  should be great. 

Update on miller the muggle, and the beer from way back,  the disastrous brew day, remember?  the one where my mash got way too hot?  I have added amylase enzyme to both now.  The miller the muggle on Saturday,  and the disaster ale last Tuesday.   Miller the muggle has formed a mini krausen and is bubbling 1 per ever 4 seconds, it was bubbling at 1 per second 12 hours after I added the amylase enzyme.   Can't wait to try it.  My beer that I screwed up with a mash that was to hot was stuck at 1.024 for a long time, it tasted like candy.  I tried all the tricks,  swirling,  warming,  yeast nutrient. .. nothing.   So I tried the amylase enzyme. ... it dropped to 1.012  so... very cool.  I have dry hopped it with .5 oz of centennial to help balance it even more.  Will be packaging soon.   Very cool to know that you can save almost any beer (sans infections and burnt beer)  

Keep brewing, and keep sending your questions and ideas... special thanks to Schlenkerla at homebrewtalk.com for his help.  Check out his recipies, he's a good guy who is happy to help, and he never acts like a Tommy Know it all.

Friday, August 7, 2015

Teaching Newbies on Saturday... What should we brew... and How?

So here's the deal.  I'm teaching some newbies how to brew this weekend.  And how to brew better.

So come on yall give me some input.  Should I teach them extract, all grain biab small batch, or partial mash.

Im leaning toward all grain small batch.  Most people own a 2-4 gallon pot already.  And all grain costs less to brew than extract.

But I'd like some input.  If you could go back in time and have someone teach you,  what would you want to learn?

My thoughts are that for the beginning brewer, extract is the easiest, but the hardest to do really well.  All grain small batch BIAB is probably the way to go 2 gallon batch right on the stove top.

Now,  the next question is what recipe?   I'm thinking a crazy hoppy AIPA. My thoughts are that many, many deficiencies that new brewers encounter would be hidden by the hops.

What say you?


Thursday, July 16, 2015

My Partial Mash Process.

My Partial Mash Process.
Scroll to the bottom for some proven partial mash recipes...
By the way... I can turn any recipe into a partial mash... just send me a comment, I'm happy to help.


I brew 5 gallon batches of beer in a 7.5 Gallon Electric Turkey Fryer.   I use the Cajun Injector, but I know there are other models out there.   Part of my basic philosophy is to bring brewing back into my kitchen, to involve friends and family, and to show that brewing great beer doesn't require an expensive outdoor brewing system.


The Cajun Injector will easily boil 6.5 gallons of wort, with the lid ajar.  I keep the lid ajar about 2” and I have never had any problems with DMS.  With the injector configured in this way, I get a hard rolling boil, and I actually have to watch carefully for boil overs.   


My preferred method of brewing is Partial Mash. I also do loads of small batch all grain right on my stovetop.  But those are for perfecting recipes, and experimenting, and also to satisfy my need to brew.   In truth I do more all grain small batch (1 gallon)  than anything else recently, but I still consider myself a partial mash brewer.


Here is why I prefer partial mash brewing.


  • More fun than extract - you still get to mash grains and sparge and the fun stuff.
  • Better Taste than extract  - Real all grain flavor - I defy you to tell the difference
  • It’s repeatable you can brew the same beer with the same results every time.
  • More recipe options than extract,  you can brew anything.
  • Less cost than extract - extract is expensive, grain is cheap. Especially if you malt your own.
  • You don't have to stress over pH & H2O chemistry, you can adjust, but you dont have to.
  • Affordable equipment - electric turkey fryer is about $100.00
  • Decoction and step mashing are available to you.
  • You control the amount and % of grain that you are using.  I have recipes that are 85% grain. The DME is there as a buffer, an insurance policy if you will.
  • Takes way less time than all grain. It’s about the same as BIAB


So here is how I do it.


  • I always use right around 6 lbs of grain, sometimes more, but never more than 9 lbs
  • I mash in 3 gallons of water  In the turkey fryer.
    • I do add 5.2 pH stabilizer to the mash water. Some people argue that a thin mash can have a negative impact on pH levels.  No sparge brewing kinda flies in the face of this claim for home brewers. With 5.2 pH stabilizer I don't have to worry about it.
  • Two 4 gallon pots go onto the stove.
  • In one I heat 2.5 gallons of water for sparge rinse to 168 F
  • In the other I heat 2 gallons of water to 160 F at the end of the mash, I add the DME to this pot.  
    • I turn off the heat add the (DME or LME) and stir to dissolve.
  • I then pull the grains and set them on a rack above the kettle
  • I pour the dissolved DME and water carefully into the kettle
  • I then rinse the grains with the sparge water until I get to the desired volume, usually 6.5 gallons.
  • I have about 5.5 gallons of wort after boil
    • I put my hops in hop sacks during the boil to reduce trub loss.
      • It does seem to reduce hop flavor and aroma… no problem add a little more hops… right?  I mean who doesn’t love a hoppy beer...
  • I chill with an immersion wort chiller
  • I take a hydrometer sample.   
    • Some easy math gives me a rough idea of my efficiency with the grain, but it is never far off.
      • usually my gravity a little higher than I expect.
  • I transfer about 5 - 5.25 of that to the fermenter.  
    • After fermentation loss I have about 4.5 gallons of yummy beer.   That is 48 bottles.  
    • I almost always force carbonate 1 or  2 gallons in 2 liter bottles.
  • I keep great records of my brewing.   
    • This is one of the keys to getting recipes dialed in...


Notice what I didn’t mention.


I didn’t take a post mash gravity sample, there is just no need to do that.
I didn’t take a pH reading, again no need. Not even sure where my pH strips are.
I didn’t stress over my water chemistry, the extract will buffer the water just fine.  Just a little 5.2 pH stabilizer in the mash water.
I didn’t crush my own grains.   Again, No need.  Ill hit my numbers almost every time with a fine crush from the LHBS
I didn’t spend 6 hours brewing.  I’m generally done in 3 to 3.5 hours.  So If I start early on a Saturday Morning, I’m done by late morning.  


I have never entered a competition with my partial mash beers.  But that will change this year.   I have shared my partial mash beers with competitive brewers, and found that almost all who tried the brews were very positive about their taste and quality.  My Kolsch and American Wheat beers are about as good as any I have ever tasted. I sometimes cant believe I brewed them in my kitchen.  The comment I get most often is “wait? what?… this is a partial mash?”  Yes it is…


Partial Mash is not a panacea.  You still have to follow good brewing practices, you still have to work in a sanitized environment, and you still have to ferment at correct temperatures.   But if you are looking for a process that is repeatable, proven, and fun…give partial mash a try.


Here are some recipes for you to try.  Almost all of my proven recipes can be found at Brewtoad.com. Brewtoad is the easiest beer software I have ever used.  


Champagne Lager An easy lager (without a fridge?)
Everyday pale aleEveryday Pale Ale
Call the Banners - a real hop monster
Wheat BeerWheat beer - a great base for fruit or hoppy wheat beers.

Monday, July 6, 2015

A couple of 1 gallon batches for your viewing pleasure

I think I'm in love... not the flighty here today gone tomorrow kind of love, not the passion burning so hot it has to burn out kind of love.   No, this is real, true love.  The kind that lasts.

I'm in love with small batch brewing.

This weekend I brewed two 1 gallon batches of beer.   It was awesome, low stress, and fast.   Cleaning kitchen to clean up under 4 hours for two batches.

Small batch fits perfectly into my ideals of counter top brewing.
  • Affordable batches
  • Low risk experimentation
  • Low Risk Entry into All Grain Brewing
  • More variety
  • Low Entry Cost
  • Easy Lagering with the right yeast strains ( a 1 gallon jug and air lock fit easily into my garage fridge )
  • Super fast chilling (I went from boiling to 68 in 10 minutes with a wort chiller and a sink full of ice water )
  • Easy forced Carbonation in 2 liter bottles... seriously? what could be easier?  faster grain to glass...
If you haven't tried it yet... come on what are you waiting for.   Small Batch Brewing will allow me to brew every weekend.  That is 6-8 gallons of beer every month... and yes... that is enough beer.   I'm not saying I wont still do partial mash batches... I will.   But as I look at my beer cellar (read under the dining room table I have over 200 bottles of beer, but only 5 styles of beer are represented)  The kid needs more variety than that.   Some web resources I have found so helpful in my quest to learn more about 1 gallon brewing.... brain sparging  this guy is an attorney who goes in depth in his explanation of home brewing in small batches, and bullcityhomebrew a homebrew shop that actually shares it's recipes for one gallon batches.  They also have equipment set ups, and a brew school.  I would be remiss if I didn't mention Homebrew Exchange Oregon's finest.   Just type in PICO on their search page.

The only things I don't have that I clearly need for small batch brewing right now are... a refractometer, hydrometers just take up too much wort for a 1 gallon batch, a really, I mean really good digital thermometer, and a really good digital scale.

The day started with dry hopping my Pliny the Toddler.  It should be ready for bottling this weekend.  If you've never had a Pliny the Elder by Russian River I suggest you find the recipe and brew one up. Mine is posted at Brewtoad. Pliny the Toddler
Next step, cleaning the brewery.   I always start by cleaning the kitchen and all of the brewing equipment.  

Next I organized my stuff for both batches.   I always lay out my stuff. I usually put sticky notes by it to remind me when to put in various ingredients.   And I clean, and put away ingredients as I brew.  Not only does it make the brew day a little shorter, it keeps down mistakes that can get made in a messy brewhouse.

Water adjustments?  Sure... I use 5.2 pH stabilizer. I find that I get better efficiency, and perhaps more importantly, my hoppy beers stay hoppy.   I know, I know... many of you will argue that you don't really need pH stabilizer.  The mash will stabilize on its' own.  I know that is a statement that is probably correct.   But, my experience says better efficiency, crystal clear wort, and longer term hop flavor and aroma.  For a small batch just a heaping 1/4 of a teaspoon.

Hops measured, organized and ready for service.   This is 1 ounce of Cascade divided into .25 ounces.  60,10,5,0.  Lots of late additions ensures that I will have lots of hop aroma and flavor.   Ill taste this beer after primary and see if it will need to be dry hopped.  Some Simcoe dry hop might get this beer to exactly where I want it to be, a hoppy, grapefruity, refreshing beer.

Honey brown mashing.   Cascade Ale boiling away.  You might note, if you have a stove like mine, that I set the kettle over two burners.  That tricks the stove into keeping both burners going with out over heating.  I can get a pretty vigorous boil.  You may also note, that my volume is too high on the cascade pale ale.  I tried a no sparge BIAB.  I wont be doing that again.  It is much easier to mash with 1.5 quarts of water, and then rinse sparge up to volume.

I use two, or three timers when doing double batches.  I have brewtimer on my phone.   I use my microwave timer, and I use the ol apple timer (not super accurate but hey, you use what you've got).  You might note the plastic plate in the bottom right of the photo.  It has been cleaned and sanitized, it is for setting things on.   Never set things on your counter, even if you have cleaned them.  It is just good practice to follow, even during the boil.

The chill went fine and fast.  Ridiculous cold break. and very clear wort.   One thing I love about small batch brewing is fast chilling.   I set the kettle into a sink of icewater, and turn my chiller on full blast. I usually go from boiling to pitch temp in 10-15 minutes, sometimes faster.

All in all a good brew day.  And I needed one after last weeks debacle.  Update on last week.  The beer from the mistake is bubbling like a fiend.   It's original gravity was... 1.081.   Well see if Nottingham can get it to a decent final gravity.  If not.  I may try adding a wine or champagne yeast just to see what happens.   

Saturday, June 27, 2015

Partial Mash Cream Ale Recipe for you all

Ok, I've gone a little overboard recently.  I currently have 28.5 gallons fermenting.   So what is the logical thing to do?  Brew more of course.

I promised I would post partial mash recipes here on line.  So here is a new version of Cool Gales Cream Ale.  The only major change is that I am using Irish Malting Company Stout Malt.  My understanding is that it is a version of 2 row Maris Otter. But I have to tell you the kernels are huge. The flavor is nutty and sweet.  I have been told that the yield is far higher too.  So here it is.  Probably brew it tomorrow, or maybe tonight.

4.5 # Irish Malting company stout malt.
2 # of Extra light DME
1 lb of flaked corn (not corn flakes, thanks for the question but No breakfast cereals)
.5 of Flaked rice (see above)
.5 oz of Cluster Hop
1 oz of Liberty Hop
US 05 yeast
1 tsp irish moss
1 tsp yeast nutrient.

Strike grains with 3 gal of water at 158.2 °F. Mash at 150 °F for 60 min. lift the basket and the bag and set on a grate above the kettle drain bag, gently squeeze add 2.25 gallons of 190 f water in which you have dissolved the dme.
Rinse the grain with approximately 2 gal sparge water at 168 °F. Stop when volume is 6.5 gallons Combined runnings gravity should be about 1.037 follow hop schedule.
add wurlfloc tablet at the 5m mark at the end of the boil you will have about 5.5 gallons of wort (maybe a little less) chill wort OG should be about 1.047 transfer wort to fermenting bucket 5.25 gallons pour wort into another bucket then back into fermenter to mix and aerate. Pitch US 05 rehydrated in 3/4 cup of 90F water. FERMENT at 63-65 for 14 days Transfer to bottling bucket, use finings (super kleer kc or brewers gelatin) bottle and let condition for 2 weeks If this is for competition etc...Cool Ferment for an additional 7 days if possible at or near 40F Consider finings. This beer should be brite.

Feel free to ask any questions, Ill answer if I can.

Monday, June 15, 2015

Pliny the Toddler... Brewday

OK, Im obsessed.  I admit it.  (isn't that the first step?)  I enjoy beer,  I really enjoy brewing beer,  I even enjoy bottling beer.  So, yes... I brewed again this weekend.  This time a beer that I have been wanting to try for years.   Pliny the Toddler.  The original recipe is by Drew Beechum.   If you don't know who Drew is, he wrote (along with Denny Conn) Experimental Homebrewing a great book.  He also wrote the best book on home made hard cider, The Everything Home Cider Making Book.   Several years ago he developed a recipe inspired by Russian River's Pliny the Elder.   (look it up).  The idea was to make a recipe that was similar in flavor to Pliny, but far lower in alcohol.  I love Pliny the Elder.  It is probably the best beer I have ever tasted.  So I have been wanting to make this for years.  So... here you go.

Orgainized my stuff.   This is an all grain batch.  3.5 gallons (5 gallon boil).  A great thing about smaller batches is the cost is way less.   This whole batch cost me less than $20.00.   It uses the same hops that Pliny uses.  The basic recipe is

  • 4.3# of 2 row
  • 1 # of Corn Sugar
  • .5# of Biscuit Malt
  • .3# of Carapils
  • .4 oz of Warrior at 60
  • .4 oz of Centennial at 10
  • .4 oz of Columbus at 5
  • .4 oz of Cascade at 0
  • 1 tsp of Irish Moss
  • 1 tsp of yeast nutrient
  • 6-8 grams of Lallemand Nottingham Ale Yeast
  • Dry Hop .2 oz of Cascade, Centennial, & Simcoe at 4 days to bottling.
As I have stated here before, I often dough in low, and slow rise to strike temperature.   This approach yielded an 84% efficiency on this batch. The low dough in temperature creates a quasi protein rest.  It allows the enzymes that break down proteins to do their thing.  Protein rests are not necessary with fully modified barley malts, and they can create a thin bodied beer, so you have to think your way through on this topic.   Here is my general guideline, for light bodied beers I dough in at about 135 and let it slow rise to strike temp.   With full bodied beers I generally dough in right at strike temp (which is generally higher for full body beers) and bring it back up to rest temp.  It works for me.  

Here is the mash resting comfortably at 150.  It stayed there with almost no fiddling around for the entire 60 minutes.  It is all about knowing your system.   What works on my ghetto electric turkey fryer, may not work on your system.  Babysit your brew!

Before the sugar addition (always late in the boil) I was at 1.030.  That is spot on.  The sugar will add roughly 1.006.  So after boil we get a gravity of about 1.045.  Which is what we want.  You always gain gravity in the boil.  Water evaporates, sugars do not. By the way I need to get a new hydrometer tube, that one is just too big, it takes way too much wort to determine the gravity. 


The boil.  Nothing fancy here just 5 gallons of boiling wort.  No boil overs this week, I was diligent.

I force chilled it with my wort chiller.  It was raining out side, so I had to use the sink.  Chilling it took 45 minutes.  Gotta figure something out to chill the wort faster and use less water.  Still thinking the jaded brewing chillers, or a prechiller system is probably the way to go.

 My final gravity was a little higher than expected. (.002 higher) Just means I did a good job with my mash and boil.  And here is Nottingham pitched into well aerated yeast.  I shook the heck out of this one.

Sunday, June 7, 2015

Saturday Brew Session Champagne Lager and a Cascadian IPA

 Your brew day should always begin with a clean kitchen.  There are no exceptions to this rule.  If you want SWMBO to appreciate your brewing hobby, it begins and ends with cleaning the kitchen.  After a crazy Friday night our kitchen was a disaster, if you look closely you can see half of a 6 of Genesee Cream to the right of the stove.  The pink pitcher,  is my one gallon brewing pitcher.
 I have some fining and bottling to do today to, it is going to be a very long home brew hobby day. (In fact is was a long day.  Started cleaning at 8 am finished cleaning at 8 pm.  But took a break for a 2 hour movie in there, and a trip to the LHBS.  But I walked away with 6 gallons of great beer,  I bottled 5 gallons, I fined 10 gallons.) You know you're a home brewer when... You have empty glass carboys in your breakfast room, and a bucket of sanitizer...
 I always organize and then re organize my stuff.   I keep a brew log and check off my boxes. I find that when I don't follow my brew log... I screw up.  Even after 20+ years.   Our hobby has lots of little details that make big differences.  You can't screw them up if you want to make truly excellent beer.   As you can see this is  a partial mash batch.
 Headed to strike temperature,  My brewery was suddenly invaded by hobbits.  "hobbits my precious...what are hobittses? filthy breakfast making dont clean up after themselves little creatures ...Hobbitses ar our friends.... not on brew day."  What are they doing up early?  They're never up before noon.  There must be some dumb "one direction" special on Nickelodeon.   Oh no maybe that one guy got a hair cut...

 Warming on the stove are my DME pot and my rinse sparge pot.   When I do large batches it is almost always partial mash.  5.5 Gallons is large for me.  So I add the DME with a whisk to a pot that I can gently heat.  I don't add the DME until after the mash.  You have to calculate your mash water correctly, and to do that you need to see how much water the grain absorbed.  The other pot is heating to 168 for rinsing the grains. A very easy repeatable way to make good beer.


After dough in, pretty much spot on.  I was at 153, but 5 ice cubes solved that.   "Listen to me young padawan... If can mash at correct temp good beer will you have... if too HIGH VERY BAD."  You can accidentally "fix" the fermentability of your wort. Not fix as in repair, fix as in affix, fasten, glue... Your best strategy is to dough in low around 135 F for a protein rest and rise to your mash temperature.  Multi step mashing is a key to excellent beer. Doughing in low cant hurt anything, doughing in TOO HIGH, can ruin a batch.  And btw, when did it become a big deal to nail your saccrification rest temp? No Belgian brewer ever tweeted about nailing his strike temp. How dumb is that, just add a protein rest.  It improves your beer, and eliminates the risk of overshooting strike temperatures.

 These warriors are ready for service.  California Lager Yeast.  A lager yeast that thrives at ale temperatures.  And you can make just about any full bodied lager with it.  I'm not kidding on this one, it makes great lawn mower lager, great steam beer, great bock, and great Oktoberfest.  Give it a try if you are an ale brewer.

The boil. Nothing too exciting here, as you can tell from the leavings on the side of the pot, I had a near boil over.  So yeah, clean up sucked.
Chilling on the patio.  Large batches get chilled on the patio.   Need the full power of the garden hose to cool them faster.  They still take 25 -30 minutes.  I hate that water waste, so I have to improve my immersion chiller in the near future.  I may just buy a Jaded chiller. http://jadedbrewing.com/. Or I may turn mine into a double coil, I haven't decided yet.
 I like to use my grains again for a second 1 gallon batch.  Here you see the one gallon fermenter the cascade hops, the S04, and the strike water coming up to temp.  There have been many days where the 1 gallon batch was the better of the two batches.  In this case the grains and a pound of DME were turned into a pretty big cascade hopped APA.  1.068 OG.   .4 oz at 60, .3 at 15, .3 at flame out.  It will have .125 of cascade, and .125 of centennial for dry hopping.   It should be a tongue stinger.  It's kinda for a friend at church who loves the big APAs and IPAs.

I suggest that if you are a partial mash or small batch all grain brewer you should almost always do a partiguyle batch when you brew.  Its fun, easy, and only adds about an hour to your brew day.
Here is the carbonated and pretty clear result of the partial mash "every day pale ale" from a couple of weeks ago.  It is dang good.