
Showing posts with label easy home brew. Show all posts

Friday, June 10, 2016

All Grain The Easy Way....No Sparge - just make some beer!

So we here at Counterbrew are kinda known for complicated mash schedules,  advanced decoction, water adjustments, absolute hop monsters, and mixed fermentations.  But we started this blog as a way to get people brewing better beer with easy methods.  To encourage new and intermediate brewers to try some all grain brewing, and to make it easy and fun for them.  So this week,  we'll be returning to our roots.   There will be no advanced mash schedule, no cold steep of roasted malts.  There will be no dry hopping,  no hop stands, and no decoction.  I know, it's shocking.

This week we make it easy. We make a recipe that will be ready quickly.  No Sparge and Grain to glass in a month (less time if you keg).   We are making water additions as easy as possible.  We are making the mash as easy as possible.   We are using a durable yeast that can ferment at basement temperatures.   Presenting the counterbrew, Easy Blonde.  This will be the beginning of a new series on Counterbrew, where we show you some extremely easy beers to brew.

Now, we did not develop the Centennial Blonde recipe,  credit for that must go to a gentleman who goes by Biermuncher on Home Brew Talk.   He has lots of great recipes, and finished with 2 of the top 3 recipes last year in the HBT top 100.   But this recipe is damn near the ultimate house ale.   Flavorful enough for craft beer fans, but easy drinking enough for beer muggles.  We will probably make 10 or 15 gallons of this, because it really is that good.   But we will present a recipe for 5.5 gallons.  If you have never tried the Centennial Blonde,  I truly encourage you to give it a try, it is a fantastic, almost magical blend of 2 hops.   We've changed the grains in the recipe over the years to meet our tastes, but we leave the hop bill alone.

Easy Blonde - Inspired by biermuncher's Centennial Blonde.
O.G, 1.042
F.G.  1.008
SRM - 4
IBUs - 22
ABV - 4.5%

6 # of Pale Ale (or pale two row)
2 # of Vienna
.5 # of C 20
.3 Centennial at 60 minutes
.3 Centennial at 35 minutes
.3 Cascade at 10 minutes
.3 Cascade at 0
US05 1 package - do not rehydrate.
1 whirflock 15
1 tsp yeast nutrient at 15
1 tsp gelatin fining


  • Mash grains at 150 F, for 60 minutes in 7.61 Gallons of water.  
  • After 60 minutes drain wort and begin the boil
  • Make hop additions at scheduled times. 
  • Chill - We'll be using our jaded hydra -  the best chiller you can buy.
  • Aerate - you can shake, use pure o2 (30 seconds), or use an aquarium pump
  • Pitch the yeast - pitch dry, sprinkle over the top.  
  • Ferment cool,  you can ferment this one in your basement, US05 is fine up to 72 F Ideal would be 64-66 F.
  • This will be done fermenting in about 5 to 7 days, but let it go for 2 extra days.  
  • Fine with gelatin and cold crash for 2 days. 
  • Keg or bottle. If you keg you can be ready to drink this beer in 14 days.  If you bottle you can be ready to drink in 21 days.  

You're going to love this beer.  I suspect it will become you go to house ale.   It is so critical to adjust your hops based on the alpha acids from year to year.   Sometimes we're at .6 per addition, sometimes were at .3, it just depends upon the alpha acids from year to year.  But keep them balanced, and don't change them.   It is the combination of centennial and cascade that make this beer fantastic.   Enjoy.  We'll post a brew day, next week.   We'll make sure to add videos, cause we know you guys like the videos.    But no sparge is really as easy as brewing gets.    Soon we're going to do a video of our super easy triple decoction in a bag bohemian lager... ok, well not super easy, but as easy as triple decoction can be.   In the near future, the gang will continue to make great beers, that any one can make,  but the small batch stuff will be highly focused on sour beers, and very high gravity beers.  In small batch we'll be exploring turbid mash, and reiterated mashing.

Update:  We brewed this beer, but It turned into a partial mash.  We were asked to test a new mash water calculator, and we did.  And It sucked.  I should have just used beer smith, or Brewtoad.   But fortunately the wort tasted amazing, so we were able to get to gravity with a DME addition late in the boil.  

Thursday, January 21, 2016

Hot Brewing action inside...10 gallon double batch... Weizenbock and Stout

Sunday was brew day.  We brew almost every weekend as a group, and I brew every week, either with the group or on my own.   But this Sunday was a process test.  Can we make 10 gallons of beer nearly simultaneously on two 5 gallon systems.  With 4 of us brewing, 10 gallons is a case of 12 ounce beers, or 12 bombers each.  By brewing 2 batches we can make 2 different styles, and increase variety.

The day was cold, the
mash was a challenge
The Oatmeal Stout mashing in
the electric brew kettle.
Sunday was our test run.  And to tell the truth, it went well.  My fledgling brew crew is turning into a semi experienced efficient team.  Everyone has certain skill sets and personality attributes that will make this a championship team in the future.

We brewed a weizenbock and an Oatmeal Stout. The weizenbock because Jake loves weizenbock, and the stout, because... St Patrick's day is coming.   The Stout was also a tribute to Alan Rickman... so we named it "Severus Stout, The Potions Master"    The weizenbock is called "Ill be bock"

Brewing 2 batches at the same time can be hectic.  But with a good team and good planning, you can pull it off.   Organization, and division of responsibility are the key to a 2 batch brew day.  So John and Jake handled the Weizenbock, and Mark and I handled the stout. Jake and Mark are both very precise people. John and I are both overview people.  We all love beer.  So great team.

Jake had to stir and
adjust the heat
constantly during mash, 

He is not smoking, that is
the thermometer cover.
Very sanitary Jake!
The mash for the stout was uneventful.  Mark took charge and kept the temperatures perfect.  The weizenbock was more challenging.  The weizenbock was brewed in the garage.  The temperature outside was 2 F.  Maintaining the mash temperature was nearly impossible, even with sleeping bags, and reflectix insulation.   (next time well be using a bag in a cooler, and doing a no sparge brew in a bag in a mash tun type of thing...got it?  good!)   A bag in a cooler will allow us to continue to crush fine, and gain the efficiency of BIAB, but keep more consistent mash temperatures on Jake's system. And it takes about the same time as BIAB, so it won't expand our brew day.

As it was, Jake had to work his but off to keep the mash going,  Stirring, and heating occasionally.   I'm sure it was the most frustrating mash of his young brewing career.   But he and John powered through and still produced a 1.074 Mash, expecting 1.080 so not too far off.  That is actually pretty good on a brew day where you can't keep the mash temperature consistent.  They were also mashing at a fairly high temperature to create more mouth feel.

You can see the amazing deep dark
brown color, almost black... yes I
know BJCP says Black... I dont
really care.  It's awesome. 
The stout on the other hand overshot.   Mark kept it at 154-156 for the entire mash, and we still overshot by .05 points.  Still with in tolerable limits.   I must admit I love the smell of stout mashing. The roasted grains create the most wonderful aroma.   Some people cap their mash with the roasted grains opting for less bitterness, and "toasty-ness" from the grains.  But I prefer to just use a little less and let all of those flavors mash away.   I think that makes my stouts a cool color, deep brown, almost black, and full flavored.   They can take some time to mellow, but I don't really mind the wait.

The boils were uneventful.  Both systems easily handled the volume being boiled.  The weizenbock finished it's boil about 12 minutes before the stout.  Not quite enough time to chill before the stout was finished but close enough.  Next time well space them out better.   The weizenbock was chilled with the stainless 25 lft chiller.   It chilled in about 18 minutes.   The stout was chilled with both chillers.  It chilled in about 12 minutes.   Love using both chillers. Using two coils chills so fast.    The simplest and most affordable way to chill rapidly is to use two 25 linear foot chillers.   Just expand one large enough to allow the other one to slide into it.   Make sure all of your clamps and hoses are tight.  Boom, instant turbo powered chilling.

Aeration with a mixing
paddle.
Jake and John are experimenting with a new way of aerating wort prior to yeast pitch.  New to us at least.  And it worked great.   They attached a mixing paddle to a drill.  The mixing paddle was sanitized, and used to aerate the wort.   The stout was aerated with our standard aquarium pump method.

John pitching a 1 liter starter of wheat beer yeast into the
weizenbock.  It really took off. 
John made a yeast starter for the weizenbock.   It is a 1.074 beer, so it was necessary to pitch a big healthy colony of yeast.  If you're not making yeast starters, give it a try it is actually really easy.  A cup of DME, 4.25 cups of water... some yeast... easy.  Of course you have to sanitize everything.  But you don't even need a stir plate.  I suggest watching the brewing tv video, and using brewunited.com yeast calculator.  Just make sure you tell it how you're making your starter...  And despite what you may have read you can use liquid or dry yeast.   We use both. But remember it is hard to get more than 300 Billion cells growth per liter, so you may need to do a step up.  Making a yeast starter has lots of great benefits; less chance of minor infection, cleaner beer with less esters and phenols, faster fermentation, and higher attenuation of the yeast.  We only needed 277 Billion cells so, no step up was needed.

We had the common sense to attach a blow off tube to the weizenbock.  Good thing we did.  John is fermenting it upstairs to keep it warmer than usual.  We want those wheat beer flavors... He reports full blow off, and bubbling so loud that it kept them awake at night.  Awesome...well awesome except for keeping John and Beth awake.

I think next time we do a double batch, we'll make 10 gallons of John's cream ale recipe. Brew on 2 systems and combine.  He calls for kolsch yeast, but you may want to try US05 for a crisper beer, or white labs cream ale blend. It is really excellent recipe.  UPDATE:  TRY K-97 for john's cream ale recipe.   He leaves out the rice... and after years of "barley, corn, rice... repeat" cream ale recipes, it is a really nice change.

That's all for now sports fans...

Prost!


Monday, January 11, 2016

Back to Big ... Amarillo Citra IPA

Overview of the counterbrew kitchen / brewery
John and I brewed today... I know that is no surprise since we are clearly both obsessed with home brew.  Today we brewed a Big IPA... originally I thought of it as a really big american IPA.  But during brewing we added some additional grain which clearly placed it squarely into the Imperial or Double IPA category.   We had no plans to add additional grain, but we are brewers who taste the mash while we are mashing, and that has a great advantage.

One of the many great advantages of milling your own, You
can adjust your recipe on the spur of the moment...
You see after 45 minutes the mash usually takes on a great sweet, bready, nutty flavor.  This time.. meh.... it was ok, not great, but ok.  But we knew it wouldn't stand up to our massive hop bill (3 ounces in a 2.25 gallon batch).  So we got the mill back out and added .5 pounds of C10.  One of the great advantages of buying grain in bulk is the ability to make changes on the fly.  So we capped our mash with .5 ounces of C10 and mashed for another 15 minutes plus the mash out.


The boil went well, The house
smelled amazing.
The boil went well.  This was a small batch on the stove top.  Loads of Amarillo and Citra were added through out the boil and the kitchen / brewery smelled amazing.   We chilled with the 25 ft stainless immersion chiller.   It was the coldest day of the year, and the chill was lightning fast.  We went from boiling to pitch temps in around 10 minutes.  Of course that is one of the advantages of brewing small batches.   They chill fast.


Then we aerated and pitched an entire package of US05.  A focus of our brewing recently has been achieving high yeast attenuation.   US05 is a champ for attenuation.

During the brew we tried the Cream Ale we brewed.  John wrote the recipe, and chose to go with corn and flaked barley rather than the standard corn and rice adjuncts.   It is absolutely amazing.   We used S04 ale yeast.  Next time I think well try US05 in this as well.

Busy week.  I have 20 gallons to bottle up this week.  No super secret tricks for that just a couple of hours of hard work.   10 gallons are already fining with gelatin.  Trying for super clear beer.
I should be ready for spring, hell I am ready for spring.
I have 20 gallons of light ale and lagers ready to go.


Monday, January 4, 2016

Friday Brewed an All Citra IPA with the crew Saturday Brewed my Stell"ale" a great brew days...hot brewing action photos at bottom

Friday was new years day.  Banks and Markets were closed all over the world.  The turbo charged, whirling gears, and clogs that are our modern world, all ground to a stop. And for  a moment there is peace in our crazy lives...  So, what else would we do but brew some beer.  On this day, an all citra hop IPA designed to be somewhere between Zombie Dust, and Pseudo Sue.  Trying to get the bitterness of Pseudo Sue with the brightness of Zombie Dust.

Recently I have been talking with the good people at Cargill.  Cargill is a US Based Grain company.  It is almost not fair to call them a grain company, their business model reaches into so many different sectors.  Luckily for us, as home brewers, it reaches into some of the finest malts you can buy.  Cargill is a dominant force in macro beer production.  But they are still growing in homebrew, and craft brewing.  If you type "Cargill homebrew" into a search engine, you'll find homebrewers every where trying to find their products.   They were kind enough to supply some malt for me to try.  And, boy did that malt perform...

After using their malts a couple of times,  I can now say... "go, young padawan, and find Cargill Malt at a local home brew shop near you".  This stuff is awesome.  It extracts like crazy,  The flavor of the malt was bready, and nutty, and sweet, and complex.  Awesome Stuff.  Will I exclusively use Cargill in the future?  No.  I'm still a fan of Rahr, and MCI, and Briess as well, but I sure will happily use Cargill when I can get it.  The point is don't limit yourself.   There are many great malts made by many great companies.   Try them, find the one that works best in your recipe.

Friday's  brew session was with out event, other than a little spill of grains... on a garage floor. Pre-boil, who cares... we scooped up what we could, we picked out anything we saw and we headed to the mash. The crew is getting good.  The brew was very good.  And we bottled up 5 gallons of Cream ale that is going to be amazing.  Although, Jake did note if this is an amazing beer it is going to be difficult to replicate what ever dirt and minerals were picked up from the garage floor.

Saturday, SWMBO went to a "married at first sight" marathon wine party.   So, I brewed again.  (And if she leaves today, to go binge watch the Kardashians with her friend "DameDrama", I'm brewing an apricot wheat beer.)

Saturday brew in detail.   Stell"ale".  My lagering capacity is full (1 carboy, Need to work on that).

I ground my grains Old school.   The bid red funnel and the tall hopper will hold about 5 lbs of grain.   This recipe is only 5.8 lbs of grain.  So I didn't bother with the drill.   Just 5 minutes of good ol fashioned hard work.  I will admit my old arms do get tired when I grind by hand.  But there is something satisfying about grinding your grains up by hand.

The grist was perfect. I had set my mill to the thickness of a credit card. My advice for all brewers is get a bag and set you grain mill fine.  Even if you are a 3 vessel brewer.  Your efficiency will climb.  My efficiency with my 3 vessel set up is around 75%,  with brew in a bag I always get into the 80% region.   Sorry for the awesome photography of the grist.  I was boiling water to clean the brew kettle, so it was kinda steamy.


I mashed this batch at 148 for 60 minutes then rose to 168 for 1 minute.  Total mash time was about 78 minutes.  I think I created a very fermentable wort.  After sparge my gravity was 1.032.  Not too shabby.  With only 5.8 lbs of grain in 6 gallons of wort, that is somewhere around 89.3% efficiency.

The mash was awesome.  The cajun injector electric turkey fryer was awesome at keeping the temperature perfect.  I use my cajun injector electric turkey fryer for partial mash and low og all grain.  Never have a problem.   I set the temperature conttrol to 150 F and stir occasionally.  If the temperature falls below 148 F, I simply turn it up to 175 F for a couple of minutes, then back to 150 F.

I sparged this one to a volume of only 6 gallons, not 6.5.  I knew I would be adding corn sugar dissolved in a gallon of water as fermentation slowed.   I began my boil with my lid on but a jar.  The boil is rigorous when I follow this method.  I never have problems with DMS and I have covered this issue ad nauseum on this blog.

The hop selection for this batch was almost 100%  US Saaz.  US Saaz had a weird year.  The reported AAUs for saaz this year were 8.9%.  That is way high for a hop that is usually 3.5 to 4.25% alpha acids.  I did throw in .1 oz of nugget at 60 just to make sure I was around 21 IBUs.

At the end of the boil, I chilled, and shook to aerate.  Then I pitched re-hydrated US05 by Fermentis, you should really give it a try.  It is reportedly the famous "Chico" ale strain from a brewery in Chico California... It can be your go to yeast for almost all "clean" ale styles.  Styles where you don't want the yeast flavors to be more pronounced.

I realized I have become spoiled with my double coil chiller.  I only used the 25' copper chiller for this batch and chilling took 30 freaking minutes.  Back to the double coil next time.  I pitched rehydrated US 05.  And a calm but active fermentation had begun by 6 hours later.  I say calm but active.  Remember this batch was only 1.039 after the boil.   It isn't going to have a super vigorous amazing fermentation.
Tonight , I'm adding corn sugar and 1 gallon of water to the wort.  This is a great old school trick to use to help your beers finish out lower.  Don't add the simple sugars to the early part of the fermentation.  Wait until you have a big healthy colony of yeast in there.  Yeast will always eat the easy sugars first.  But if you give them the easy (simple) sugars after they are established, you will wake them up and get them munching again.   The result, they'll finish eating all of the maltose too... Boom! a clean, dry, ale... that tastes like a lager.   I'll update the blog with more pictures after I add the corn sugar.

Update:  it is 11 days later and this beer is done fermenting.  It tastes amazing.  It had fining added 2 nights ago and is currently cold crashing.   Still looks a little hazy in the carboy, but not in the hydrometer or the wine glass I use to taste.  So I'm bottling it up tonight.  I told you all how easy this beer is.  John and Jake both have tried it and assured me I am not crazy.  It really is excellent.

Update 2:  This beer is amazing.   There is the slightest fruity hint from the ale yeast.  Next go round well use K97.   But it tastes just like a stella.  Fantastic! brew it!

Tuesday, December 15, 2015

Cream Ale Brew Day - PROCESS CONTROL BREW

Saturday Brew Day... Cream Ale.   John's First Recipe for the team.
John and Jake trying
Pliny the Petulant

Every now and then you need to to a "process control brew".   A brew that reveals any and all of the potential flaws in your process.   A brew that can't hide any of these problems.   For us... that brew is a very light ale.  Cream ale or Blonde Ale.   Today, it was a cream ale.   So what separates a blonde ale from a cream ale?  They are very similar afterall.  And today's batch was mostly Rahr 2 row malt.  Perfect for cream ale.  Rahr 2 row should be a part of your regular brewing regimen. 

The things that separates a blonde ale from a cream ale are two fold.  1.  Cream ales almost always have corn and or rice in them.   And they always have an adjunct grain  of some kind. Blonde Ales only have barley in them, base and crystal.  2.   Cream ales almost always feature noble hops, or the american version of a noble hop.  Blonde ales often feature another type of hop.  i.e. biermunchers centennial blonde.  Cascade, centennial,  even citra are used in blondes some times.  

I'm actually a big fan of cream ales.  Not only do they taste delicious.  They protect your inventory of more esoteric beer from the muggle hoards who want to "try" your home brew.   You know the type,  friends of your wife who think bud is actually the king of beer.    These people are dangerous to your inventory.

forgot the grate we normally
use, had to raid the oven.
So we set out to brew a cream ale.   John wrote a great recipe.   And we started early Saturday morning.   Well early for the millennials, for me... a certified Gen Xer... it felt like noon.


We doughed in at 156.9 hoping to mash at 149.  But we had a tough time maintaining temperatures.  First time with the electric rig at Johns house.  Now that may seem like a cop out, but trust me, it is not.  The power in the older homes is wildly inconsistent.  We eventually figured out that turning off the accent lights in the family room, gave us consistent power, and mash temps.  It was Me, John, and Jake this week.  MA having fallen victim to some dreaded illness... So, other than the temperature fluctuations, the mash was uneventful.  We followed our normal, taste and see mash method.    The mash was done in just under 65 minutes.  Remember, a mash with corn in it is going to take longer.  The enzymes in the barley have to convert the corn as well...

Despite the ups and downs of our mash, we still exceeded our targeted SG.  This time we just barely overshot.  We hit 82.3% efficiency.  Which is a little low for Johns house.  So that tells us the inconsistent mash did have an effect on our efficiency.

The boil was straight forward with on 3 additions, Mt. Hood, Liberty, and Liberty.  We wanted to stick with American hybrids of noble styles.    This beer after all was originally created by American brewers to compete with light lagers.

Here is the cajun injector in action during our boil.  It really does well with the lid on but ajar like that.  It is so rigorous, and vents so well, DMS is never a problem.

At the end of the boil, we used both immersion chillers to cool the batch.  That is parallel 50 linear feet of cooling power.  The chill only took 15 minutes, for a 5.5 gallon batch.  For fun we left the thermometer in the pot,  It was cool to watch the needle sink so fast.

After chill down, we aerated for a good 25 minutes with the aquarium pump, and then we pitched a very healthy Fermentis S04.  Fermentis says you don't have to rehydrate any more.  But we always do.  We actually rehydrate at the beginning of our brew day.  Lots of guys think because you don't have to rehydrate... you shouldn't.  I'm sure Kevin and the gang at Fermentis would still agree it is preferable to rehydrate.   With the billions and billions of cells we get from a dry yeast package there is no reason to make a starter.  By rehydrating 4 or so hours before pitching, we get amazing yeast action.  Our beers are bubbling away with in hours of pitching.

Overall it was a great brew day.  We were shooting for 1.048, we got 1.052.  So we overshot a bit, but not too bad.   This should be an amazing cream ale.  John reports that the active portion of fermentation is largely over.   The S04 was so healthy and in such a healthy environment that it took off like a rocket.  We'll let it sit for a while to clean up before bottling.  But it is really cool to see such a healthy fermentation.


Sunday, December 6, 2015

2xs the fun Brewday action for you... first the BSDA...

Yup... Im officially insane... no we're not, we're enthusiastic... No quiet voices in my head!... I will write this post... not you... filthy nasty little hobbitses...   I did it again 2 batches in a weekend.   Saturday morning the brew crew assembled early (well early for us) and we set out to brew a Belgian Strong Dark Ale...  And boy did we brew one.  A monster at 1.082  Pushing the outer limits of the OG for the style.

As you can see we milled our grains fine. Special thanks to MA the malt grist machine for coming early and helping me power through the grains.   We also sampled some amazing beers.   Ill let John make a comment below to tell us all what they were.    One of them was an all bret sour, so naturally the dregs got added to my bret sour.  Which should be ready by summer.

Now this was a partial mash batch.   Hopefully many of you have read my partial mash process by now.  It uses 3 pots.  The electric turkey fryer,  a pot to dissolve the DME/LME, and a sparge pot.  I know it sounds complicated, but it really isn't bad at all.   The set up allows you to brew high og beers in the turkey fryer.

We mashed 8 lbs of grains at 154 for an hour,   We used Rahr 2 row malt.  It is awesome.   Nutty and kinda sweet.   Love this malt.  We also used some biscuit, and some Cara 75.   Yes w used pale ale 2 row not pilsner.  But we did use pilsner LME. Then added the water in which the extract had been dissolved (3.3 pilsner liquid and 2 lbs of light DME, and 1 lbs of wheat malt DME)  Then we sparged to volume.   See?  Simple.  We nailed our gravity.   We were shooting for 1.080 and we came in at 1.082 after boil.     I'd love to tell you that the boil was uneventful but we kinda forgot to add the candi syrup.  So when we were transferring to the fermenter we stole some wort, brought it to 165 added the d180 to dissolve, then added more wort to temper it down to temperature, then into the fermenter.   There is always a solution when you screw up.  You just have to think your way through things.     We also removed a couple of cups of wort and used it to puree 6 oz of dried prunes.... yes prunes.  If you want a super raisin taste in your BDSA try prunes.   But put them in a bag and use them like a hop.   You don't want all that prune fiber in your final wort. I know it sounds crazy, but give it a try.

We chilled the batch using the 2 coil 50' set up.   We went from 212 to pitch temps in about 12 minutes.  Awesome.   But I have to say if the jaded chillers can do better... I still want one.

We pitched 2 different Belgian yeasts.   We pitched Wyeast 1214 Monastery yeast, and a pint of WLP 500 that I had on hand.   As of Sunday morning the batch was bubbling away nicely with a beautiful krausen.   Cant wait to taste this beer.

Bonus photo for you.  Starsan does some cool stuff.  in this photo we are sanitizing the aeration stone and the fermenter.   This weird star san snake just kinda formed itself.

And by sunday morning before church, the Belgian Dark Strong Ale was bubbling away.   Love that air lock action.  I don't ever trust it for determining if a beer is ready to bottle or transfer but it sure is cool to get some tactile confirmation of success.   Right?

This one is fermenting in the kitchen.  It is a Belgian after all.  I want those temperatures up at the high end of the fermentation range.   That is a real key to getting the belgian notes.  The color is spot on.  It is now Monday morning and it is still bubbling away nicely.  It is too dark to see much of the party the yeast is having inside but with the flash light on my cell phone, I can see things moving all over the place.

Thats all for now sports fans.  Prost!

UPDATE: 1/29/16  The BDSA fermented to 1.008.  French oak chips were soaked in bourbon, and then added to a secondary fermenter.  The BDSA was transferred onto the chips.  That was about a month ago.  The beer is ready for bottling.  It is oaky, but not very bourbony.  But it is delicious.

Thursday, November 5, 2015

HOME BREWERS! STOP COMPLICATING EVERYTHING!

Some people could complicate making toast. And unfortunately many of them are in our hobby.  I Just saw a combination eHERMS recirculating biab, gas kettle recirculating mash system.   What the what people...So once again... I'm compelled to act like an angry old man...

Mash doesn't know it is being recirculated.   And quite frankly, even if it did, it couldn't care less.  Mash doesn't know how it is being lautered. Mash doesn't need to be recirculated.  Enzymatic action works whether or not you recirculate.  You can easily agitate your beer with a spoon.  

Enzymes work whether or not they are recirculating.  Yes exposing more surface area to enzymatic action for a longer period of time will produce more conversion of starch to sugar. But again, temperature, pH, and grist size are far more important that recirculation.   Use the finest grist you can use.  Yes, even if it makes some flour, line your mash tun with voile fabric ($9.00 a yard at JoAnn).  You'll thank me.  That will do more for your mash than some $5000 brewing system.  

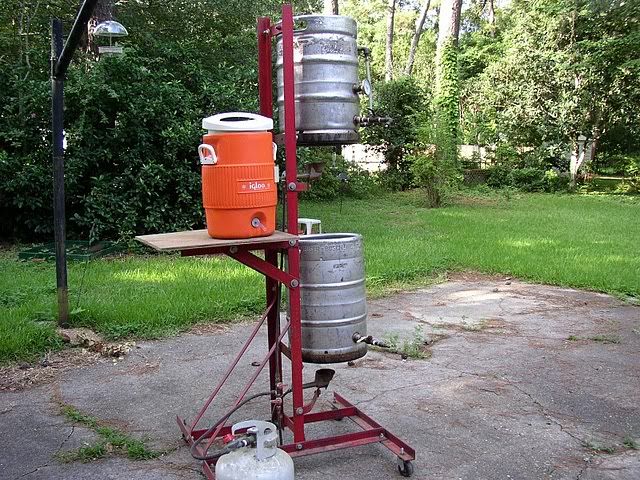
this system still works just fine, 
So once again, my best advice is Keep it simple.   A simple gravity system or a simple BIAB system will produce excellent beer.  If your beer isn't good, it is because your process, or recipe isn't good.  Not because your equipment sucks.   I learned from a guy who used aluminum pots, and plastic buckets.  His malty beers were the best I ever had.   If you complicated your brewing system, you complicated your sanitation regimine. There is just no reason for that.   If you improved your brewing system, you probably also improved your processes.  Why not just improve your processes?   Why not put your focus on sanitation and fermentation? Why not learn how to create a yeast pitch with maximum vitality? Why not learn how to decoction mash?  Why not learn about the hop glycosides, or the role of melanoidin in malt flavors?
Put your focus on things that matter.  Yes a pump is nice to have,  but it doesn't improve your beer.  And I only run water through my pump...water is easy to clean, wort is not.  Water doesn't tend to foster bacteria, fungus, or mold. 

this system also works just fine
People we are focusing too much on the creation of wort, when we need to be focusing on the sanitation, and fermentation of beer.  I know from my experience that an identical grain bills created with 3 different systems, 3 vessel Gravity, BIAB, and recirculating BIAB, come out nearly identical, with the 3 vessel Gravity system gaining only a slight advantage in conversion.   And the maltiness, and time savings of no sparge BIAB cant be beat for me, so that is what I usually do.   Plus with BIAB I can partigyle my grains into a partial mash batch.  So what is my real efficiency?  No idea, just know I'm getting two batches of beer out of each set of grains. (of course I can tell you my average efficiency is 81.9%)  But what is my real brewhouse efficiency when I get 10 gallons out of each grist?

So if you want to redneck engineer something please create something that makes sanitation, and fermentation better.   Please show me how to create a fermentation chamber that can have multiple temperatures in one chamber.  The best I've come up with is a lower overall temperature and heating bands to create different temperatures.  Please show me how to more easily control lagering temperature schedules.  Please show me how to make a carboy cleaner that makes sense and doesn't just spray sanitizer in a carboy.  Let's get a home brew hack for sanitation.   Show me how to make a carboy cleaner out of a drill and some car cleaning shammies.  Show me how to track the fermentation of my beer without exposing my beer to potential contamination. 

Look, do your thing and have fun doing it.  It's just home brew.  But it really doesn't have to be this complicated.

UPDATE:  This weekend we hit 84.5% with BIAB.  Now granted, it was a small batch, and they generally are more efficient, but still, 84.5%.   You're not gettng that out of an eHERMS system.   We didn't recirculate, we didn't use some fancy controller system.   We made sure our water pH was perfect, we made sure our strike was perfect, we crushed our grains very finely, we stirred every 15 minutes.   We used spoons to occasionally taste the wort.   (you did what?  well that just makes no sense...)  I'll write more about this technique later, but trust me if you can learn what the different tastes are and what they mean... you will become a wort whisperer. 

Tuesday, October 27, 2015

So, I quit washing yeast.

I quit washing yeast.   Now, I just save the entire yeast cake.   Ok maybe I shouldn't say I quit washing entirely.  But after following the work of Steven Deeds at Woodland Brewing Research, I made the decision to save the part of the yeast cake that had the least bacterial content, and the most viable cells.  And that is the crud I've always left in the bottom.

The elusive creamy layer
of supposedly good yeast.
We have all been taught that you want to go through the process of washing yeast to get that small band of creamy light colored yeast just on top of the trub.    Turns out that isn't the case.   The trub has just as many viable cells, and less bacterial content.  

If you're not following Steven and Woodland Brewing Research.  You need to be.  Along with Marshall Schott (Brulosophy.com). Steven is taking a practical common sense approach to brewing.  He doesn't care what tradition or cannon says.   He follows the science.  He also wrote a book.  I have it, it is somewhat technical, but it is also pretty excellent.  I don't recommend it for brand new brewers, but if you are intermediate or advanced, there is loads of great information in Brewing Engineering.   Steven has also pioneered a 15 minute brewing approach that is truly fascinating.

For me the big take away has been in how I handle yeast.   Any step or process that I can eliminate, gets eliminated.   Not only does this save time, it also reduces the chances of a process error or problem.   12 pint canning jars are $10.00 at your local Target.  This is a way easier way to handle your yeast cake.   Just save it.   The whole thing.   Drain the beer off, add a little pre boiled room temperature water to lower the viscosity, and package the whole thing.   Done.  

If you really want to manage your cell counts, and build starters Steven also has great information about setting up a home laboratory, viability testing, and cell growth testing.  I don't do any of that.   I brew.   So I find that two pint jars of slurry (yeast cake)  will give the same kind of fermentation as a starter, in most of my beers.  

Sunday, October 18, 2015

Updates... lager at ale temp, Oktoberfest w/wyeast 2112, session ipa

Ok I got a lot done today,  more to do tomorrow.  5 gallons to bottle up tomorrow, and Ill probably brew a small all grain batch. 

I love the small all grain batches in the Mr beer fermenters.   You can brew them on your stove top and they are easy to move, and they are easy to bottle.   I just don't love the ingredients. I truly hope Coopers continues to make the LBK.   I even love the Mr. Beer bottles, and the carbonation tablets.  Although I ran out of those a long time ago and bought the Brewer's Best tablets.  The only problem is the location of the spigot means you will inevitably pick up some protein foop, and trub when you want to bottle.  But don't worry sports fans,  I have a $10 solution.  (update there is no problem bottling in PET)

I ran to the LHBS this morning.  Now, I am lucky I have 3 home brew stores in close proximity, where they know my name.  But I most frequently shop at one close to work called Bacchus and Barley corn.  I have been buying beer supplies at this store for 25 years.  The owners Big Al ( a petite woman named Alberta) and her husband Jackie are incredibly knowledgeable.  The store is plastered with ribbons from AHA competitions they have won. I purchased 4 lft of tubing, a 2 gallon bucket, a bottling spigot, and a voile hop bag.   

For all three batches I simply transferred from the Mr. Beer LBK to the new miniature bottling bucket.  I clipped the voile bag to the side of the mini bottling bucket, and inserted the tubing.   Boom, poor mans filtering.   The voile bag is an excellent filter.  I was able to bottle all three batches in under 1 hour.  All were filtered through the voile bag.  I got clean clear beer.   Easy. 

ROOM TEMPERATURE LAGER
Update on the "You can go all grain LAGER with the Mr. Beer"    I brewed this on Sept 5th.  It fermented for 10 days at room temperatures then, on the 15th it went into the fridge at 38 F.    I has been sitting there ever since.    You may recall our not so subtle friend "Tommy Knowitall" sent multiple messages assuring me it wouldn't work.  I bottled it in 2 liter bottles today.   Two of the bottles were forced carbonated with a CO2 gun.  The final bottle got 5 carbonation tablets.  The beer is freaking amazing.
 The beer is crystal clear, the beer has no off flavors or aromas.  There is the very slightest hint of DMS (appropriate and intended)  There is just a wee touch of Diacetyl (again intended). The beer is excellent.   On the left you can see the 1 gallon that I packaged up in 2, two liter bottles.    I have covered that topic before, but by all means feel free to ask questions about it.  It is really an easy way to package your beer. These will sit there under pressure for the week getting ready for John and Beth's wedding brunch.  When you force carb in 2 liter bottles you can try your beer in a couple of hours.  But to get it truly, fully carbed up, you have to let it sit for a couple of days,  occasionally shooting it with more CO2.

I also bottled up the Oktoberfest (made with Wyeast 2112) and the Session AIPA "by grace and banners fallen"  that was originally inspired by Drew Beechum's Pliny the Toddler.  The Oktoberfest is good, not great.  The carbonation might help the malt character come out more.  To me it just tastes like a basic, non hoppy, malty, amber beer.  So Im sure it will be a big hit with the muggles.  The AIPA is fantastic.  It always it.  It is a hop monster.  Hop perception is based on a ratio of hops to specific gravity.   This one delivers.  This batch in particular is very balanced.  About 66 IBUs and only 5% alcohol it is a tongue stinger.  It is a little darker than the last batch, I'm sure that is from the addition of the biscuit malt.   But the beer needed that balance, so I'll take it.

I also made counterbrew cider.   Cider is the easiest thing you'll ever make. Definitely give it a try.  Especially if your SWMBO or SO doesn't prefer beer.   I'll cover this in another post.   Today, Church, Chiefs, a Centennial Blonde, and bottling the Belgian Quad.

UPDATE I let the quad sit for another week.  It had a slight rubber note.  That is acetyl.   As of last night... that was gone... its ready to bottle.  The lesson?   BIG BEERS TAKE WHAT EVER TIME THEY TAKE.

Monday, October 12, 2015

McClouds Kilt Brew day

Well SWMBO was out of town, at a charity softball tournament in Wichita, Ks.   So what else would I do... time to brew.  Scottish Export Brew.  I know I had promised an all grain small batch brew day, but well... I changed my mind.   The decision to change to a 5.5 gallon partial mash was motivated by two factors.  First,  I have a friend who loves 90 shilling, and I wanted to see if I could make it up to his standards.  Second,  when I went to bottle the Oktoberfest, it became clear that it was going to need to be cold crashed for a while.  So, when life hands you lemons... make a 5.5 gallon partial mash batch of beer, and put the lemons on the counter in the fruit basket. (really put them in the fruit basket or you get in trouble...she means it)


Began by organizing my stuff.   As you can see I was using Safale S-04.  One of my all time favorite yeasts.    I also used 5 star pH stabilizer for the mash and for the rinse water.  Thank goodness I had it because something funky is going on with our local water.  The pH out of the tap is very inconsistent.  If you are going to do a lot of all grain brewing, you need to learn a little bit about water chemistry.  You don't have to learn everything.  You don't have to nerd out over the water  book from brewers publications.   But you do need to know what to do when the pH is too low or too high.  The easiest way to handle your water chemistry is to down load Bru'N Water, or EZwater Calculator.  (I actually use EZ). Get your local water report, input the variables.  For each batch you should put it into the calculator and see what adjustments you need to make.  If you are doing a partial mash you need to treat the water adjustments like a BIAB with rinse.  My initial mash pH was coming in at 6.8... what the what?  never seen that before.  I didn't have gypsum, or calcium chloride.   So... I tried 5.2 pH stabilizer.  Now, where I live the water is nearly perfect for brewing.  So I usually use a 1/3 dosage (1/3rd of a teaspoon) of 5.2 as an insurance policy to make sure things stay good, and I don't have to use acidulated malt every time I brew. But today a full teaspoon.  Fortunately, it worked, my pH came up to "5.25ish".  But this week I will go buy some gypsum and some calcium chloride.

The mash was misbehaving.  Had to regulate temperatures a lot more than I usually do.  Think it is time to fill the cavity of the electric turkey fryer with expanding foam.  Fortunately I am a contractor, and I have access to a foam rig.  Should take about 10 seconds to do that this week. Normally, I set it at 150, and it stays at 150.   (Remember for partial mash I don't worry about mashing at any temperature other than 150, if I think it needs more body... I add wheat malt,  more silky texture...oats) You get the picture.

In two other pots I got my rinse water, and my DME water ready.   This procedure is great.   And with it I almost always hit my numbers spot on, or slightly exceed them.   Today was no exception my post mash gravity was 1.035 I knew that the DME,  2 # in 2 gallons was going to be 1.044 Plus rinse water of a gallon. So I would be at about 1.035 pre boil.

Please notice that the pot is off the stove when I add my DME.  It has been heated to about 130 F.  But it is off of the stove.   The DME gets mixed in thoroughly. Nothing is stuck to the bottom.  Normally I bring it very slowly to 190 so that the color is not darkened.  Today I was a little more aggressive with my heating, hey its a dark amber colored beer...  at the end of the mash, I added the DME solution, and rinsed the grains.  This created 6.75 gallons of wort.

So here is the Cajun Injector at maximum capacity. 6.75 gallons of wort.  For a 90 minute boil, at 12.5% boil off rate, I ended up with 5.5 gallons of wort.   I used  Kettle Defoamer 105 from 5 star chemicals.   I knew boil over was a real threat. And I'll tell you, 1 drop was not enough, but 3 drops kept everything kosher.   If you are having troubles with boil overs, this is a great product.   The photo is right after it has started it's boil.

From here on pretty standard brew day.  Hops at 90, 45 and 0 all cascade, the recipe is posted in the previous post.  I rehydrated the safale S 04. Fermentation had started up with in a couple of hours, and is still going strong this morning. Fermenting at 68 F.   This yeast is rated for optimum performance up to 68, so I'm probably on the high side, but I want some of the fruity esters with this scottish beer, so I'm not worrying about it.

Chilling took forever,  I have to get my big chiller back from the knucklehead who currently has it.... I chilled this batch with my 25 lft stainless chiller, and it took 45 Minutes to chill... ouch. Think the next 5.5 gallon batch I'll be heading back to using ice to chill, it is so much faster and I have yet to have a problem with it... but like I said when I posted about it, "check back with me, I've only been doing it for 20 years." But the color was perfect for this style of beer.

Seriously though,  I know there is risk of some microbe getting into my beer when I chill with Ice, But until I can afford a Jaded brewing Hydra... or Talos wort chiller I will probably just chill 5.5 gallon batches with Ice.

Upcoming priorities,  Build the new fermentation chamber.   I'll post all about it.  Then it is time to get a couple of tap a draft systems.   If you, like me are primarily a small batch brewer, the tap a draft is perfect.  Just doing a little quick math.  1.5 gallons fits in each tap a draft.   I brew 2.25 gallons, and generally get 2 gallons to package.  So I'll fill 1 tap a draft and 1 two liter bottle with every batch, perfect.  And with the tap a draft system there is no need to modify anything.

Next up on deck is Raspberry Wheat.  The holidays are coming and I know the family will put down the beer.  Need to have their favorites ready.


Friday, October 9, 2015

McClouds Kilt... Scottish Export...

So, it's almost the weekend... that means brewing.  Tonight means Royals Playoff Baseball, my daughter's choir concert (can't wait they're damned good), and some bottling (the octoberfest, and old school lager), and some yeast washing and collection. So things are busy on the home brew front.

But that in a nutshell is our hobby. You can fill your downtime with something that you love doing, and that produces yummy beer.


Recently, I have fallen in love again with an old friend.  O'dells 90 Shilling. Now I know some of you pooh pooh the big craft breweries.   Some of you only drink "continuously hopped organic chocolate nib pomegranate Saison aged on french oak" and anything less is not worthy of your time. And that is fine, but I ask you to remember if it wasn't for Anchor, Harpoon, Sierra Nevada, Boulevard, O'Dells, Dogfish Head, and Boston Beer Company, there wouldn't be a craft beer revolution.    You wouldn't have your ridiculous glass of deliciousness to drink.


90 Shilling is an american take on Scottish export.  It is all about the malt with just a hint of cascade to make it American in it's interpretation.   Amber in color the beer assaults your tongue with wave after wave of malt complexity.   Perfect for a fall day or a winter's eve.   My recipe has changed over time.  I dropped the Cara 20 for Biscuit Malt.  They are both about 20 Lovibond, and the biscuit adds more malt complexity.  We may all love hop bombs, but the general public does not.  This is a perfect gateway beer for your beer muggle friends.

The recipe is here.  Let me know what you think. I'm always looking to improve my recipes.   But here it is typed out for your viewing pleasure.  Mash at 154 for 60 Minutes.  Boil for 75 minutes adding the first hop addition at 60.  Ferment at 65 F for a week or 10 days, then yes, actually rack this one to secondary, there will be a lot of trub in this, better to get your beer off the trub, not for fear of acetyls, but rather for clarity.   If you want to really geek out, you could do a partial decotion on this.  I probably will.  Just take out a quart of the mash and boil it for 15 minutes.  It adds that shinny shimmering caramel look that you just don't get with out decoction.


Tuesday, October 6, 2015

ENOUGH ALREADY... All you really need to make great beer.

OK, here I go again.   Just saw some posts online that set me off.   A guy was claiming he couldn't go all grain until he finished his home water filtration system, and his ridiculous brew rig.  I happen to know this knucklehead, he lives in my neighborhood (you know who you are).  He is a good guy but he has gotten caught up in the whole "the best rigs make the best beer" silliness.  So here we go again...

FACT 1 : The best rigs do not make the best beer...the best brewers do!

The man who taught me to brew all grain beer passed away 10 years ago this month.  We called him Mankind.  Out of respect to his family I reserve his name.  He was a legend in the Kansas City brewing scene.    He was only 51. He died of a brain aneurysm.   But his wisdom and sense of humor stay with me. I have saved every funny email he ever sent out.   He brewed amazing, award winning beer in his garage with jankity equipment he found or sourced for free.   He was legendary for going to closed up restaurants, and churches and getting their pots.


Our mash tun was three 5 gallon buckets, one had the holes drilled in the bottom to be a screen. (some of you have been asking why 3?  He hated valves, valve have to be cleaned.  So with three we could vorlauf the entire volume of wort for each batch)   We spent an entire afternoon drilling little holes to make it.   To keep it warm we would pour a little more nearly boiling water into it... The boil kettle was a turkey fryer, aluminum.  He stirred the mash almost constantly.  He kept his recipes and his process simple.  The only extravagance he owned was a 75' copper 1/2" immersion wort chiller.  He was a wort whisperer.   He could literally see, hear, and feel what was going on in the mash tun and the boil kettle.   No valves or pumps. A bamboo stick was the sight tube... You have probably only tasted beer as good as his once or twice in your life time.  The best brewers make the best beer, you do not need to spend thousands of dollars on your gear.  

FACT 2 :  If you can't control fermentation temperatures... your rig doesn't matter.   

Don't spend any additional money on your mash/boil rig until you have a fermentation chamber.   "brewers don't make beer, yeast makes beer". Mankind used to say, "if you aren't controlling your fermentation temperature... you don't love brewing... you just like making wort".   Many people have won major awards with extract brews.   My Champagne lager may actually be better as an extract.  No one I am aware of has won major awards without being able to control fermentation temperatures.  Even Saisons, and Dark Strong Ale, which like higher temps... don't like up and down fluctuations.


FACT 3 :  If you made something that is difficult to clean... you failed. 


Cleaning is the most important thing you do.   And yes it sucks.  So if you build a rig that you don't want to clean... you failed.   If you build a system that is difficult to clean...you failed. Other than the recirculating eBIAB systems, the new systems are bears to clean.   Mankind also used to say "if you don't enjoy cleaning... you don't enjoy brewing".   The late Dr. George Fixx taught us that many of the issues we have with our brews are minor infections.  Not big nasty scary pedio infections, just minor infections.   Other neutral yeasts that were part of your pitch or in your air. They keep your beer from being everything it should be.  I rarely comment on this because I don't want to start the whole infection debate again.   So just read his book.  Many many times when someone is posting about a beer not attenuating all the way... a bell goes off in my mind... "minor infection" but I don't post it because implying that someone was not awesome in their cleaning and sanitation regimine is considered uncouth.

FACT 4 :  All you really need to brew great beer.  And this is a fact.  
  • Knowledge and Experience... get it by brewing, or brew with a friend who knows what they are doing.   Feel free to ask an experienced brewer.  Brewing is fun, we're almost always ready and willing to brew with you. 
  • A large pot, for 5 gallons you need a 8 - 10 gallon pot. Aluminum is fine. Just boil water in it first and let it boil off. 
  • A good brewing thermometer
  • a large stainless spoon.
  • A 1 gallon water pitcher.
  • A brew bag or a voile sheet.
  • A Heat source capable of boiling your wort.
  • A water report and some basic chemicals for pH adjustment.
  • A clean fermentation vessel.
  • An air lock.
  • FERMENTATION TEMPERATURE CONTROL
  • Scrub brushes and Sanitizer, I prefer starsan. 
That's it.  You need nothing else.  I suggest that before you invest in a fancy wort production machine, you invest in a fermentation chamber, and anything that makes your cleaning easier and better. Before you spend thousands on an "e RIMS 3 vessel system" that is controlled by an ap on your phone... Build a lagering chamber.   Your focus should always be, cleaning, temperature control, and to a slightly lesser degree aeration.

That is all...keep brewing.
Prost.